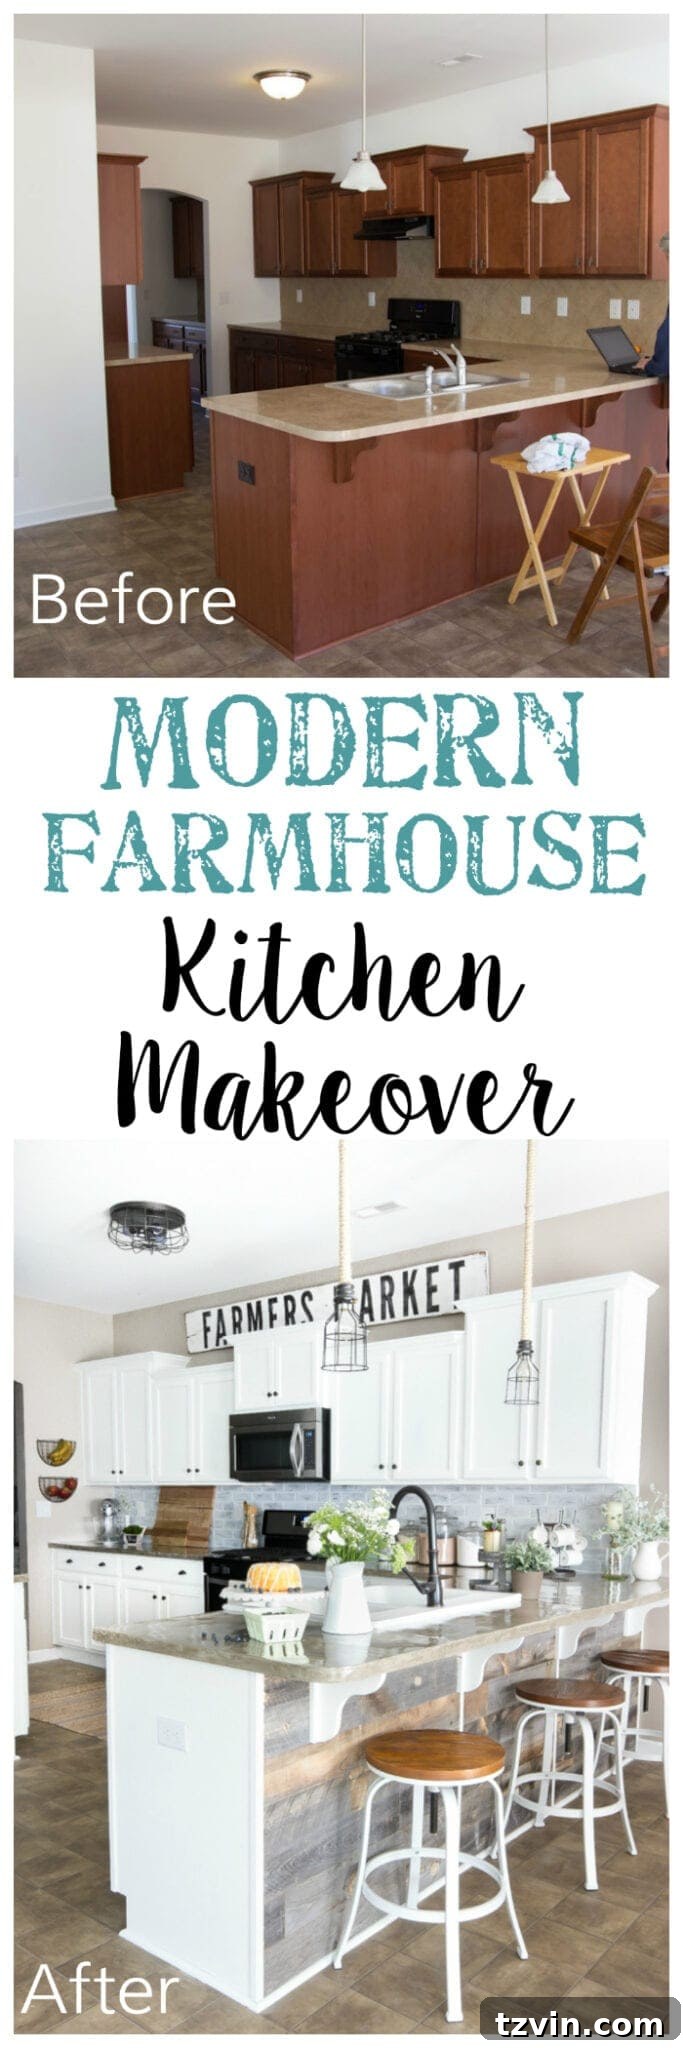
A dark and boring builder grade kitchen gets a budget-friendly makeover with modern farmhouse style using 100% doable DIY projects.
After 2.5 years of dreaming, meticulous planning, and dedicated DIY effort, the highly anticipated kitchen reveal day has finally arrived! It’s incredible to reflect on where we began, thinking about the gallons of paint, countless buckets of concrete, and the sheer amount of sweat equity poured into this space. The transformation is so dramatic, I’m practically doing cartwheels behind the screen just thinking about it, and I can’t wait to share every detail of our journey with you!
The “Before”: A Builder-Grade Blank Canvas Awaiting Character
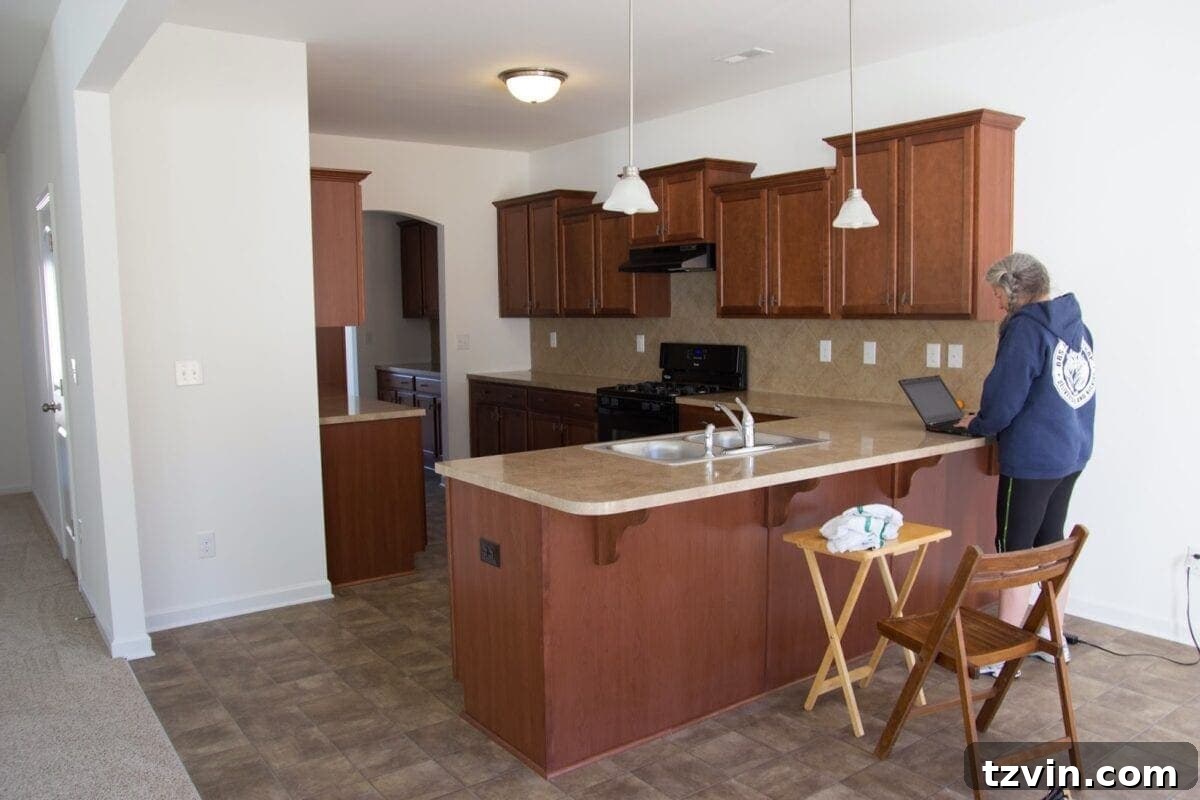
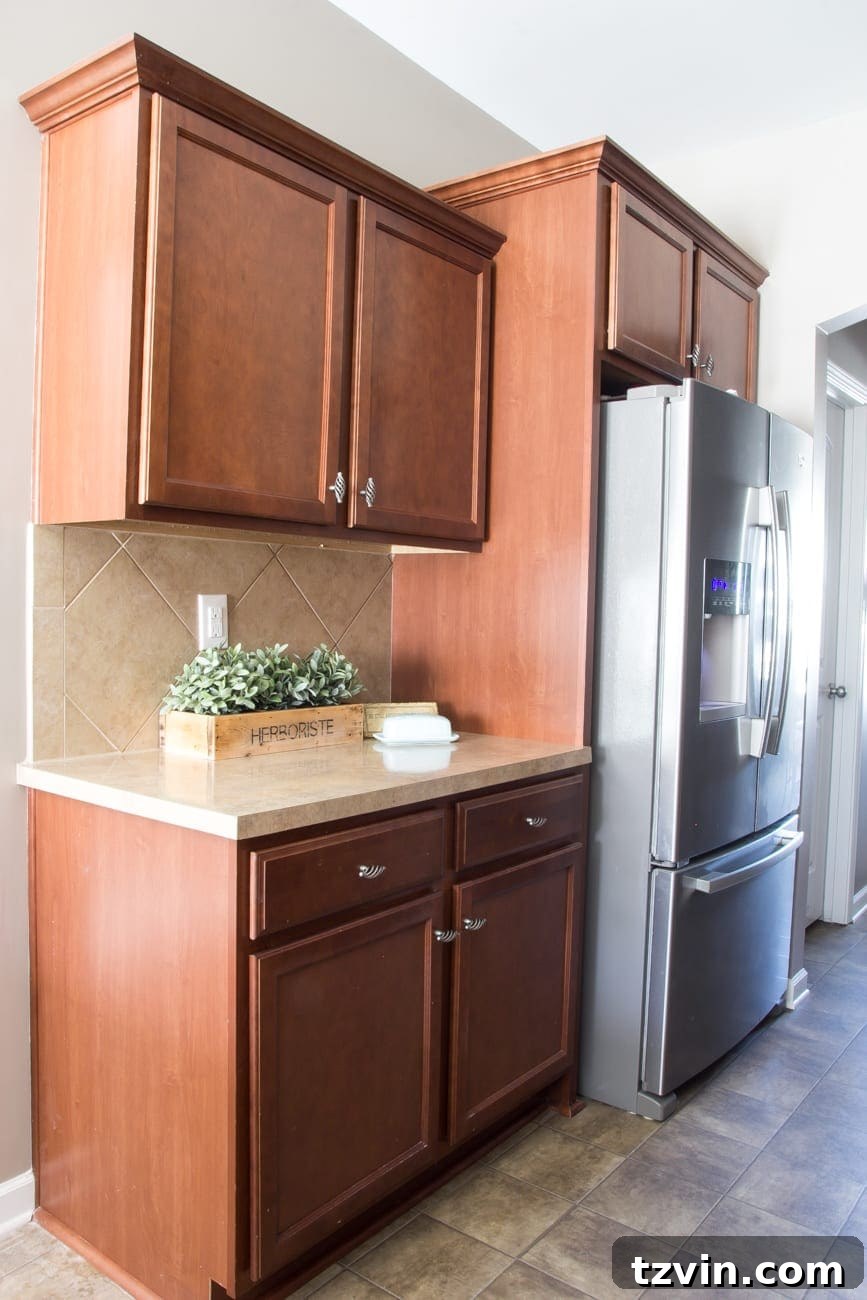
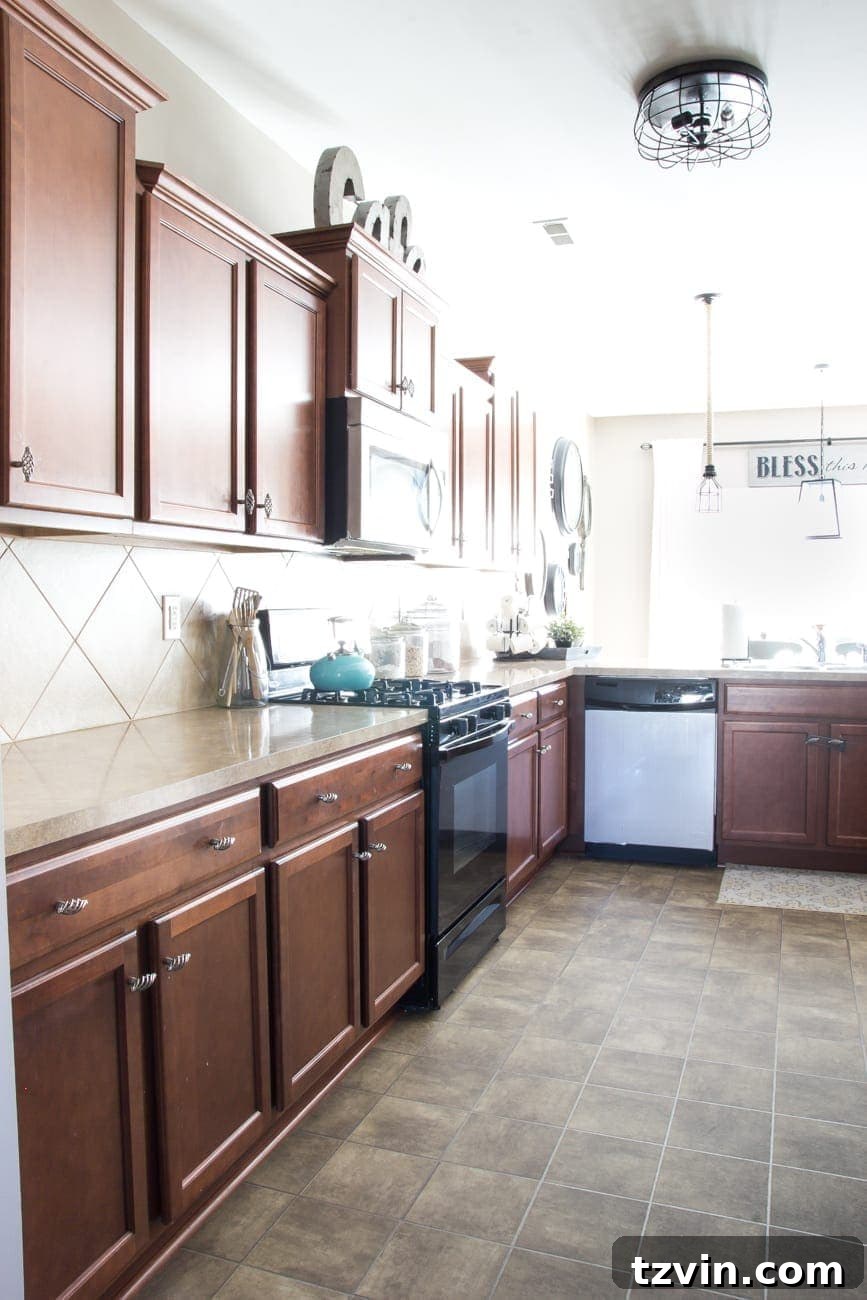
To truly appreciate this journey, let’s revisit our kitchen as it stood on the day we moved into our newly built home in December 2013. The space, while perfectly functional and new, epitomized the term “builder-grade.” It was characterized by dark wood cabinets, beige Formica countertops, and a matching tile backsplash – a palette that left much to be desired in terms of warmth and personality. While many homeowners grapple with expensive, labor-intensive renovations of aging kitchens, we were fortunate to start with a new foundation. This allowed us to focus our energies and budget on personalization rather than extensive structural overhauls, bypassing the typical headaches associated with older homes. Our “before” kitchen wasn’t inherently flawed; it simply lacked the distinctive character and inviting charm we envisioned for the heart of our home.
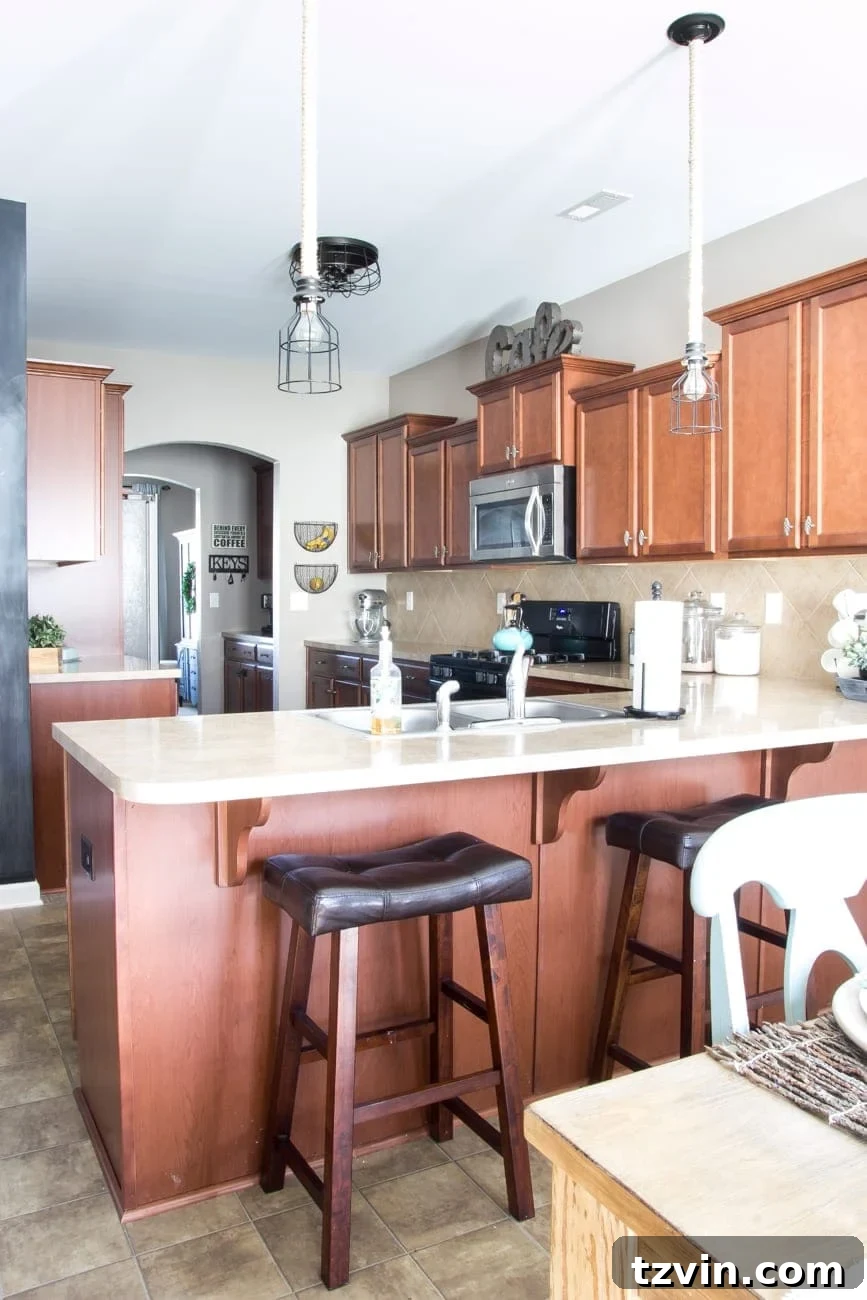
Initially, we made a few quick, impactful updates shortly after moving in: a fresh coat of paint on the walls, replacing some standard lighting fixtures, and adding a practical chalkboard wall. These initial steps breathed a little life into the space, offering a glimpse of its potential. However, like many ambitious home projects, everything then paused. We knew a full kitchen makeover would be the most significant investment and project in our home, demanding careful planning, budgeting, and a clear design vision. This two-year waiting period proved invaluable, giving us ample time to refine our aesthetic for the perfect modern farmhouse kitchen, ensuring every detail aligned with our desired look and functional needs. Patience truly paid off, allowing us to solidify our style and prepare for the extensive DIY work ahead. (You can still glimpse our original plans and mood board here for inspiration on starting your own project).
The “After”: A Dream Realized in Modern Farmhouse Style
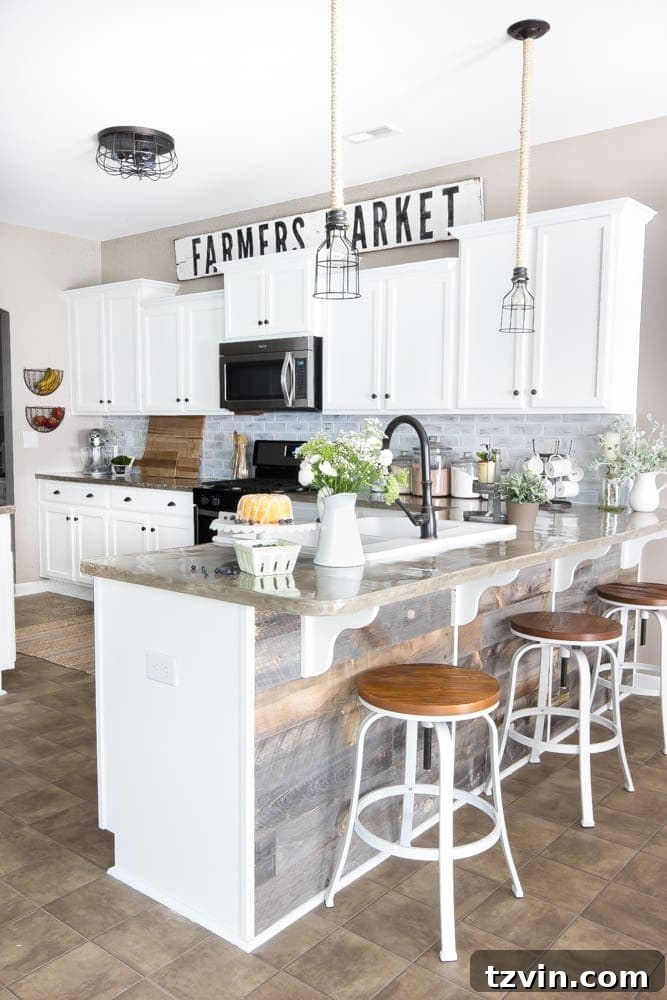
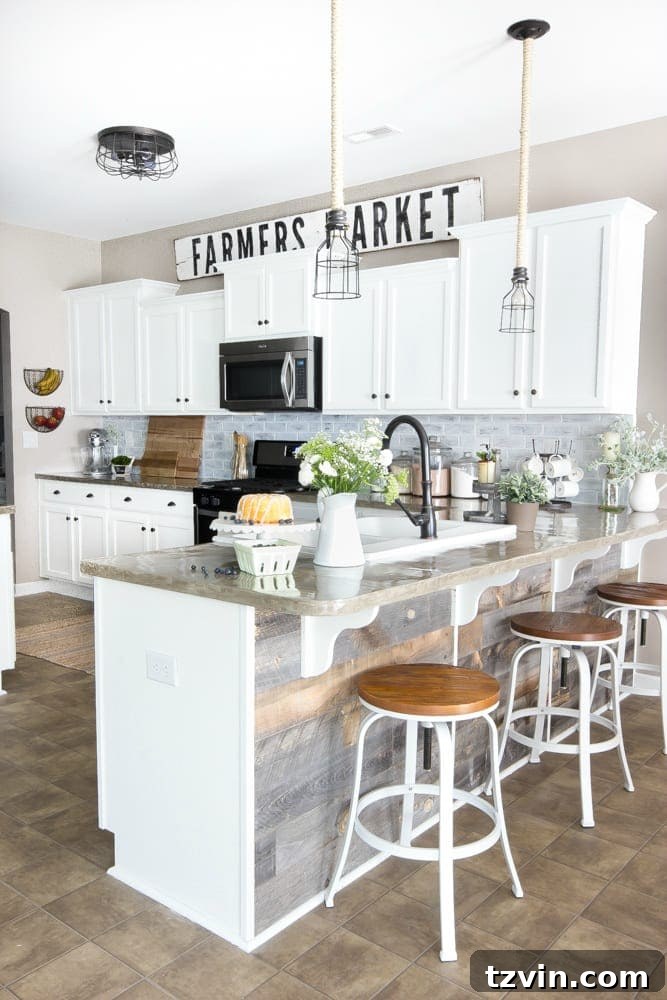
And here it is, in all its finished glory! What a transformation! Our overarching goal was to infuse warmth, brightness, and a welcoming modern farmhouse charm into a space that once felt somewhat uninviting and dim. Every design decision, from the choice of paint colors to the selection of fixtures, was made with this vision firmly in mind, and we believe the result speaks for itself. This reveal isn’t just about the stunning aesthetic upgrades; it’s about creating a true heart for our home, a place where family memories are made, everyday tasks feel a little more joyful, and the overall atmosphere is one of comfort and style. The once dark and uninspired space has been reborn into a bright, airy, and truly personalized kitchen that we adore.
The Power of Paint: A Luminous Cabinet Transformation
One of the most impactful decisions we made, and arguably the biggest visual transformation in the entire space, was painting our dark wood cabinets a crisp, clean white. Given that our kitchen lacks natural light from windows, the original dark cabinetry created a perpetual “cave-like” atmosphere, making the entire space feel enclosed, heavy, and perpetually dreary. Furthermore, the reddish undertones of the original wood clashed noticeably with our home’s overall decor scheme, contributing to a disjointed and unharmonious feel. Opting for white cabinets was, quite simply, a no-brainer to combat the pervasive darkness and create an illusion of greater space and brightness.
Beyond the dramatic aesthetic uplift, I’ve discovered a surprising practical benefit to white cabinets: enhanced visibility. While some homeowners might shy away from white for fear of showing dirt, I actually appreciate being able to spot any smudges, spills, or cooking grease at a glance. This makes quick clean-ups incredibly efficient, ensuring our kitchen always looks its best. Surprisingly, despite our family’s enthusiastic love for frying bacon and other culinary adventures, the cabinets have remained remarkably clean since we painted them a month ago, a testament to quality paint and perhaps a bit of ongoing vigilance. This change alone radically altered the mood and functionality of our kitchen, turning it from dark and forgettable to bright and inviting.
Embracing the Farmhouse Sink: Where Functionality Meets Classic Style
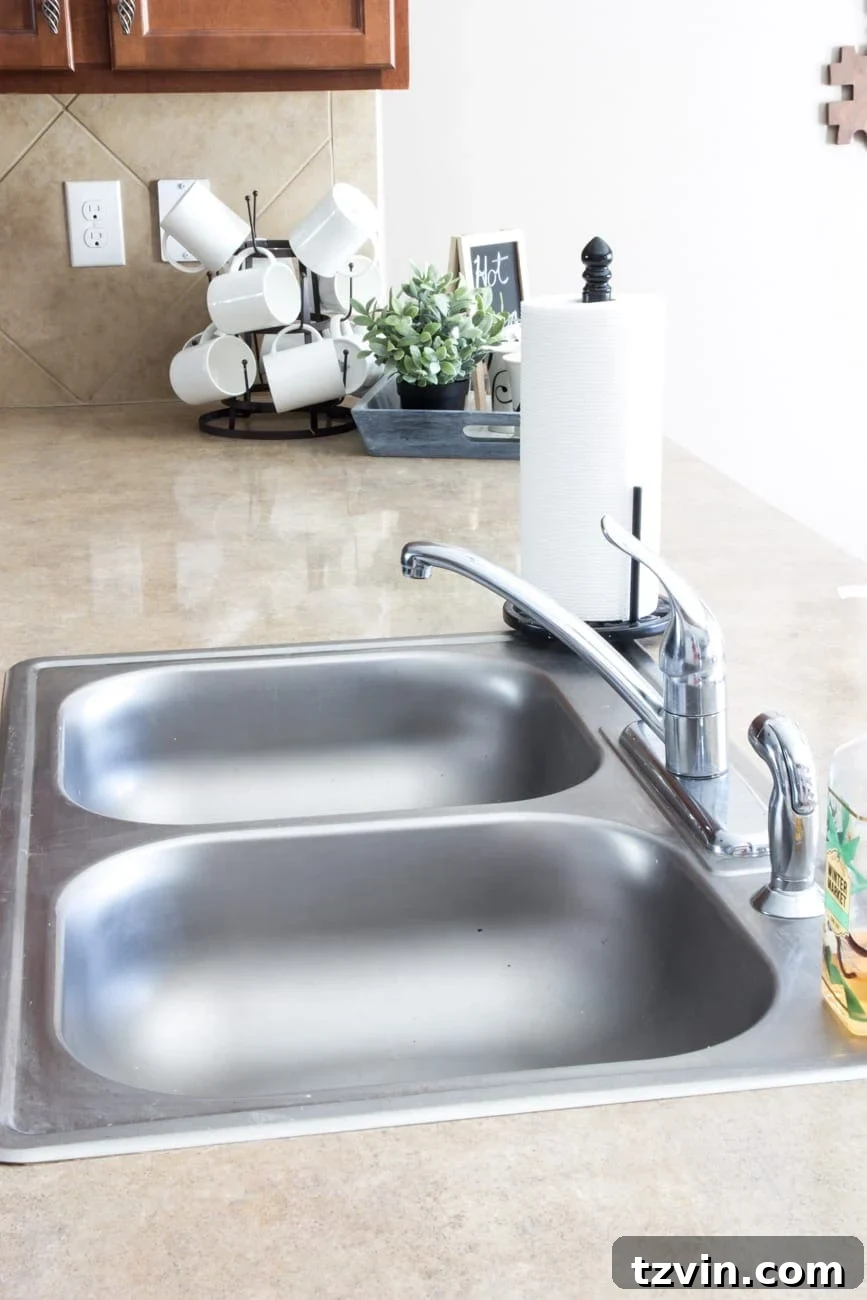
Before this much-needed makeover, our standard stainless steel sink was a constant source of daily frustration. Not only was its surface notoriously difficult to keep spotless and gleaming, but its conventional size and the low-slung faucet made washing larger pots, pans, and baking sheets an absolute ergonomic nightmare. It was a functional bottleneck in our kitchen, practically screaming for an upgrade that would enhance both usability and aesthetics.
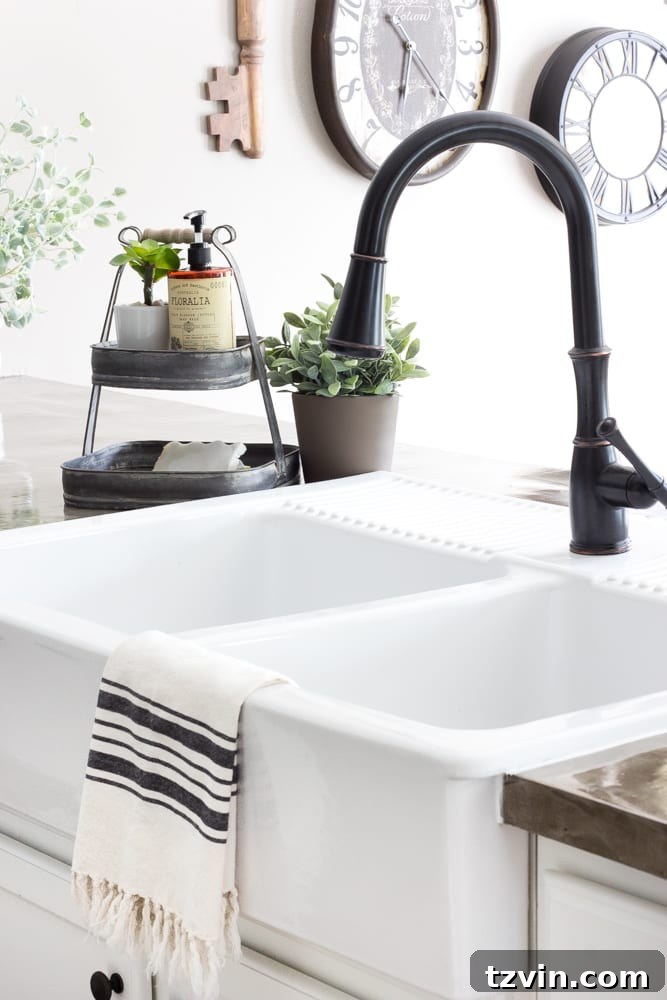
Initially, I considered a simpler white drop-in sink, which would have been an easier installation. However, the overwhelming encouragement and positive feedback from our amazing online community gave me the courage and conviction needed to pursue a true farmhouse sink – a much more ambitious DIY endeavor. The idea of cutting into our existing countertop and cabinet for a custom fit was daunting, to say the least – a truly scary prospect for any DIYer! But with Robert and his dad lending their invaluable expertise and muscle, we successfully installed a gorgeous, oversized farmhouse sink from IKEA. This incredible find cost only slightly more than a standard drop-in, proving that achieving dream features doesn’t always necessitate exorbitant price tags. Their incredible effort and skill in tackling this complex installation earned them major “brownie points” and our endless gratitude!
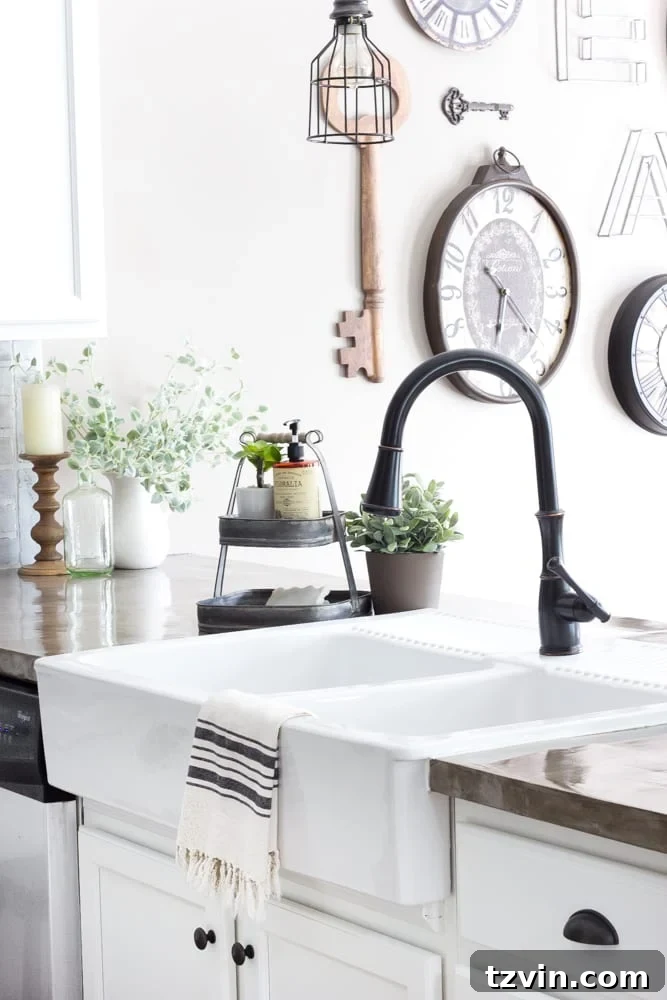
It might sound like an exaggeration, but I genuinely find myself enjoying washing dishes now, or at the very least, it’s no longer the dreaded chore it once was! The significant improvement in both functionality and aesthetics has transformed a mundane, difficult task into a far more pleasant and efficient experience, embodying the functional beauty of modern farmhouse design.
DIY Countertops and Backsplash: A Textured and Enduring Statement
Our builder-standard beige Formica countertops and the bland, matching beige tile backsplash were yet another element that left much to be desired. They contributed to the kitchen’s uninspired aesthetic, lacking any distinct personality or style, and frankly, felt outdated even in a new build. This entire section was a prime candidate for a budget-friendly, high-impact DIY project that could dramatically alter the kitchen’s character.
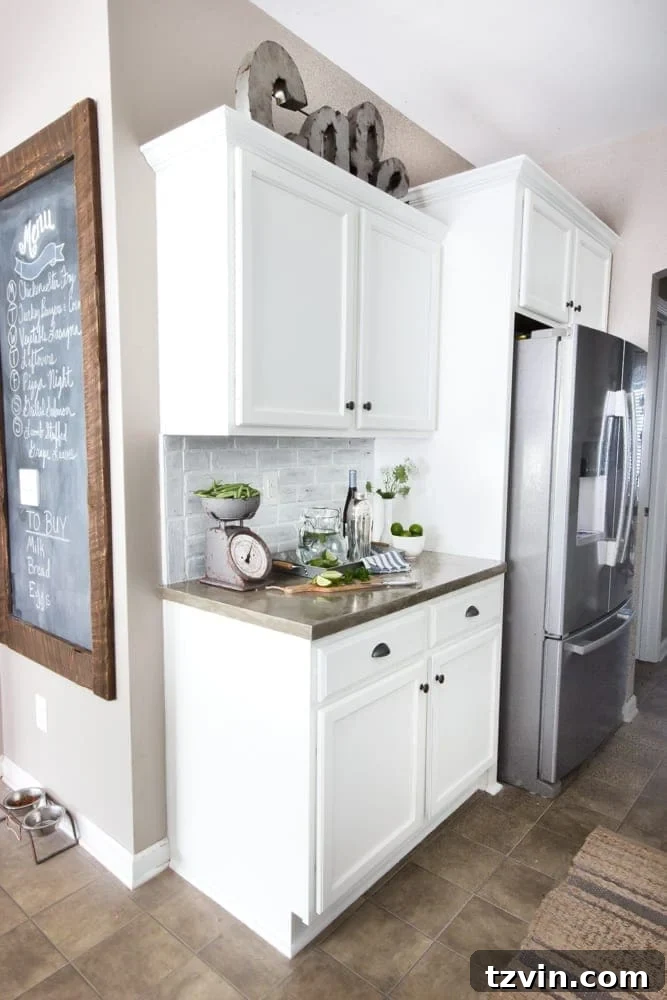
The countertops received a stunning and incredibly durable update with several carefully applied layers of feather-finish concrete. This was a labor-intensive project, a true “wrestling match” that demanded significant patience, attention to detail, and precision through each layer. However, the final result is absolutely worth every ounce of effort. The concrete provides a durable, modern, and perfectly imperfect surface that beautifully complements the rustic-chic farmhouse aesthetic. For the backsplash, we opted for whitewashed faux brick paneling, which was installed directly over the existing tile. This choice added incredible texture, visual interest, and rustic charm without the mess, high cost, or complex installation associated with traditional brick. I am absolutely thrilled with how both these elements turned out, working in harmony to create a cohesive, stylish, and highly functional backdrop for our revitalized kitchen.
Appliance Refresh and Thoughtful Flooring Solutions
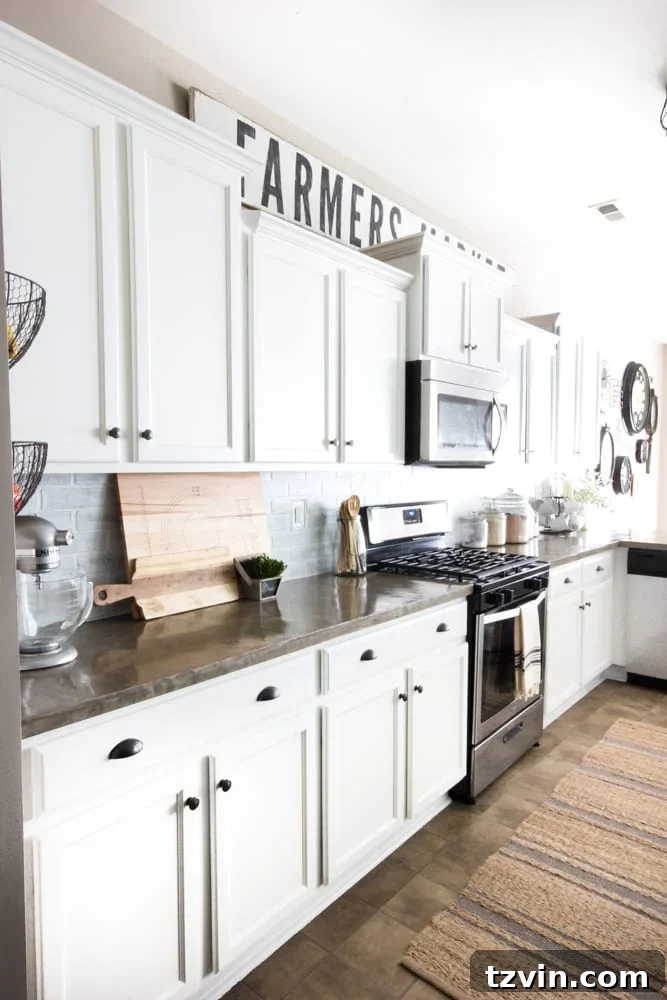
A significant aesthetic hurdle in our transforming kitchen was our original black gas range, which felt visually heavy and distinctly dated against the evolving bright and airy space. We patiently waited for the opportune moment and eventually swapped it for a sleek, modern stainless steel model. This upgrade was made even sweeter by scoring an incredible deal during a 30% off appliance sale at Lowe’s. This strategic appliance upgrade immediately elevated the kitchen’s modern feel and blended seamlessly with the new color palette, contributing significantly to the desired aesthetic without a full-price investment.
While a complete new flooring installation wasn’t financially feasible during this phase of the renovation, we’re perfectly content with our existing vinyl for now. Recognizing that every detail contributes to the overall ambiance, we found a clever solution to enhance the floor’s aesthetic. To help tie the entire space together, add a touch of inviting texture, and subtly define the kitchen’s main workspace, a beautiful striped jute rug was introduced. Found at an amazing 40% off, this rug not only adds warmth and a natural element but also perfectly complements the modern farmhouse style, proving that smart accessory choices can make a big difference without necessitating a full flooring replacement.
Every Detail Counts: Functional Decor and Personalized DIY Accents
I confess, I often find myself simply walking into the kitchen and just staring. The difference truly is like night and day. The overwhelming darkness that once pervaded the space has been completely banished, primarily thanks to the cabinet paint. But beyond these significant projects, it’s the thoughtful details and personalized DIY accents that truly complete our modern farmhouse kitchen, infusing it with character and making it uniquely ours.
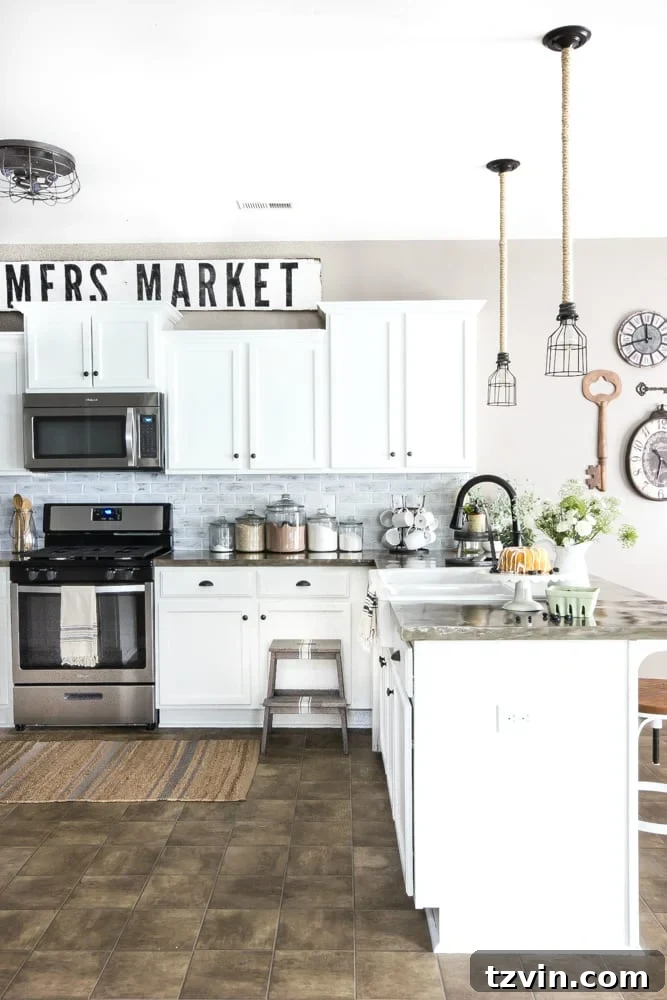
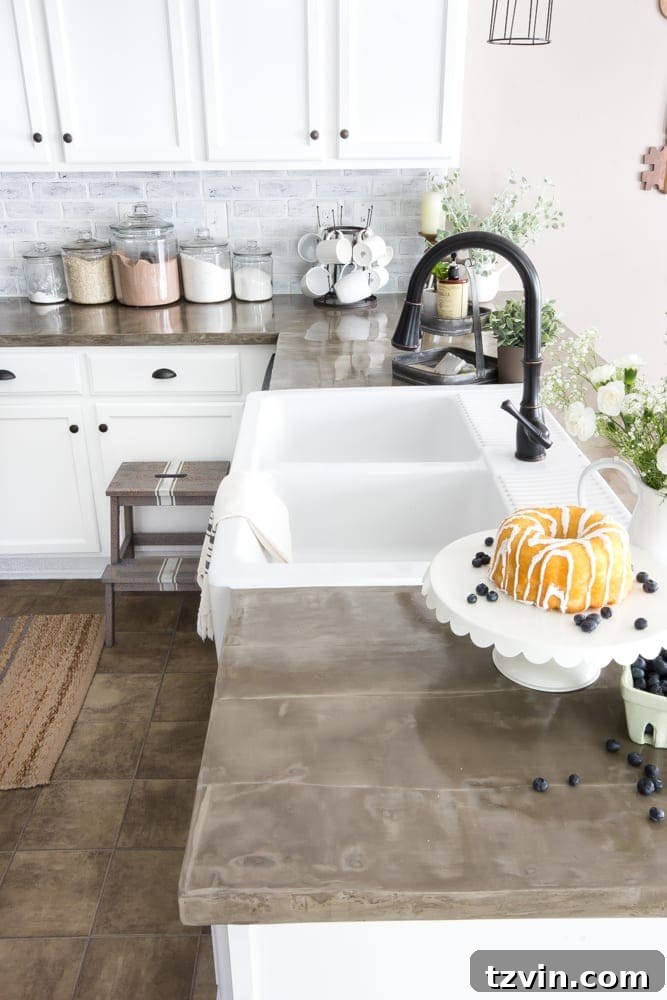
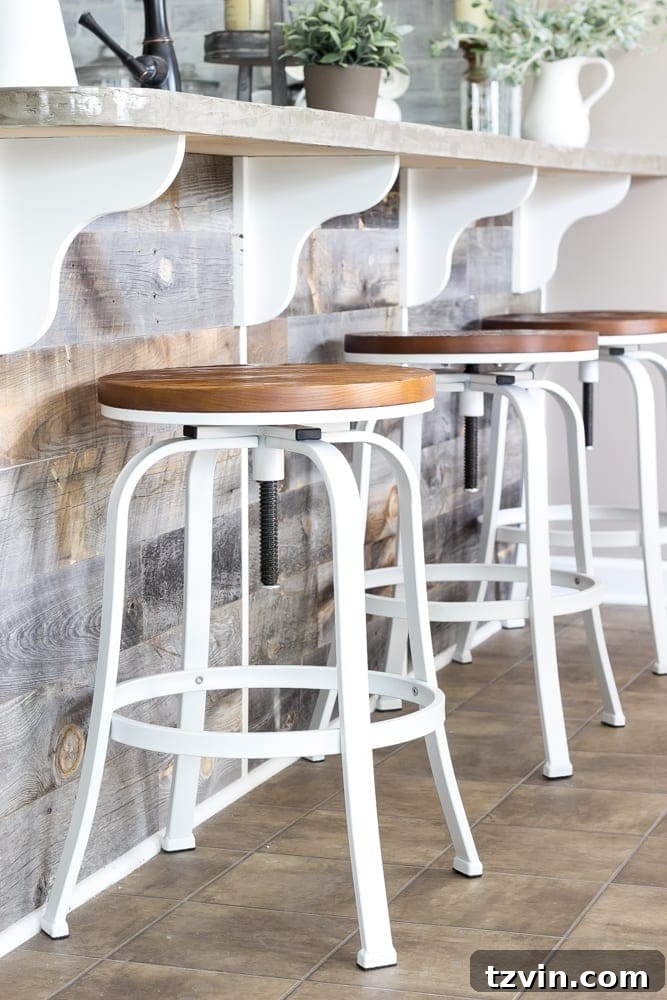
This bright and inviting space has made everyday activities, like baking “parties” with our daughter Olivia, significantly more enjoyable (even if this particular cake was a delicious grocery store cheat!). Olivia absolutely loves perching on one of the new barstools for lunch each day, and the Stikwood we installed on the front of the bar provides durable, stylish protection from her energetic swinging feet, making cleanup a breeze and adding another layer of rustic texture.

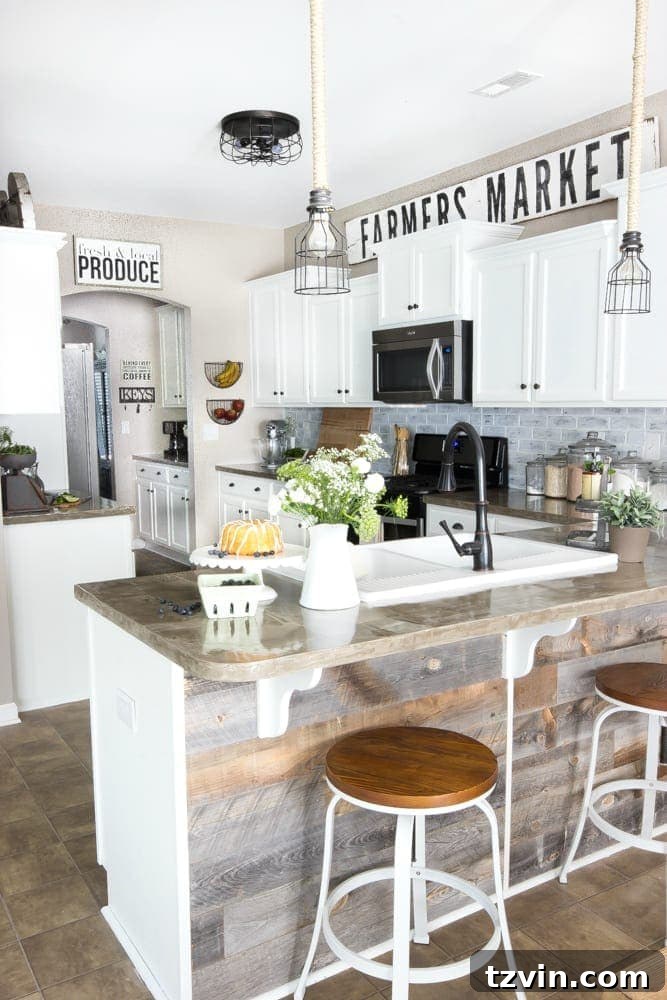
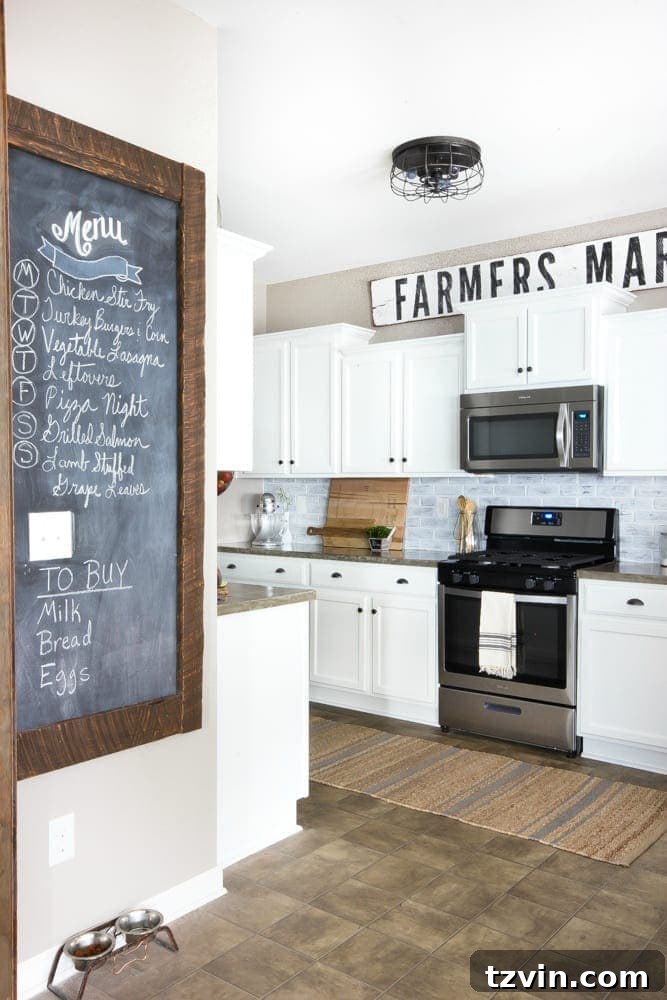
Above the cabinets, an awkward empty space was beautifully transformed with a “Farmers Market” sign, made entirely on a whim from our scrap wood pile using only leftover paint. This piece perfectly embodies the essence of budget-friendly DIY decor, adding delightful character and filling the space with farmhouse charm without costing a dime.
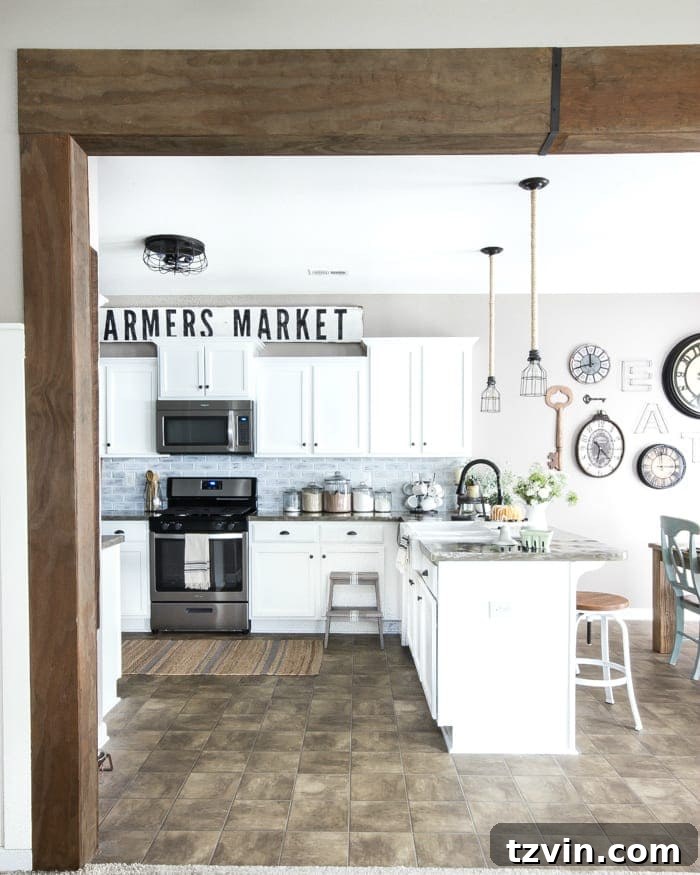
Though technically a living room project, our DIY wood beam doorway seamlessly connects the two spaces and adds immense architectural interest and rustic warmth to the kitchen entry. It also beautifully complements our framed chalkboard, which gained its authentic rustic charm from reclaimed wood meticulously sourced from Robert’s parents’ barn. We’re excited to utilize more of these precious reclaimed pieces for future furniture builds, extending the farmhouse aesthetic throughout our home.
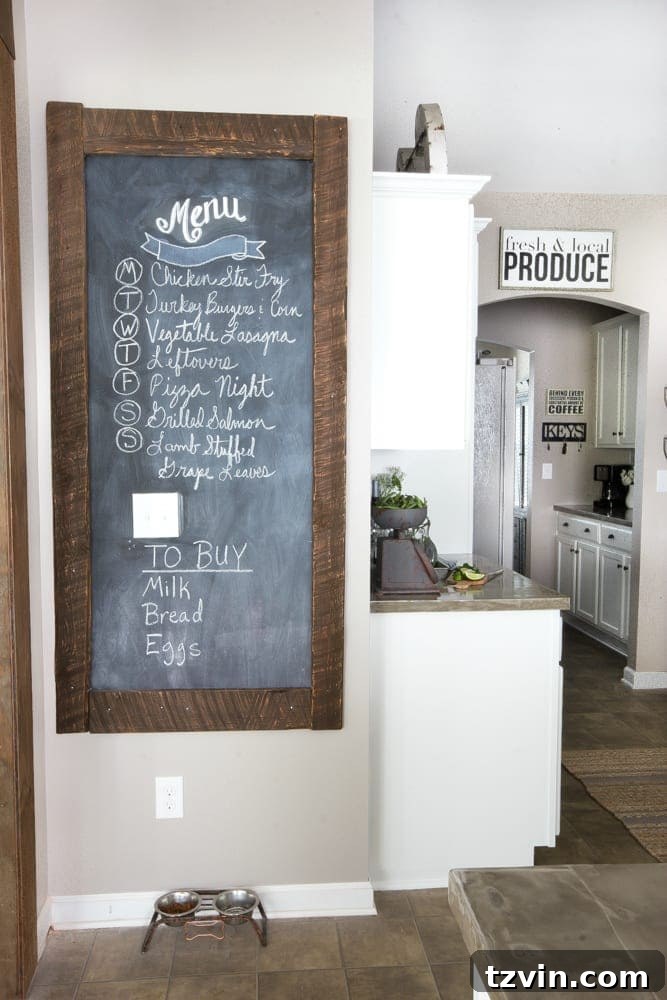
Small decor elements, often overlooked, also play a crucial role in bringing the modern farmhouse vision to life. I was absolutely thrilled to find a working vintage food scale while thrifting. Though originally a beaten-up stainless steel, a creative faux rusted paint treatment gave it an authentic antique look and feel. It now proudly displays fresh veggies from my parents’ garden or our backyard garden box until they’re ready for cooking, adding both charm and practicality to our counter space.

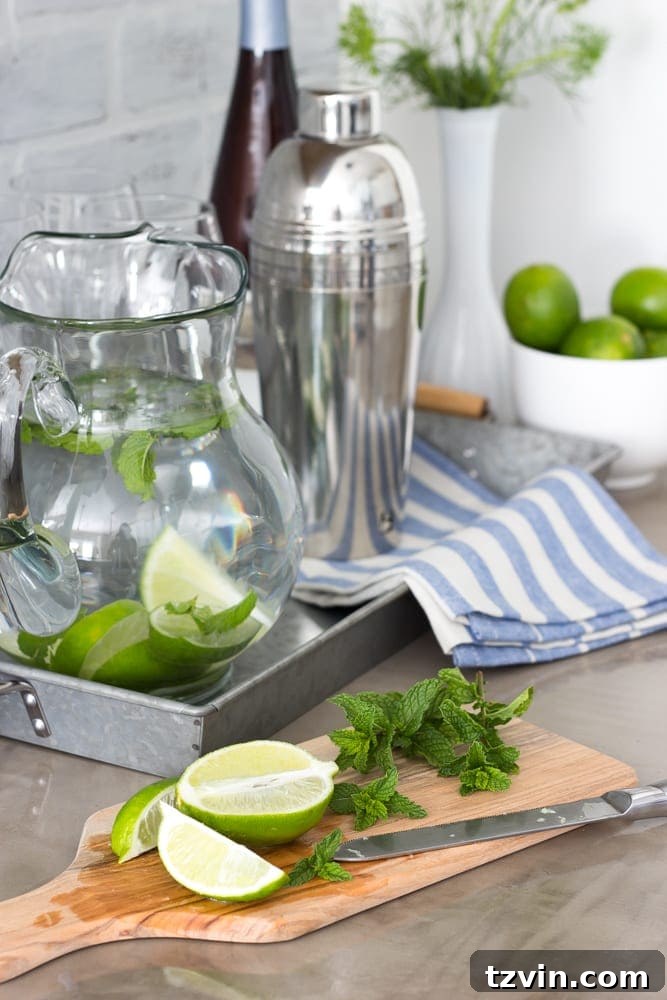
Summertime inherently means entertaining, and our kitchen easily transforms into a refreshing drink station for guests. Fresh mint, conveniently snipped from our backyard garden, is always on hand for whipping up delicious mojitos, perfectly placed in a charming pitcher next to the fridge. This dedicated spot makes hosting effortless and adds a touch of natural freshness.
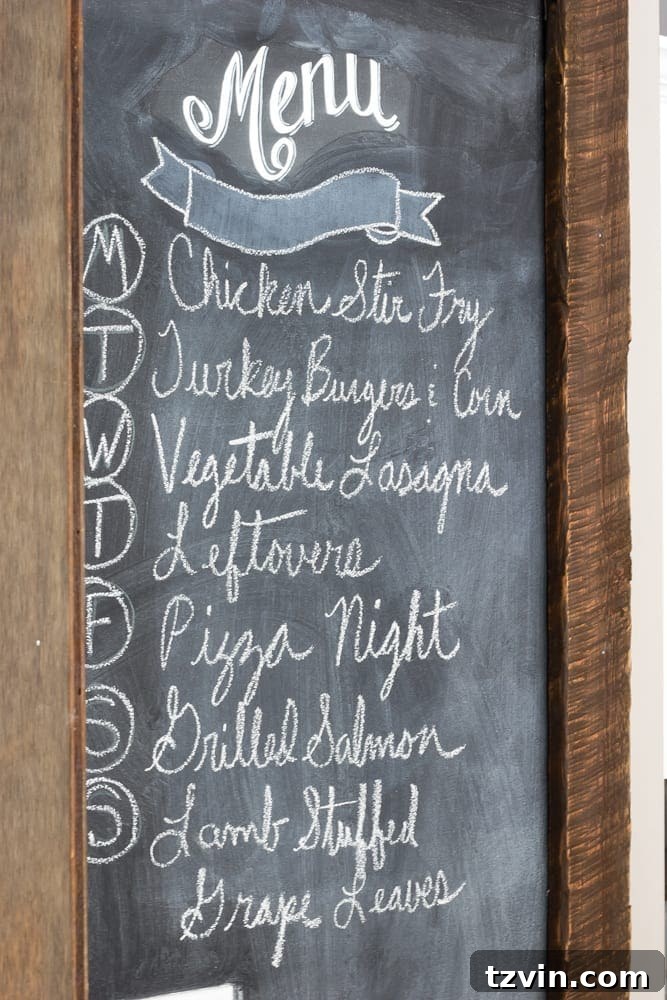
The chalkboard remains an indispensable organizational tool in our kitchen. I consistently use it to plan our weekly meals, streamlining grocery lists and ensuring we make the most of our ingredients. A dedicated space at the bottom serves not only for jotting down last-minute grocery items but also as an impromptu canvas for Olivia’s creative drawings while I prepare dinner, making the kitchen a hub for both productivity and playful interaction.
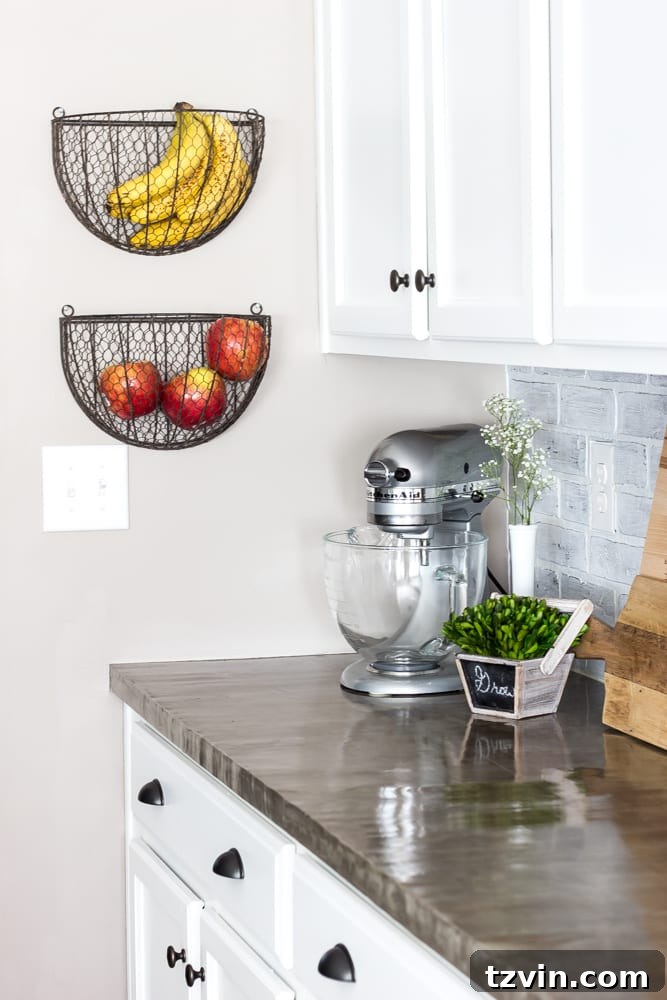
Repurposed wall planters, originally hung a couple of years ago, continue to serve as charming and highly functional storage solutions for fruits and vegetables. Their enduring utility and aesthetic appeal prove that good ideas, blending form and function, truly stand the test of time in home decor.
Finally, a small, galvanized tiered tray conveniently keeps dish sponges, soaps, and other cleaning essentials organized and within easy reach next to the sink. This simple addition combines essential practicality with a touch of decorative flair, ensuring our sink area remains tidy and stylish.
Reflecting on Our DIY Journey and What’s Next for Our Home
It’s almost unbelievable to think that with the successful completion of this kitchen, we now have only two rooms left to finish our entire house! The playroom and the laundry room are the final frontiers on my exciting hit list, perhaps with a few closets sprinkled in for good measure. This kitchen project, however, stands as a profound testament to what can truly be achieved with a clear vision, a willingness to get hands-on, and a little creative problem-solving. It’s a journey that began with a dark, uninspired, and merely functional space and culminated in a bright, inviting, and truly personalized heart of our home. We couldn’t be prouder of the transformation and the countless hours we’ve invested. You can explore the rest of our home’s room reveals here to see more of our whole-house transformation journey.
Dive Deeper: Our Kitchen Makeover Project Guides
For those of you feeling inspired to undertake similar transformations in your own homes, we’ve meticulously documented each step of our kitchen makeover journey. If you’re eager to learn more about specific projects, discover our methods, or missed any of our detailed how-to guides, we invite you to explore them from the very beginning. These resources are packed with practical tips, tricks, and step-by-step instructions to help you achieve your own budget-friendly DIY kitchen dreams:
- Kitchen Makeover Plans and Mood Board
- DIY Industrial Pendant Lights
- Installing an IKEA Farmhouse Sink
- DIY Feather Finish Concrete Countertops
- How to Paint Kitchen Cabinets Like a Pro
- Faux Rusted Vintage Scale Makeover
- DIY Reclaimed Wood Bar
Budget Breakdown: Achieving Farmhouse Style on a Realistic Budget
Now for the moment of truth – the comprehensive final tally of our kitchen makeover! I must admit, my eyes went wide when I calculated the total cost of this entire transformation. At first glance, the figure might seem substantial, but considering the extensive scope of what we achieved – a brand new stainless steel stove, a massive farmhouse sink with a new faucet, completely transformed concrete countertops and a stylish faux brick backsplash, professionally painted cabinets, elegant barstools, upgraded lighting throughout, and all the charming small decor items – it represents an incredible value for our generously sized 20′ x 12′ kitchen. The sheer size of the space itself naturally played a significant role in the overall cost, requiring more materials and effort for each project.
This was undoubtedly the most expensive single room we’ve tackled to date, but the investment has truly paid off exponentially in terms of enhanced functionality, breathtaking aesthetics, and the sheer joy it brings to our daily lives. In fact, I suspect we spent nearly as much on takeout food during the three months the kitchen was periodically out of commission for cooking! Here’s a detailed breakdown of our expenditures, thoughtfully compiled to illustrate how a dream kitchen doesn’t necessarily require breaking the bank when you strategically embrace DIY and smart shopping:
Source List / Budget Breakdown: (Affiliate links are provided below for convenience. For more information, see my full disclosure here.)
- Wall Color– Sherwin Williams Perfect Greige
- Cabinet Color– Benjamin Moore Simply White
- Painted Cabinets – DIY – $152
- Cabinet Knobs / Pulls – D Lawless Hardware – $105.59
- Concrete Countertops – DIY – $250
- Faux Brick Backsplash – $75 (tutorial coming July 16th on Remodelaholic)
- Farmers Market Sign – DIY – Free using supplies from scrap pile
- Framed Chalkboard – DIY – Free using supplies from scrap pile
- Produce Sign – $0 gifted
- Cage Pendant Lights – DIY from original builder grade fixtures – $20
- Flush Mount Light – Amazon – $113.42
- Stainless Steel Range – Lowe’s – $419.00 (30% off sale)
- Bar Reclaimed Wood – Stikwood – $560
- Farmhouse Sink – IKEA – $312.98
- Sink Faucet – Amazon – $187.20
- Barstools – Target – $143.97 for all three (40% off sale)
- Striped Jute Runner – Target – $43.24 (30% off sale + 10% off coupon)
- Cake Stand – World Market – $0 using loyalty rewards points
- Storage Jars – Walmart – $59.80 for all five
- “Antique” Kitchen Scale – Thrifted – $16
- Mug Drying Rack – World Market – $16.99
- Large Pastry Board – World Market – $34.99
- Small Cutting Board – World Market – $0 using loyalty rewards points
- Kitchen Aid Stand Mixer – $0 Christmas present
- Blue Striped Dish Towels – World Market – $0 using loyalty rewards points
- Gray Striped Dish Towels – World Market – $7.98 for both
- Wooden Spoon Holder – Kirkland’s – $0 gifted
- Galvanized Tiered Stand – Curtis Creations – $35
- Wall Planter Baskets – already owned (similar linked)
- Galvanized Tray – Walmart – $7.94
- White Pitchers – Thrifted – $6 for both
- Glass Pitcher – $0 wedding gift
(This comprehensive list details every element, big and small, that contributed to our kitchen’s transformation. If I inadvertently left anything out, please let me know!)
TOTAL: $2,567.10
Your Own Kitchen Makeover: Tips and Encouragement
Are you as thrilled as we are to see this project finally completed? Feel free to join our virtual dance party – we’re celebrating this massive accomplishment with immense joy! Embarking on a huge kitchen makeover can seem incredibly daunting, a true Everest of home improvement projects. However, our detailed journey proves that with a strategic approach, a genuine willingness to embrace DIY projects, and a keen eye for sales and budget-friendly solutions, you can achieve a stunning, high-impact transformation without completely blowing your financial reserves.
Have you ever tackled a major kitchen renovation yourself? Or are you dreaming of one in the future, perhaps inspired by our modern farmhouse transformation? We’d absolutely love to hear your budget-friendly tips, innovative DIY ideas, and clever tricks you’ve used in your own kitchen renos. Sharing our collective experiences truly helps all of us on our home improvement journeys. And for anyone feeling intimidated by the sheer scale of a major space makeover, remember this powerful truth: you absolutely can do it! Just break the project down into manageable steps, tackle one task at a time, and never, ever underestimate the incredible, transformative power of paint. It truly can work wonders beyond imagination!