
DIY Sofa Makeover: How to Add Bullion Fringe for a High-End Look on a Budget
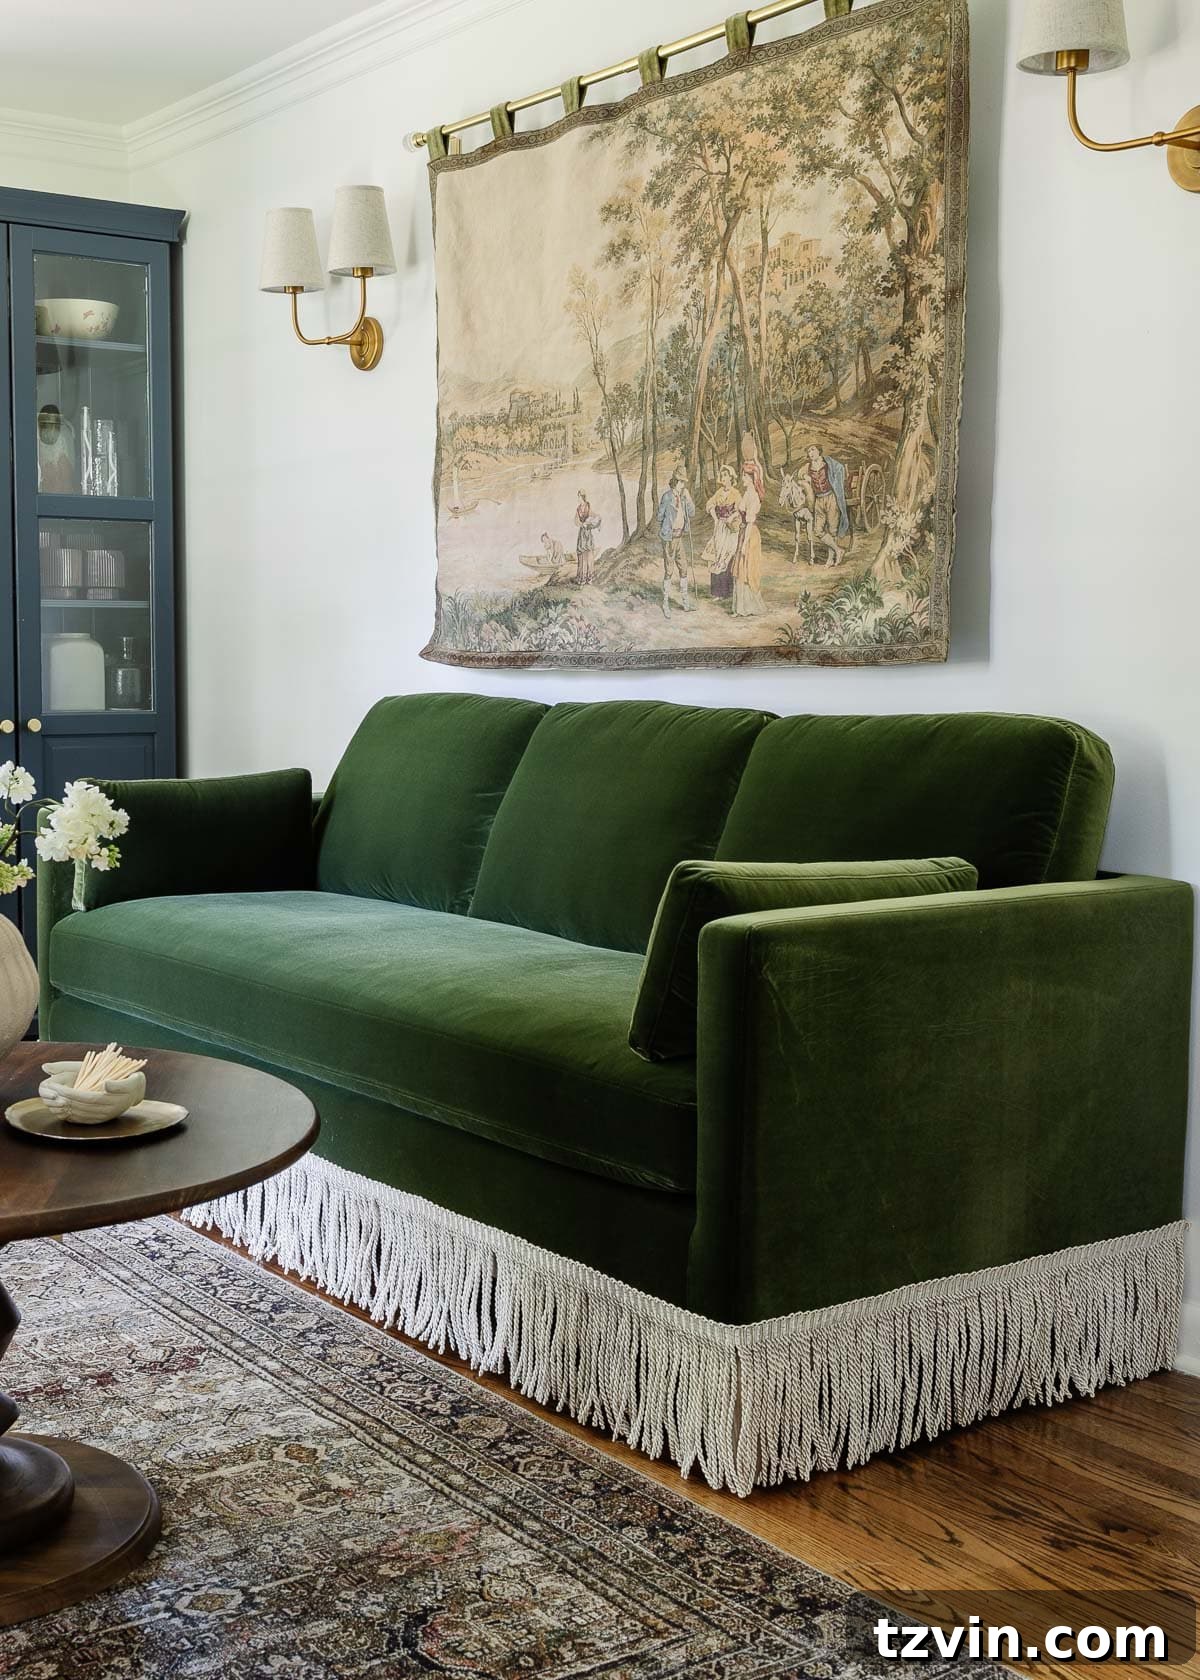
For what feels like an age, I’ve harbored a secret desire to undertake a specific DIY project: adorning a sofa with elegant fringe. This vision, cultivated over several years, finally materialized into a delightful transformation. Adding fringe to a sofa is more than just a decorative tweak; it’s a bold statement that infuses a piece of furniture with personality, historical charm, and a touch of bespoke luxury.
While this distinctive aesthetic might not appeal to everyone, it’s an absolute game-changer for those who deeply appreciate grandmillennial style, embrace “Grandma core” aesthetics, or simply crave interiors with character and depth. This project stands out as a wonderfully simple yet incredibly effective way to achieve a high-end, custom look without the exorbitant price tag, making it an ideal endeavor for any DIY enthusiast looking to elevate their home decor with a unique, vintage-inspired flourish.
Instant Elegance: Transforming Your Sofa with Decorative Fringe
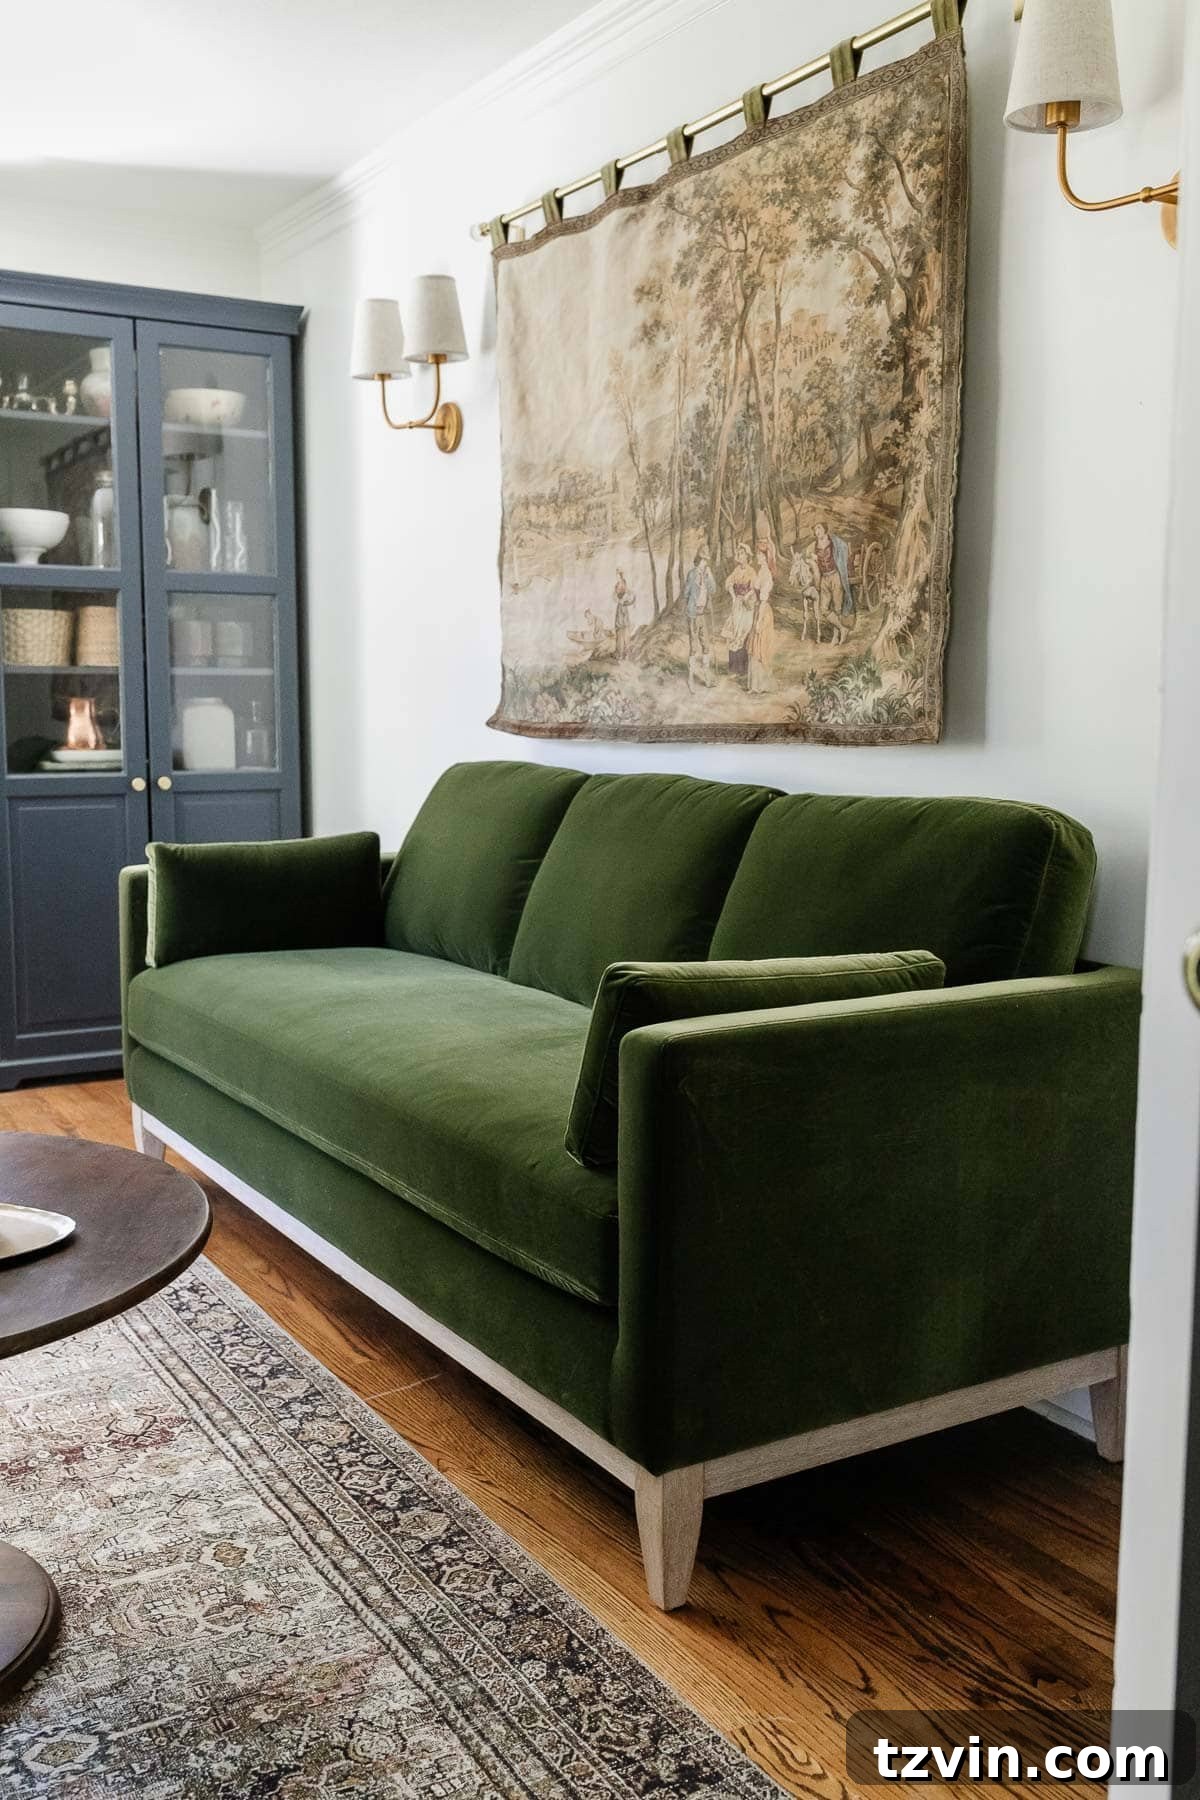
Adding a decorative trim like fringe is an incredibly swift and impactful way to completely revitalize the style of any sofa, whether it’s a brand-new purchase or a cherished old favorite. I recently acquired this gorgeous green velvet sofa for my home office. While I adored its rich color and plush texture, the base of the sofa had a distinctly “modern farmhouse” vibe. Let me be clear: modern farmhouse is a beautiful and incredibly popular style! However, it wasn’t quite the aesthetic I envisioned for my own home, which leans towards a more classic, layered, and slightly maximalist design.
The solution was deceptively simple: attaching bullion fringe around the bottom edge. The transformation was almost instantaneous – I managed to completely change the sofa’s style in about 15 minutes flat. What was once a contemporary-leaning piece now exuded an air of timeless elegance and vintage charm, perfectly aligning with my desired grandmillennial decor. This project is a testament to how small, thoughtfully chosen details can have a monumental impact on the overall look and feel of a room.
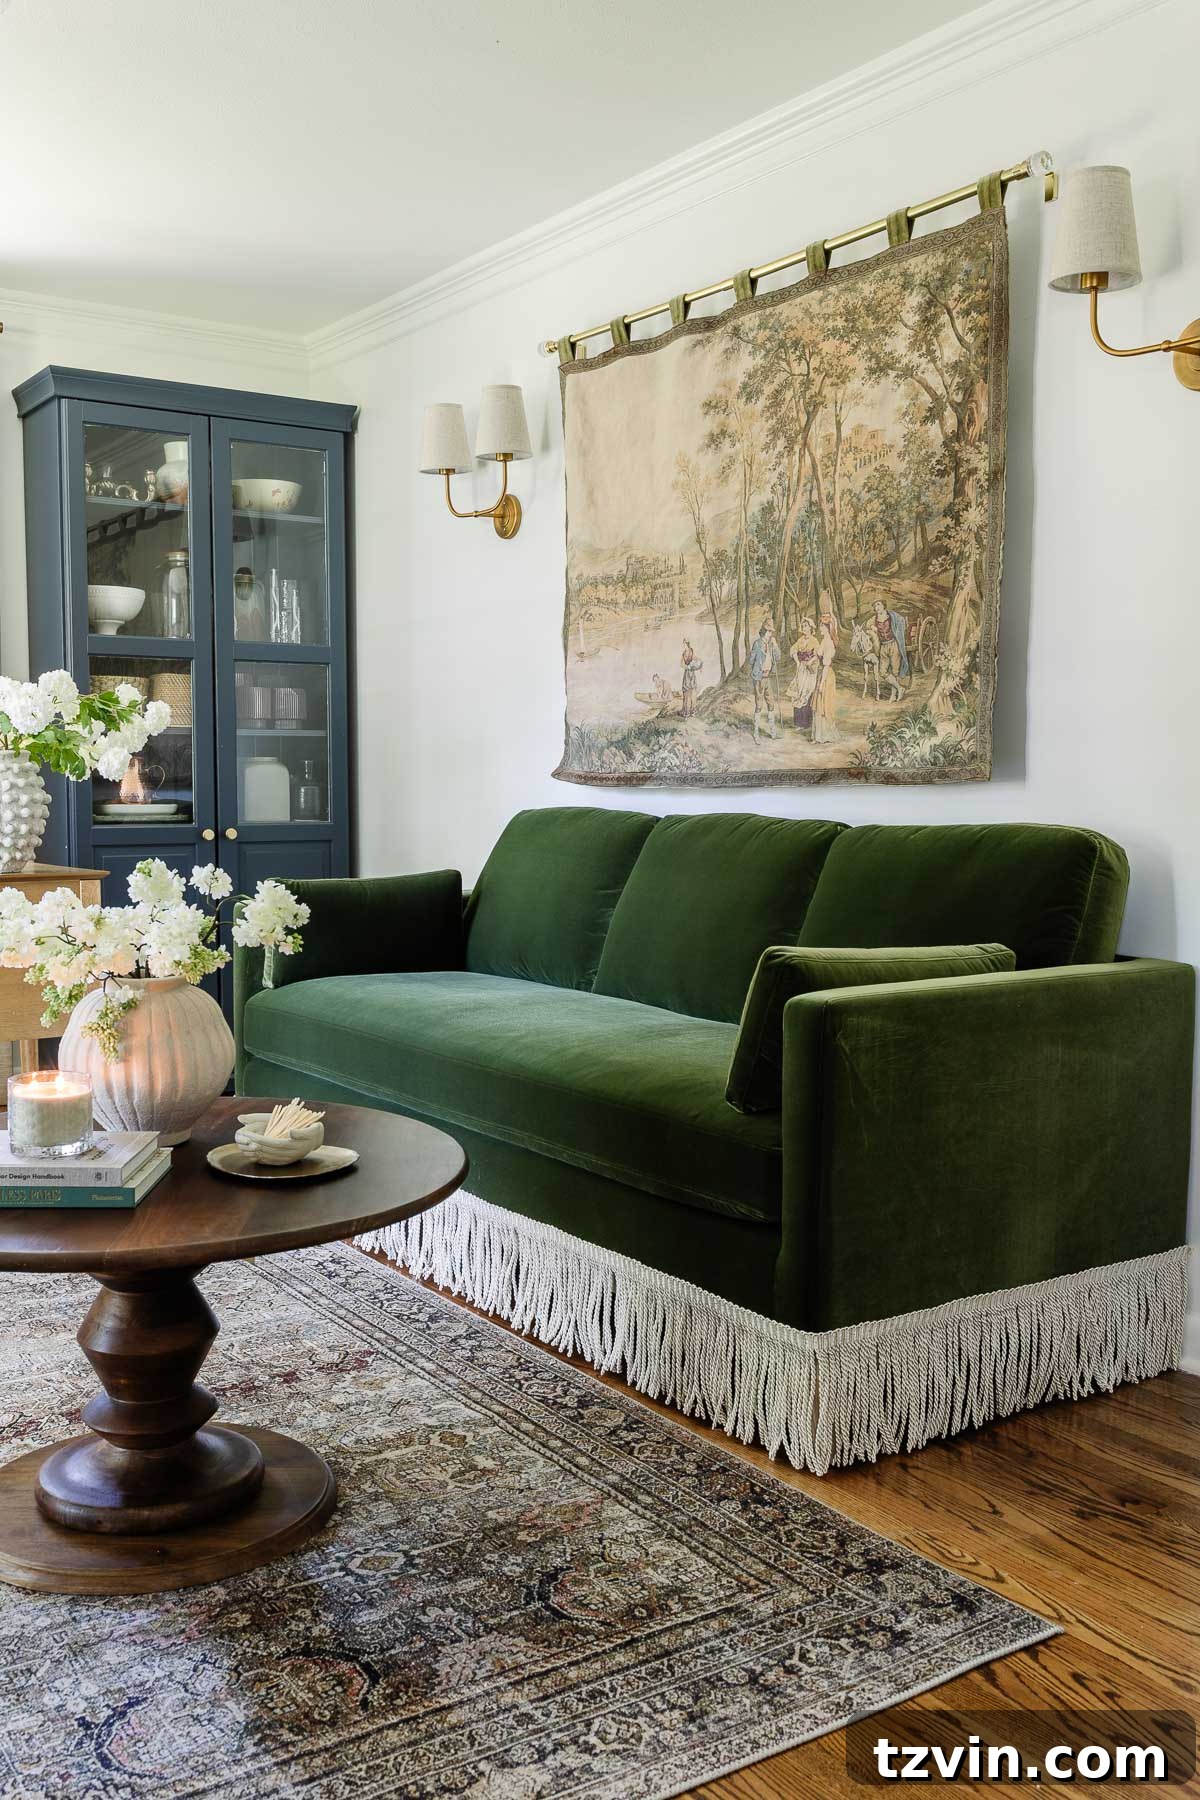
Beyond the quick aesthetic upgrade, incorporating fringe adds a layer of softness, texture, and visual interest that can instantly make a room feel more curated and inviting. It breaks up the stark lines of a traditional sofa, introducing movement and a tactile quality that modern furniture often lacks. This project is not just about decorating; it’s about personalizing your space and infusing it with character that truly reflects your unique taste. If you’re seeking to add warmth, history, and a touch of sophisticated drama to your interiors, a fringed sofa is an exceptionally rewarding choice.
As an Amazon Associate, I earn from qualifying purchases. Full disclosure
Unveiling Bullion Fringe: A Glimpse into its Rich History and Style
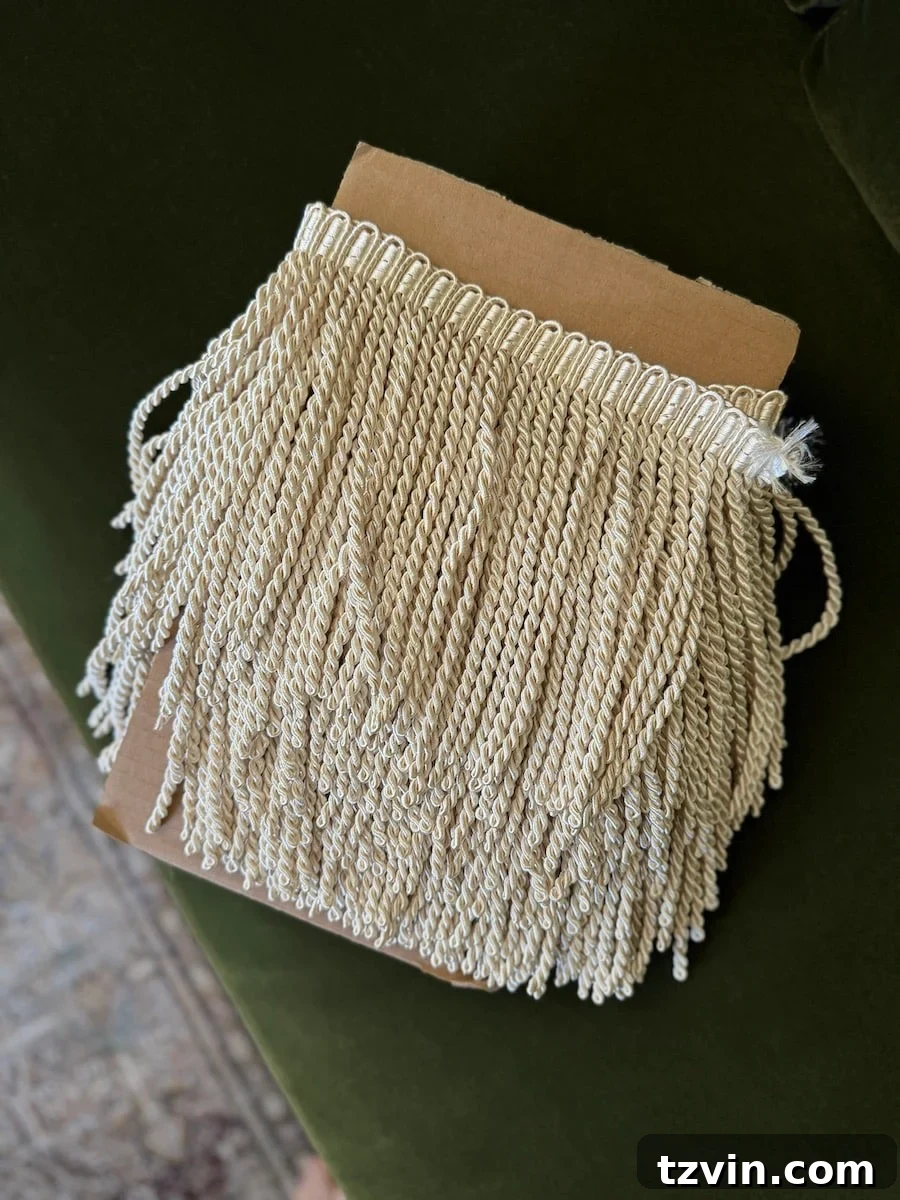
Before we delve into the practical steps of attaching this beautiful trim, let’s take a moment to understand what bullion fringe is and why it’s such a cherished element in interior design. Bullion fringe is distinctively known for its luxurious, twisted yarn appearance. It typically consists of multiple strands of yarn, often silk, rayon, or cotton, tightly twisted together and then allowed to hang freely, creating a dense, opulent cascade. This unique construction gives it a substantial weight and elegant drape, making it ideal for upholstery and drapery.
The popularity of bullion fringe soared during the Victorian era, a period celebrated for its elaborate ornamentation and a maximalist approach to decor. Homes of the wealthy were often adorned with rich textiles, intricate carvings, and an abundance of decorative details, with bullion fringe gracing everything from curtains to furniture. Its charm didn’t fade with the Victorians; it experienced a magnificent resurgence during the Art Deco and Hollywood Regency movements of the early 20th century. These eras embraced glamour, theatricality, and bold design, finding bullion fringe to be a perfect complement to their sophisticated and dramatic aesthetics.
To truly visualize its iconic presence, cast your mind to classic cinematic depictions of lavish interiors. Think of the sumptuous living room settings in Judy Garland’s Meet Me in St Louis, where every detail contributed to a sense of old-world charm, or the decadent, over-the-top furnishings that brought F. Scott Fitzgerald’s world to life in Leonardo DiCaprio’s The Great Gatsby. Bullion fringe was a recurring motif, signifying status, comfort, and an undeniable flair for the dramatic.
In essence, bullion fringe is more than just a decorative trim; it’s a statement piece that commands attention. It’s the “drama queen” of furniture details, capable of transforming an ordinary item into a focal point. Its ability to add texture, movement, and a profound sense of historical elegance makes it an invaluable tool for anyone looking to infuse their decor with depth, character, and a touch of enduring style.
Related: Trend Alert: Bullion Fringe Furniture for All Budgets
Gather Your Tools: Essential Supplies for Your Fringe Sofa DIY
One of the most appealing aspects of this project is its simplicity, requiring only a handful of readily available tools and materials. This DIY is so straightforward, it barely needs a tutorial – yet, here I am, providing you with all the details for a perfect, professional finish. Having all your supplies organized and at hand before you begin will ensure a smooth and enjoyable crafting experience.
- Your chosen sofa (the canvas for your masterpiece, of course!)
- Tape measure (essential for precise measurements and a tailored look)
- Bullion fringe trim (the star material; ensure you purchase sufficient length and the correct height)
- Fabric scissors (sharp scissors are crucial for clean, crisp cuts that prevent fraying)
- Straight pins or a staple gun (your chosen method for attachment; pins for temporary, staple gun for permanent)
- Fray Check (a liquid sealant that prevents fabric edges from unraveling, ensuring durability)
When selecting your bullion fringe, consider the material and drape. High-quality fringe will fall beautifully, enhancing the luxurious look. Polyester blends are often a durable and economical choice, while rayon or cotton can offer a softer, more traditional feel. Don’t overlook the color! A fringe that closely matches your sofa’s upholstery can create a seamless, integrated look, while a contrasting color can make a bolder, more eclectic statement. Think about your overall decor style and what kind of impact you want the fringe to have. Remember, buying a little extra trim (an additional yard or so) is always a good idea to account for any mistakes or future needs.
Related: Pottery Barn Sofa Review: What You Should Know Before Buying
Step-by-Step Guide: How to Easily Add Bullion Fringe to Your Sofa
The beauty of this DIY lies in its adaptability. I initially chose a temporary attachment method for my sofa, which is perfect if you’re experimenting with the look or prefer the flexibility to change your mind later. However, I’ll also detail a more permanent solution for those who are ready to fully commit to the fringed sofa aesthetic.
Step 1: Precise Measurement and Fringe Selection
Accurate measurement is the cornerstone of a professional-looking fringed sofa. Start by measuring the height of your sofa’s legs from the base to the floor. The goal is for your fringe to hang elegantly, just skimming the floor without puddling or appearing too short. My sofa’s legs were exactly 9 inches tall, so I specifically ordered 9-inch length bullion fringe trim to ensure a perfect fit.
Avoid the “high waters” look of overly short fringe, but also prevent it from pooling unattractively on the floor, which can gather dust and look untidy. The ideal length provides a graceful, flowing appearance that enhances the sofa’s silhouette. This precise measurement ensures your DIY project will look custom-made rather than store-bought.
Next, use your tape measure to determine the entire perimeter of your sofa where the fringe will be attached. This critical step will tell you exactly how many yards or meters of fringe trim you need to purchase. For instance, my 84-inch sofa required approximately 5 yards of fringe to cover its front and both exposed sides. Always err on the side of caution and buy a little extra – an additional yard is usually sufficient – to account for any miscuts or future needs. Regarding aesthetics, while I opted for a classic cream-colored fringe, the market abounds with color and style options. Feel free to explore and select a fringe that perfectly complements your existing decor or creates a desired contrast.
Step 2: Attaching the Fringe – Choosing Your Method
With your fringe carefully measured and selected, it’s time for the exciting part: attachment! Begin at one corner of your sofa, which will make it easier to create a neat seam at the end. For a temporary and non-committal solution, utilize straight pins. Push the pins through the top woven band of the fringe at a slight downward angle, directing them into the upholstery of the sofa’s base. This angle is key, as it provides a more secure hold and prevents the pins from easily pulling out. You will likely need a considerable number of pins – I comfortably used over 100 to ensure the fringe was firmly and evenly secured around the entire base of my sofa.
Work your way around the sofa, placing pins every few inches, ensuring the fringe hangs smoothly and evenly. Pay particular attention to corners, where you might need to gently fold or make a small, precise cut in the top band of the fringe to allow it to turn neatly. The significant advantage of using pins is their reversibility; should you decide to refresh your decor or if the fringe falls out of favor, it can be removed without any permanent damage to your sofa’s upholstery.
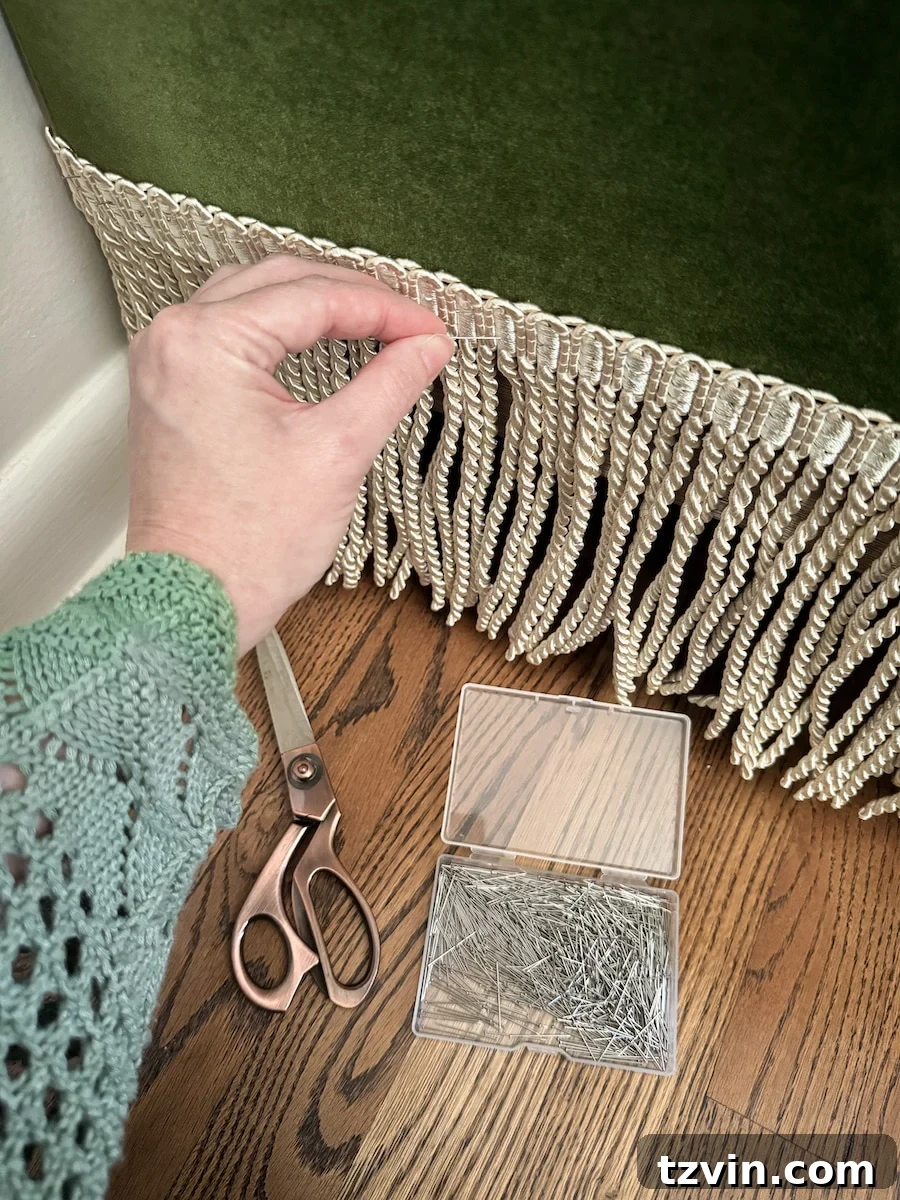
Step 3: Finishing Touches – Cut and Seal the Frayed Edge
Once you have meticulously pinned the fringe all around the perimeter of your sofa, completing the full circuit, it’s time to finish the ends for a polished look. Using sharp fabric scissors, carefully cut the fringe trim to the precise length needed, allowing for a small overlap (about 1/2 to 1 inch) where it meets the starting point. This slight overlap helps create a seamless visual transition.
To prevent the cut edge from unraveling, which is a common issue with woven trims and can quickly detract from your DIY’s professional appearance, apply a generous amount of Fray Check liquid sealant. Allow the Fray Check to dry completely according to the product’s instructions, ensuring the edge is fully sealed. Once dry, carefully turn the raw, sealed edge under itself. This creates a neat, clean hem. Secure this folded edge firmly into the upholstery with additional pins, making sure it aligns perfectly with the starting point of your fringe. This final step is crucial for achieving a truly finished, high-end look that stands the test of time and mimics custom upholstery work.
Beyond Pins: Considering More Permanent Attachment Methods
While the straight pin method offers unparalleled flexibility and is perfect for a temporary update or if you’re not fully committed to the fringed look, some may desire a more enduring attachment for their transformed sofa. If you are confident in your design choice and envision your fringed sofa as a long-term fixture, an upholstery staple gun provides a robust and permanent solution. Instead of pins, simply use the staple gun to firmly attach the top band of the fringe trim around the base of the sofa. Ensure you use upholstery-grade staples that are appropriate for your fabric type to avoid damage. This method offers a very secure hold, making it ideal for high-traffic furniture or pieces destined for a permanent spot in your home.
Another alternative often mentioned for permanent attachment is upholstery glue. However, I generally advise against this method, especially for those new to upholstery DIYs. Upholstery glue can be quite challenging to work with, making it difficult to achieve a clean, even line without messy excess. Furthermore, it leaves a permanent residue that is nearly impossible to remove without damaging the fabric, limiting future flexibility or repairs. For both ease of application and clean, reliable results, staples or pins typically remain the superior choices for attaching fringe trim.
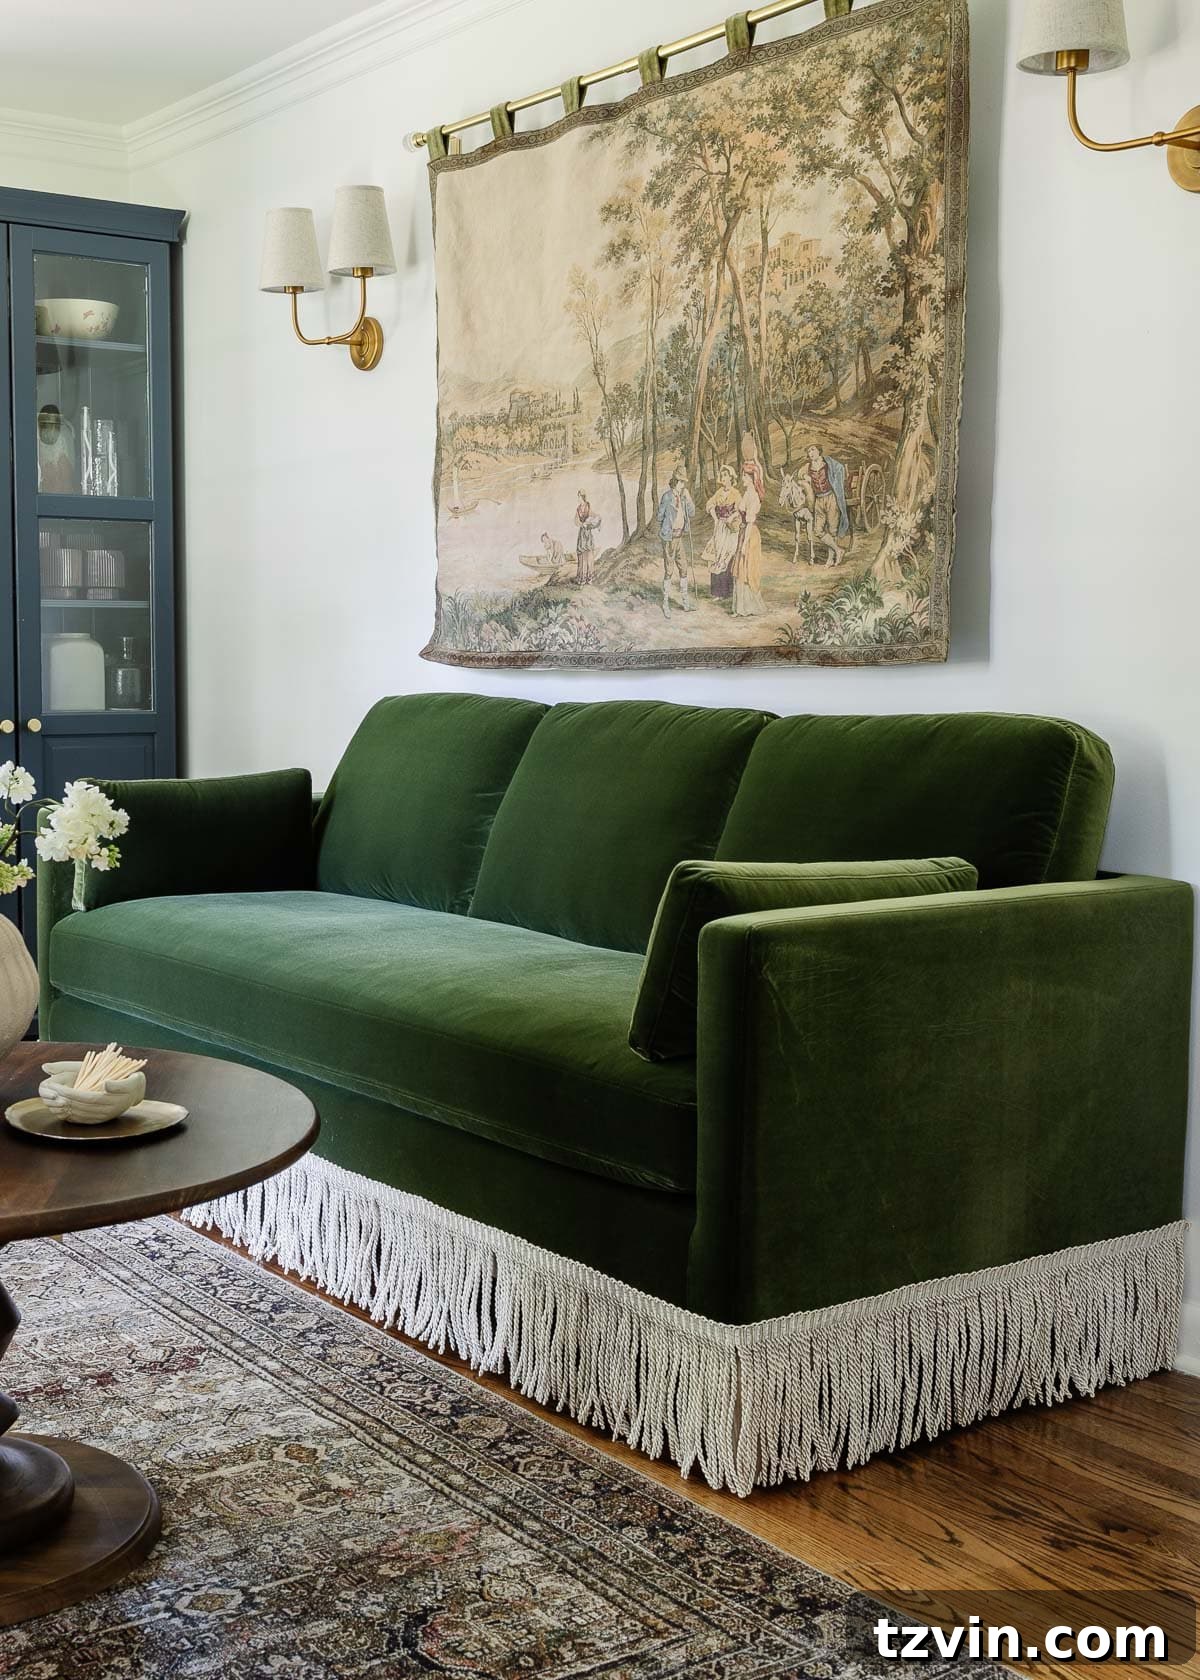
Achieving Designer Look on a DIY Budget: Incredible Savings!
And there you have it! The truly astounding aspect of this DIY project is the incredible financial advantage it offers. Sofas adorned with elegant fringe trim are often found in high-end boutiques and designer showrooms, where they easily sell for prices ranging from $5,000 to an eye-watering $10,000 or even more. If you find these figures hard to believe, a quick glance at the market confirms it: this stunning fringe sofa from Serena & Lily, for example, is priced upwards of $7,000, and this exquisite fringe sofa by the renowned designer Bunny Williams commands a staggering $11,000! It’s enough to make you exclaim, “What the what?!”
By opting for the DIY route, you unlock the potential to achieve that very same luxurious aesthetic for a mere fraction of the cost. Imagine scouting a fantastic deal on a quality, pre-loved sofa – perhaps a velvet beauty in great shape – from platforms like Facebook Marketplace for less than $500. With a relatively minimal investment in premium bullion fringe trim and a short amount of your time and effort, you can meticulously replicate these high-end, designer looks. Your total expenditure for the sofa and the fringe materials could easily remain under $600, delivering a custom, high-impact piece at an unbeatable, budget-friendly price point.
This approach isn’t solely about the significant monetary savings; it’s also a testament to smart, sustainable decorating. Giving a pre-owned sofa a fresh lease on life with a custom fringe treatment is both an environmentally conscious choice and an immensely rewarding creative endeavor. It empowers you to craft a truly unique piece that authentically reflects your personal style and narrative, setting your home apart from mass-produced interiors. The satisfaction of knowing you created something so chic and expensive-looking with your own hands is truly priceless.
Of course, if engaging in a DIY project isn’t feasible for you, or if you simply prefer to purchase a ready-made item, there’s no need to despair! I’ve thoughtfully curated a selection of beautiful bullion fringe furniture pieces that cater to various budgets, ensuring everyone can embrace this captivating trend effortlessly and elegantly.
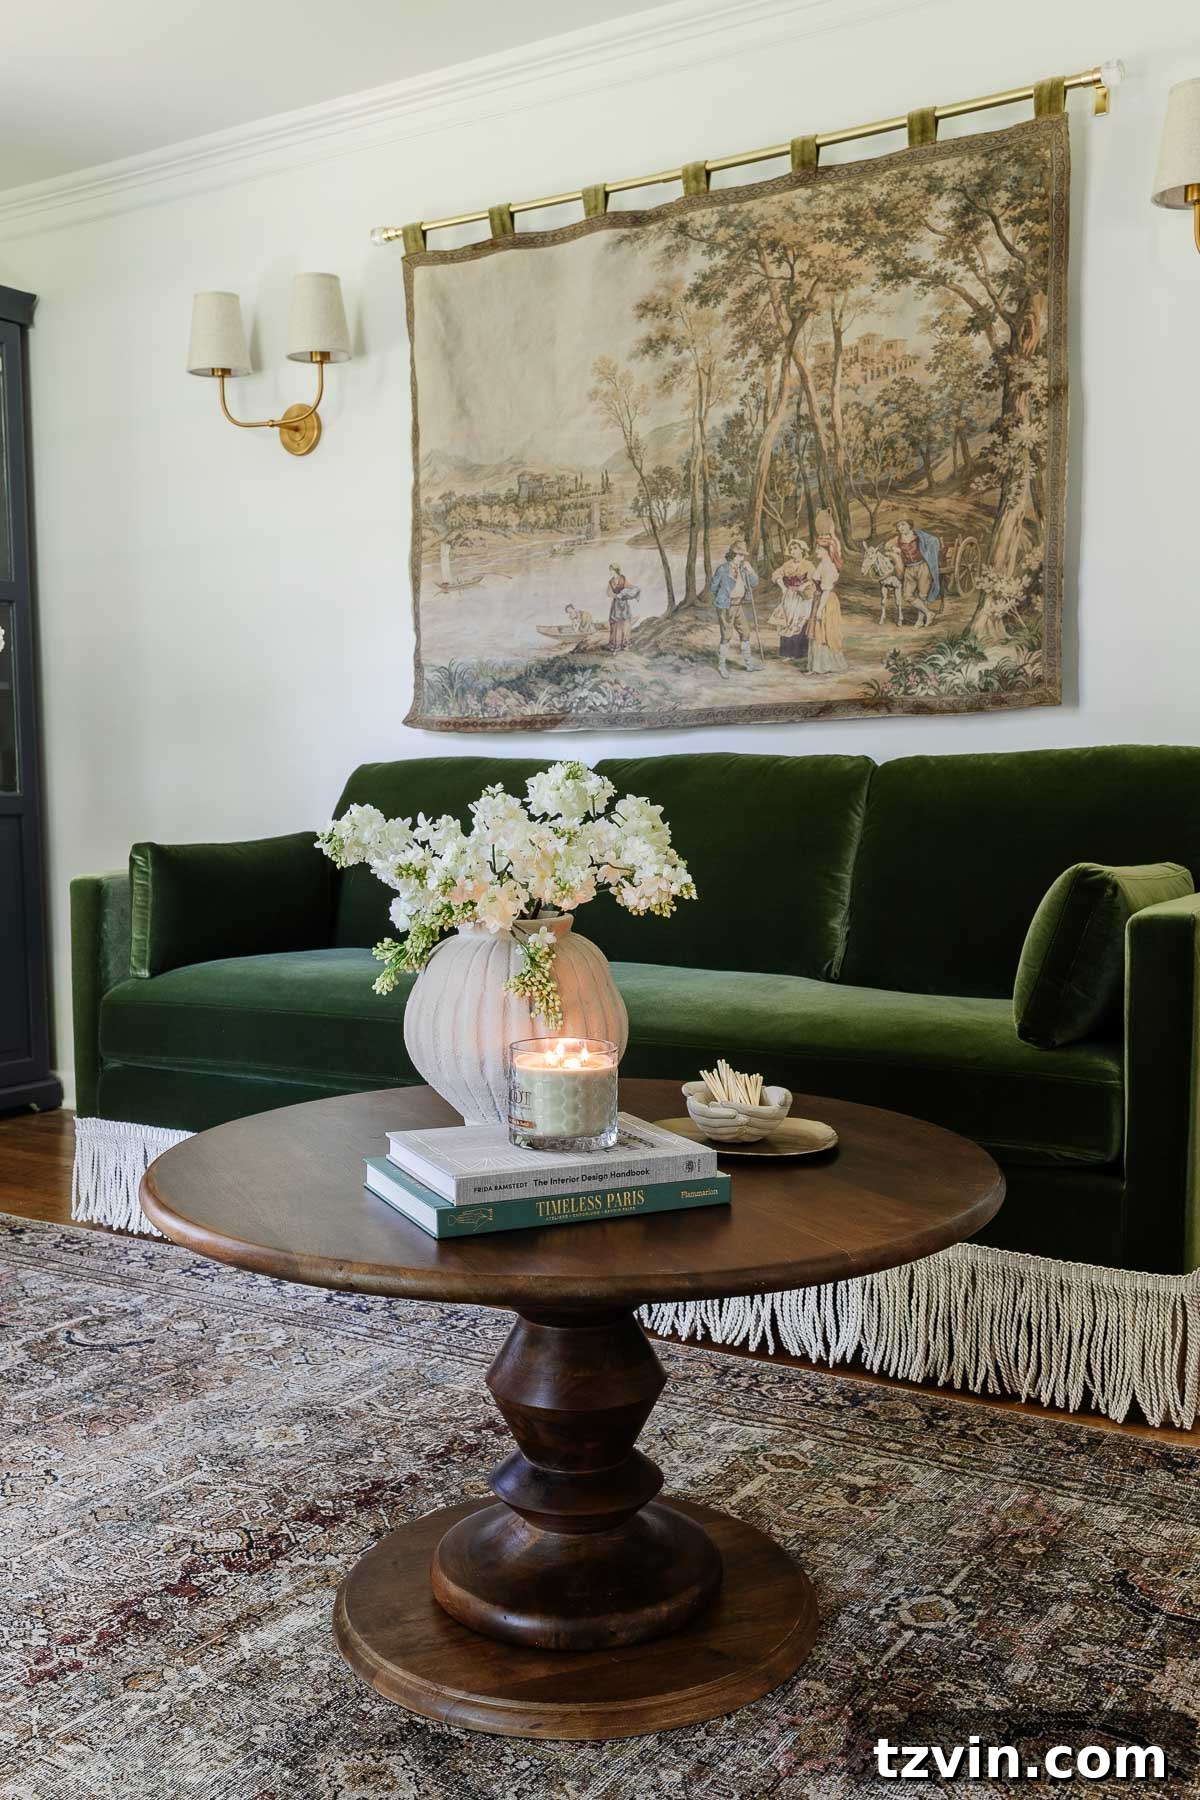
With this project complete, my new home office layout now proudly showcases this elegant, dramatic sofa right in the center, and I can hardly contain my excitement! Beyond its absolutely stunning appearance, it’s also incredibly comfortable, and knowing I achieved this high-end look for roughly one-eighth the cost of designer versions makes the entire experience even more satisfying and triumphant.
So, what are your thoughts? Are you ready to dive into the wonderful resurgence of the bullion fringe trend? It’s perfectly understandable if this bold style isn’t quite aligned with your personal taste. After all, the “drama queens” of the decor world don’t always fit seamlessly into every home aesthetic, but when they do, they truly transform a space with unparalleled flair and personality!
Quick DIY Guide: Adding Fringe Trim to a Sofa
Time needed: Approximately 15-30 minutes
Transform your sofa with elegant bullion fringe using this simple step-by-step tutorial for a high-end, custom look.
-
Measure and Select Your Fringe
Begin by measuring the height of your sofa legs from the base to the floor to determine the ideal fringe length; it should hang gracefully, nearly touching the floor. Next, measure the full perimeter of your sofa’s base to calculate the total amount of fringe trim needed. It’s always a good idea to purchase an extra yard for buffer.
-
Attach the Fringe Trim
Starting at one corner, attach the fringe. For a temporary solution, use numerous straight pins, pushing them at an angle through the top band of the fringe into the sofa’s upholstery. For a more permanent attachment, use an upholstery staple gun, ensuring staples are evenly spaced and secure.
-
Cut and Seal the Edges for a Professional Finish
Once the fringe is attached around the entire base, carefully cut the trim with fabric scissors, allowing for a slight overlap. Apply Fray Check to the raw edge to prevent unraveling. After the sealant dries completely, turn the rough edge under itself and secure it neatly with pins or staples, creating a clean, professional seam.
More Quick DIY Decorating Ideas to Transform Your Home
If you thoroughly enjoyed this sofa fringe project and are inspired to tackle more home decor transformations, you’ll be delighted by these other simple yet impactful DIYs. They are perfect for refreshing your home’s aesthetic without requiring extensive time or a significant financial investment. Explore these creative projects to further personalize your living space:
How to Make Easy No-Sew DIY Cafe Curtains
DIY Bobbin Frame For a Samsung Frame TV Bezel
Easy DIY No-Sew Curtains With Trim: Step By Step Tutorial