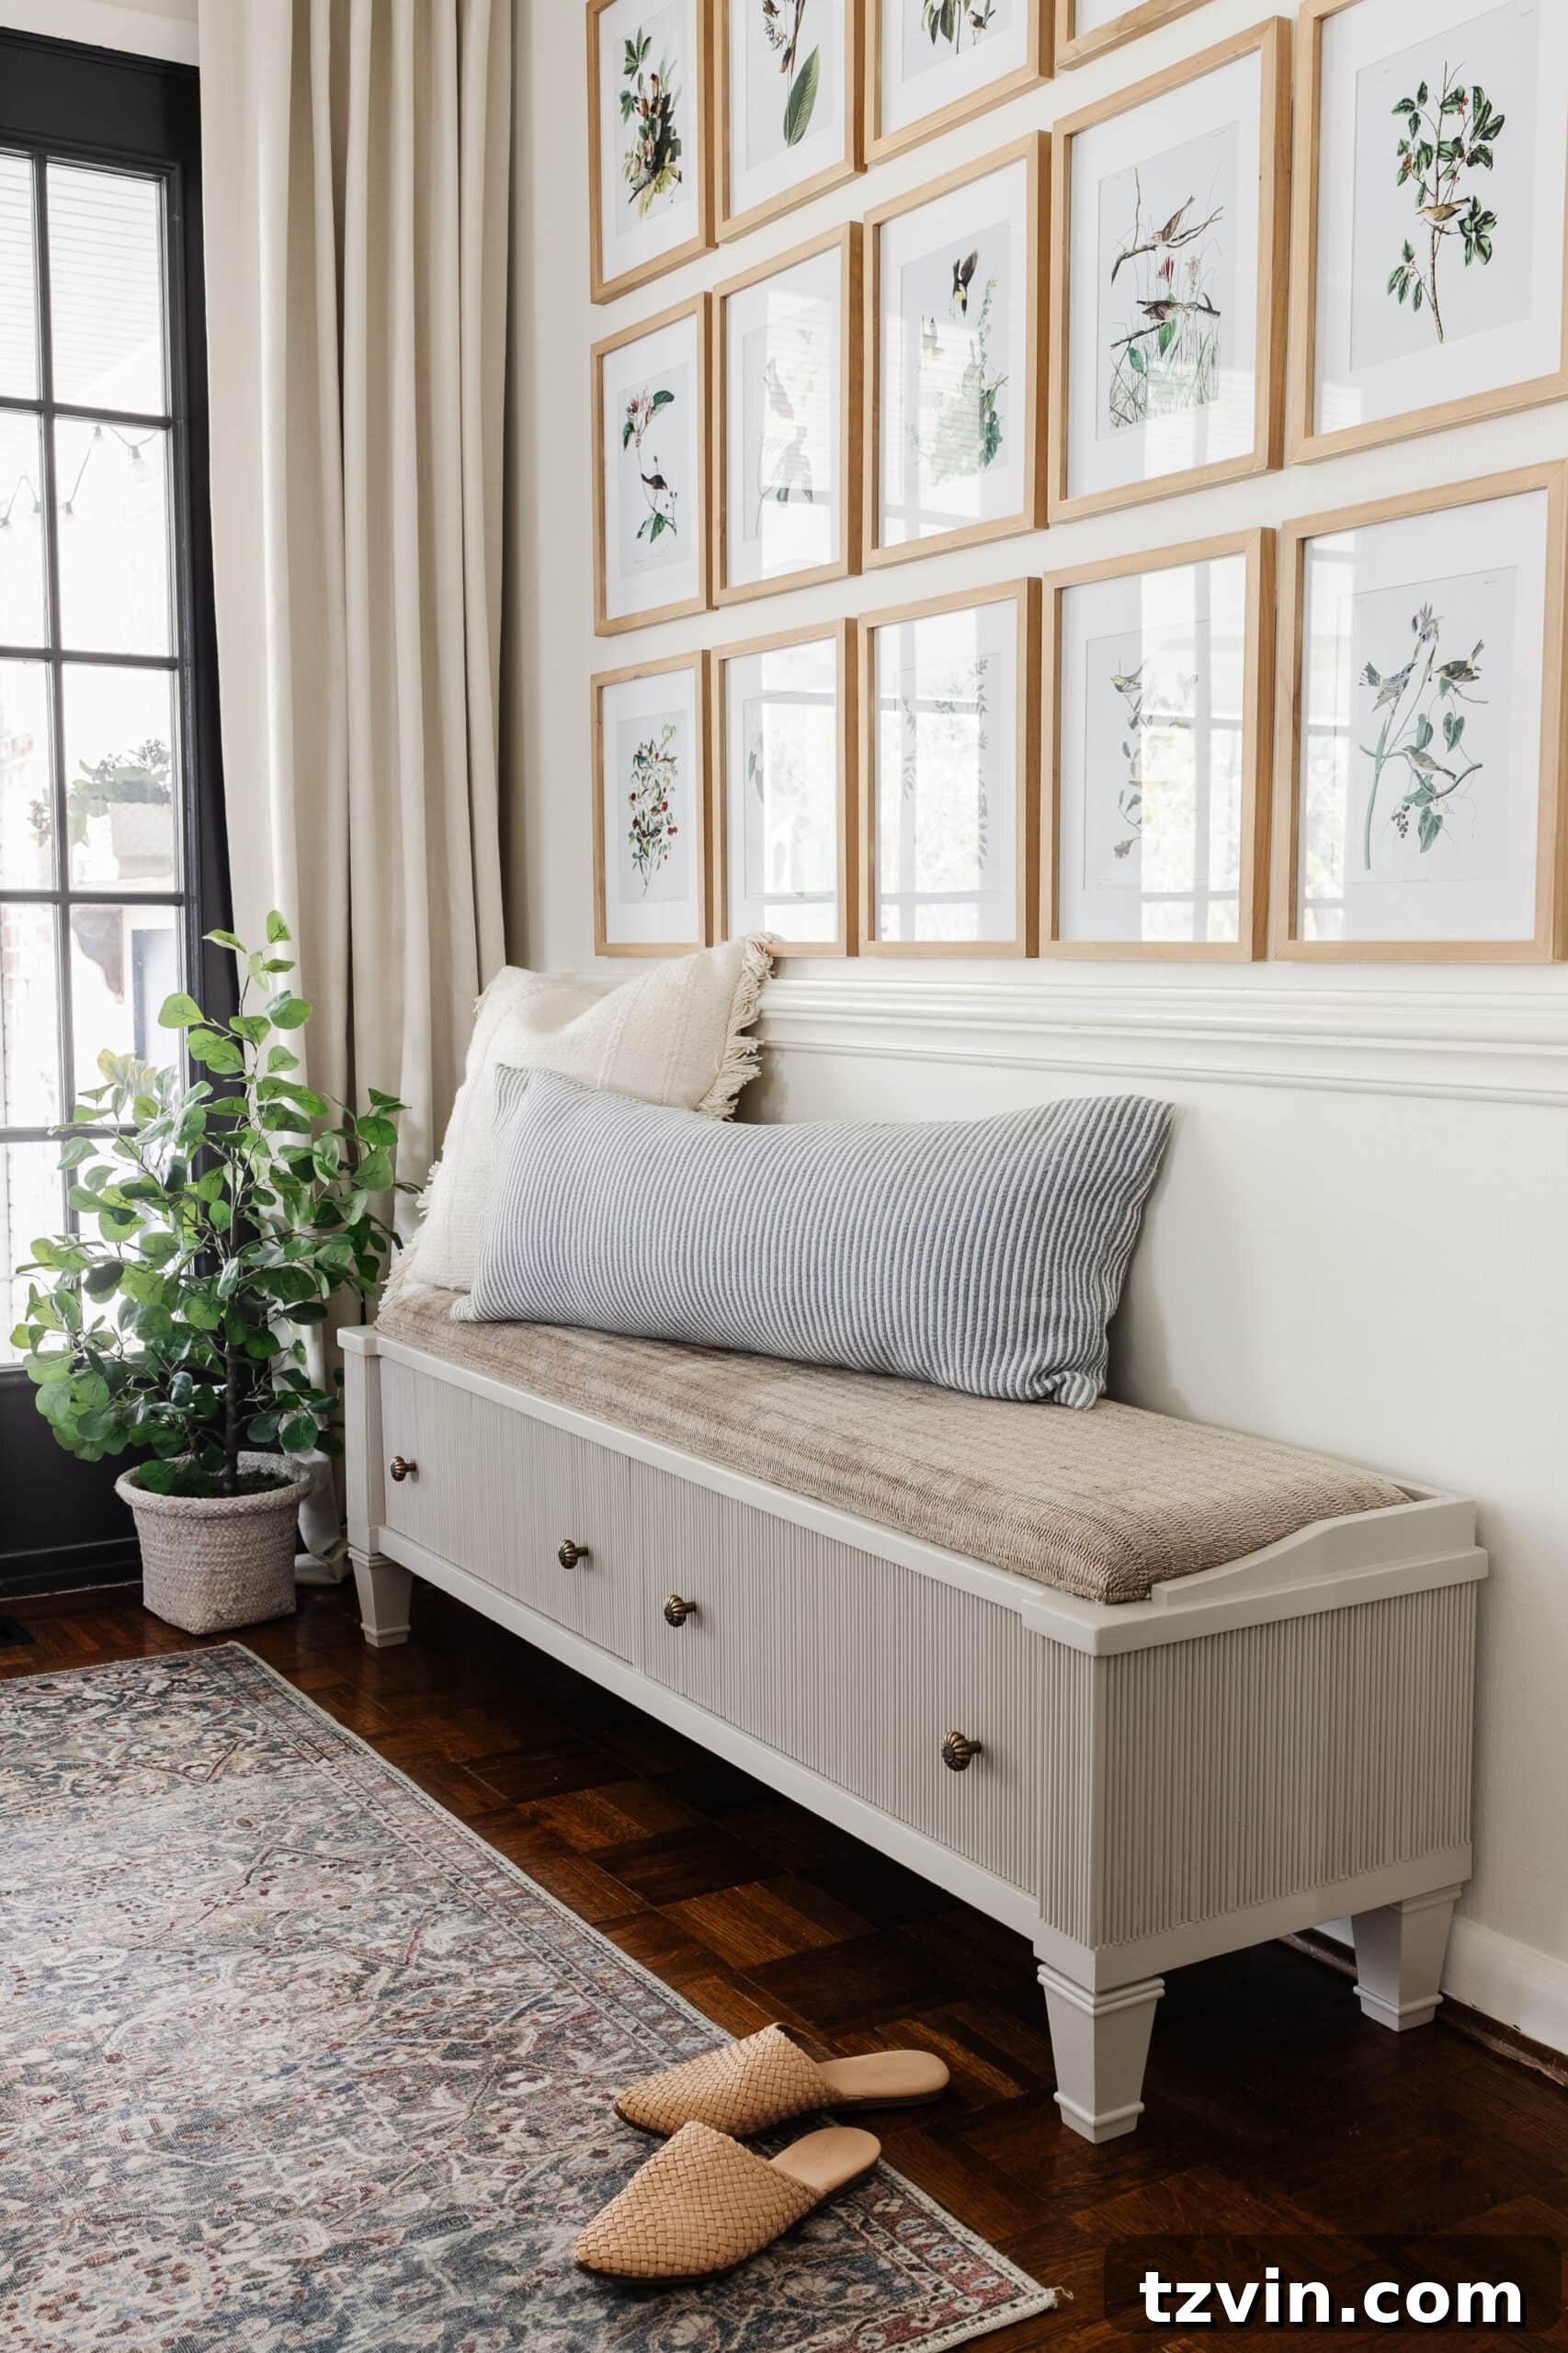
Transform Your Furniture: The Ultimate Guide to Adding Decorative Fluting or Reeding for a High-End Look
Are you looking to add a touch of sophistication and unique texture to a plain furniture piece without breaking the bank? Discover how to incorporate beautiful decorative fluting or reeding, transforming ordinary surfaces into eye-catching focal points. In this comprehensive guide, we’ll walk you through a complete entryway shoe storage bench makeover, demonstrating how a low-budget DIY project can yield stunning, high-end results.
Every home presents its own set of design challenges and opportunities. For us, the absence of a dedicated mudroom meant getting creative with our entryway space. What we *did* have was an empty wall beside our back door, a blank canvas ripe for a practical yet stylish solution. This spot, though not a formal mudroom, was destined to become our functional entryway hub for shoes and everyday essentials.
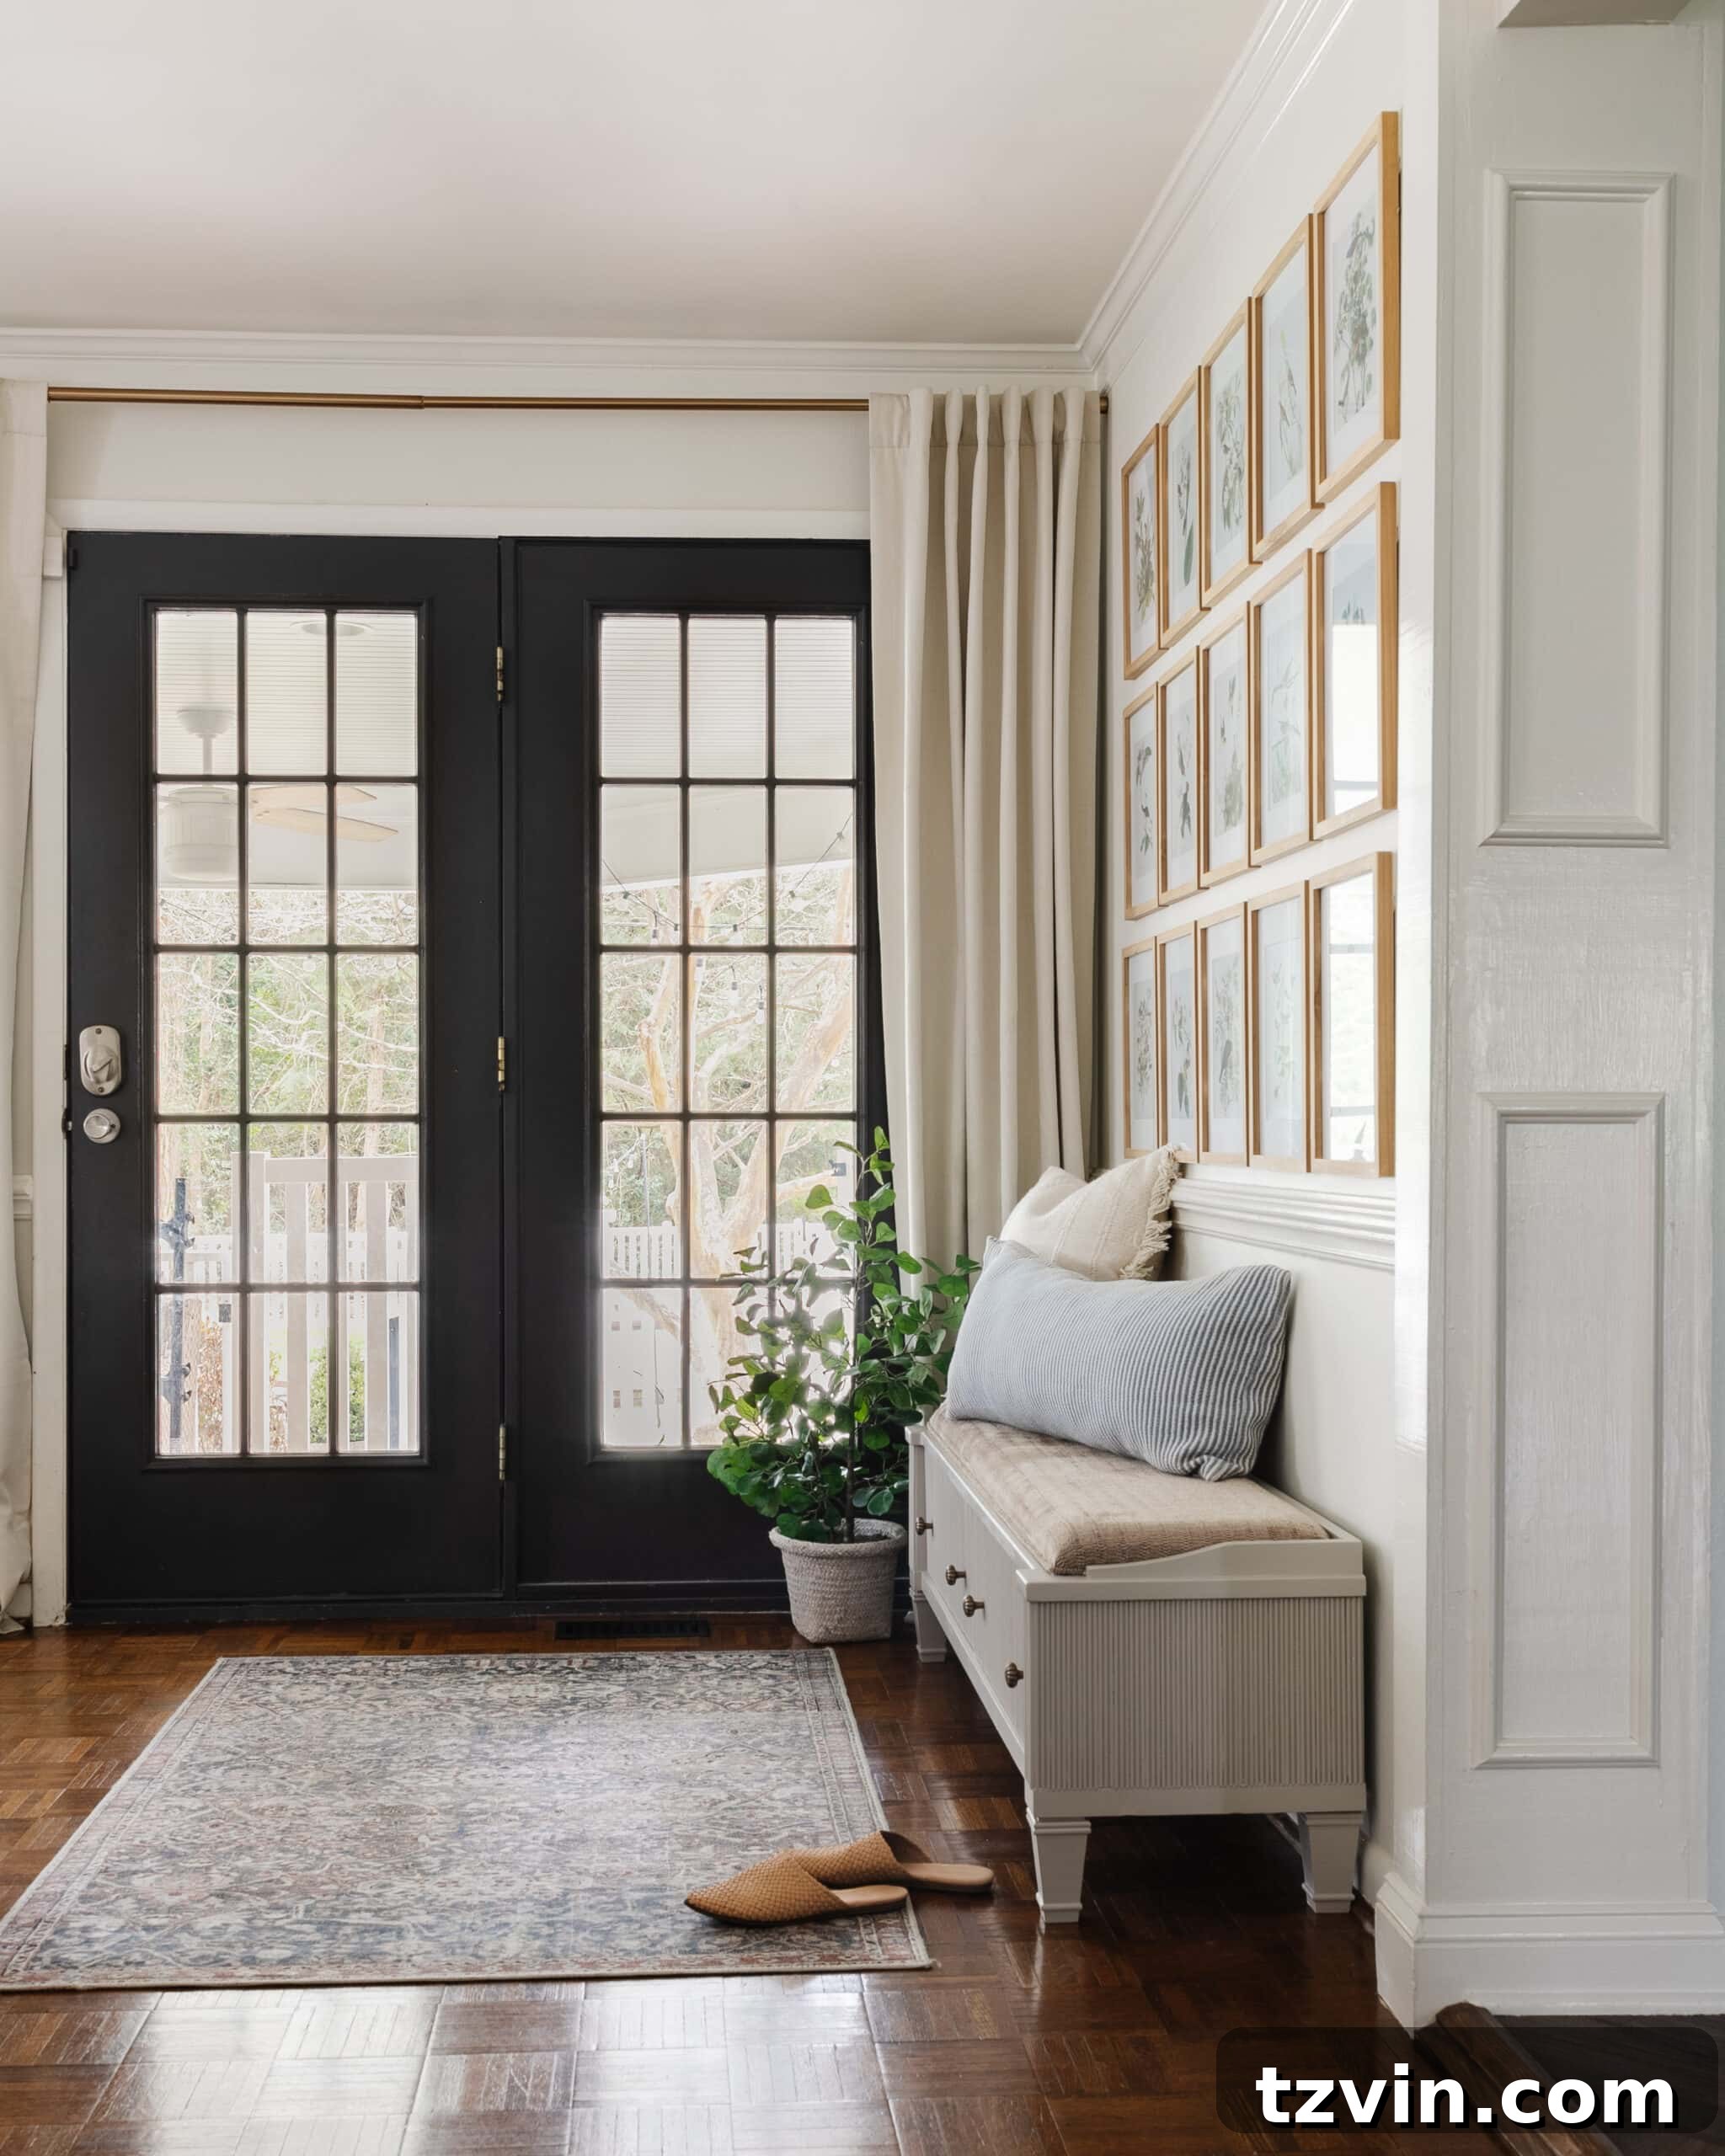
Reeded Shoe Storage Bench: From Drab to Fab Transformation
The silver lining to our entryway dilemma was the perfect excuse for a fun and rewarding furniture makeover project. If you’re a seasoned DIY enthusiast, you know that a design challenge isn’t a setback; it’s an exciting opportunity waiting to happen! And for us, this was precisely the kind of good stuff that gets our creative juices flowing.
Our entryway wall desperately needed a shoe storage solution. With kids constantly coming and going, shoes seemed to multiply and scatter themselves across the house the moment they stepped through the door. The clutter was real, and a stylish, organized spot for footwear was a top priority.
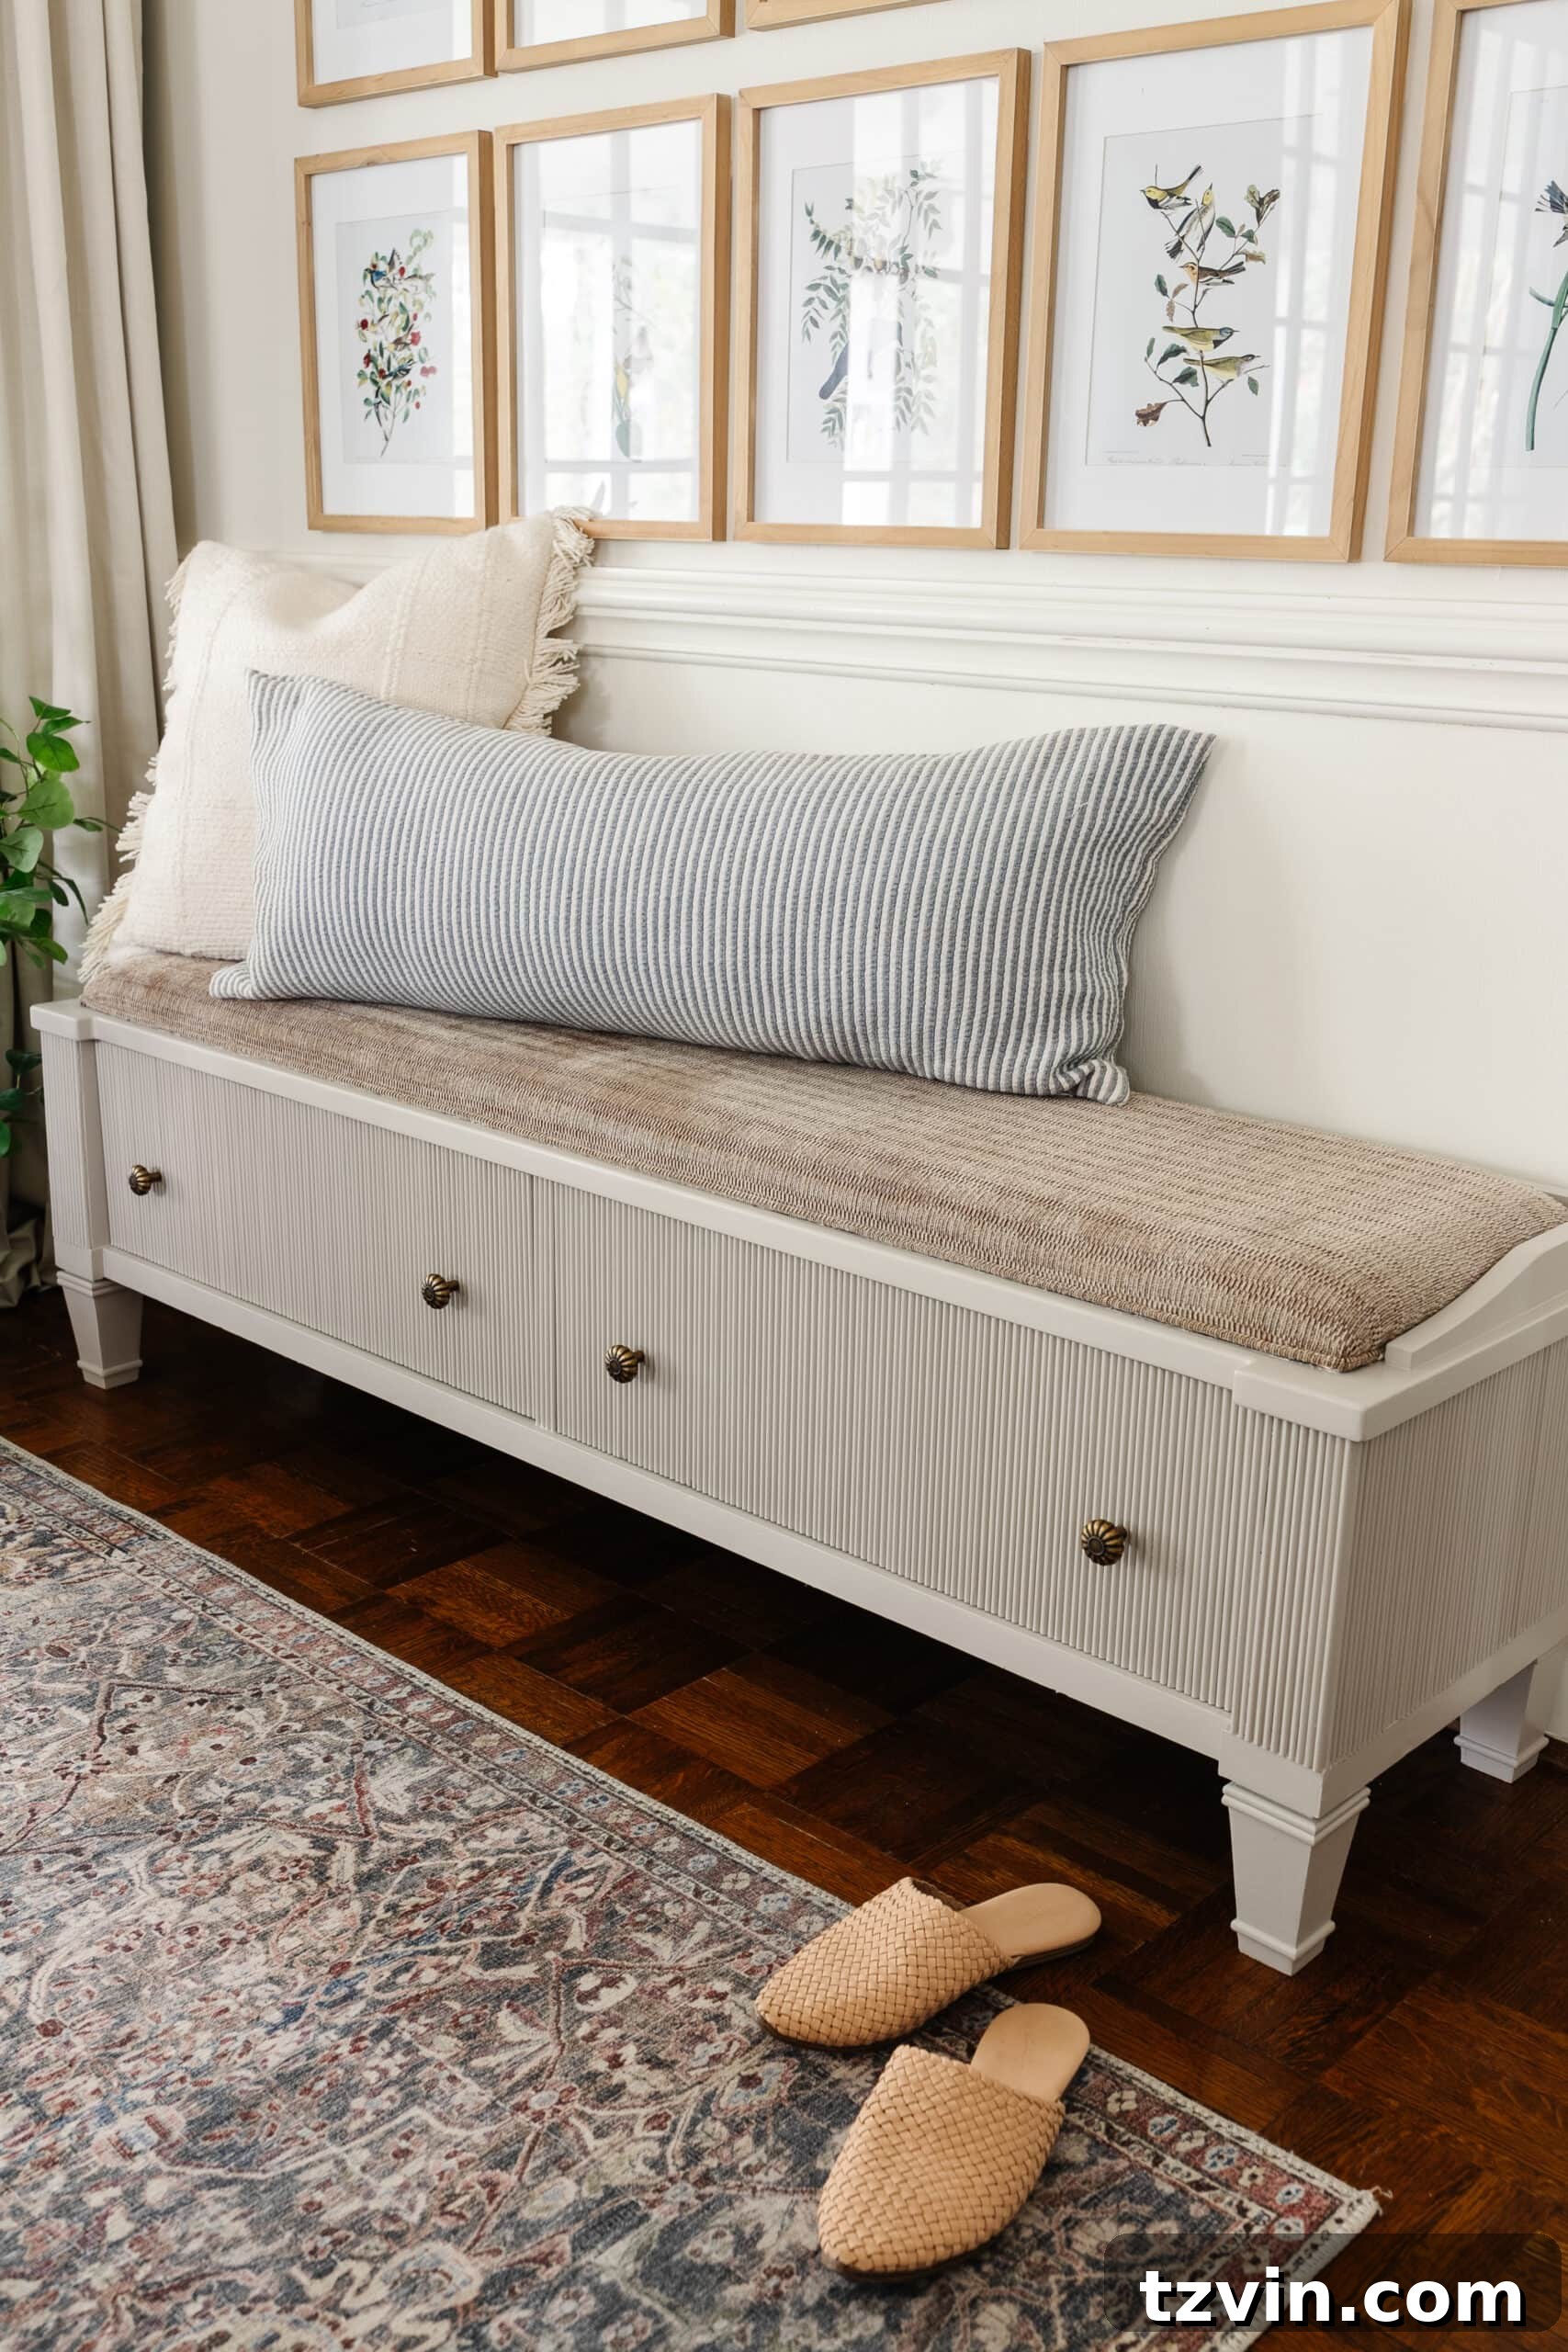
We embarked on a quest for the ideal base piece and struck gold on Facebook Marketplace. With a budget-friendly find in hand, we set out to add the exquisite detail of reeding, instantly elevating its character. The final result? A custom-look bench that strikingly resembles high-end pieces, like a $2,600 console table, but at a fraction of the cost. This project is a testament to how creative vision and a little elbow grease can lead to designer-level aesthetics.
Whether you have a tired dresser, a bland console table, an outdated nightstand, or a simple bench gathering dust, this DIY project offers an exciting path to revitalization. Adding reeding or fluting is a fantastic way to infuse a piece with architectural interest and a custom feel, making it truly unique to your home.
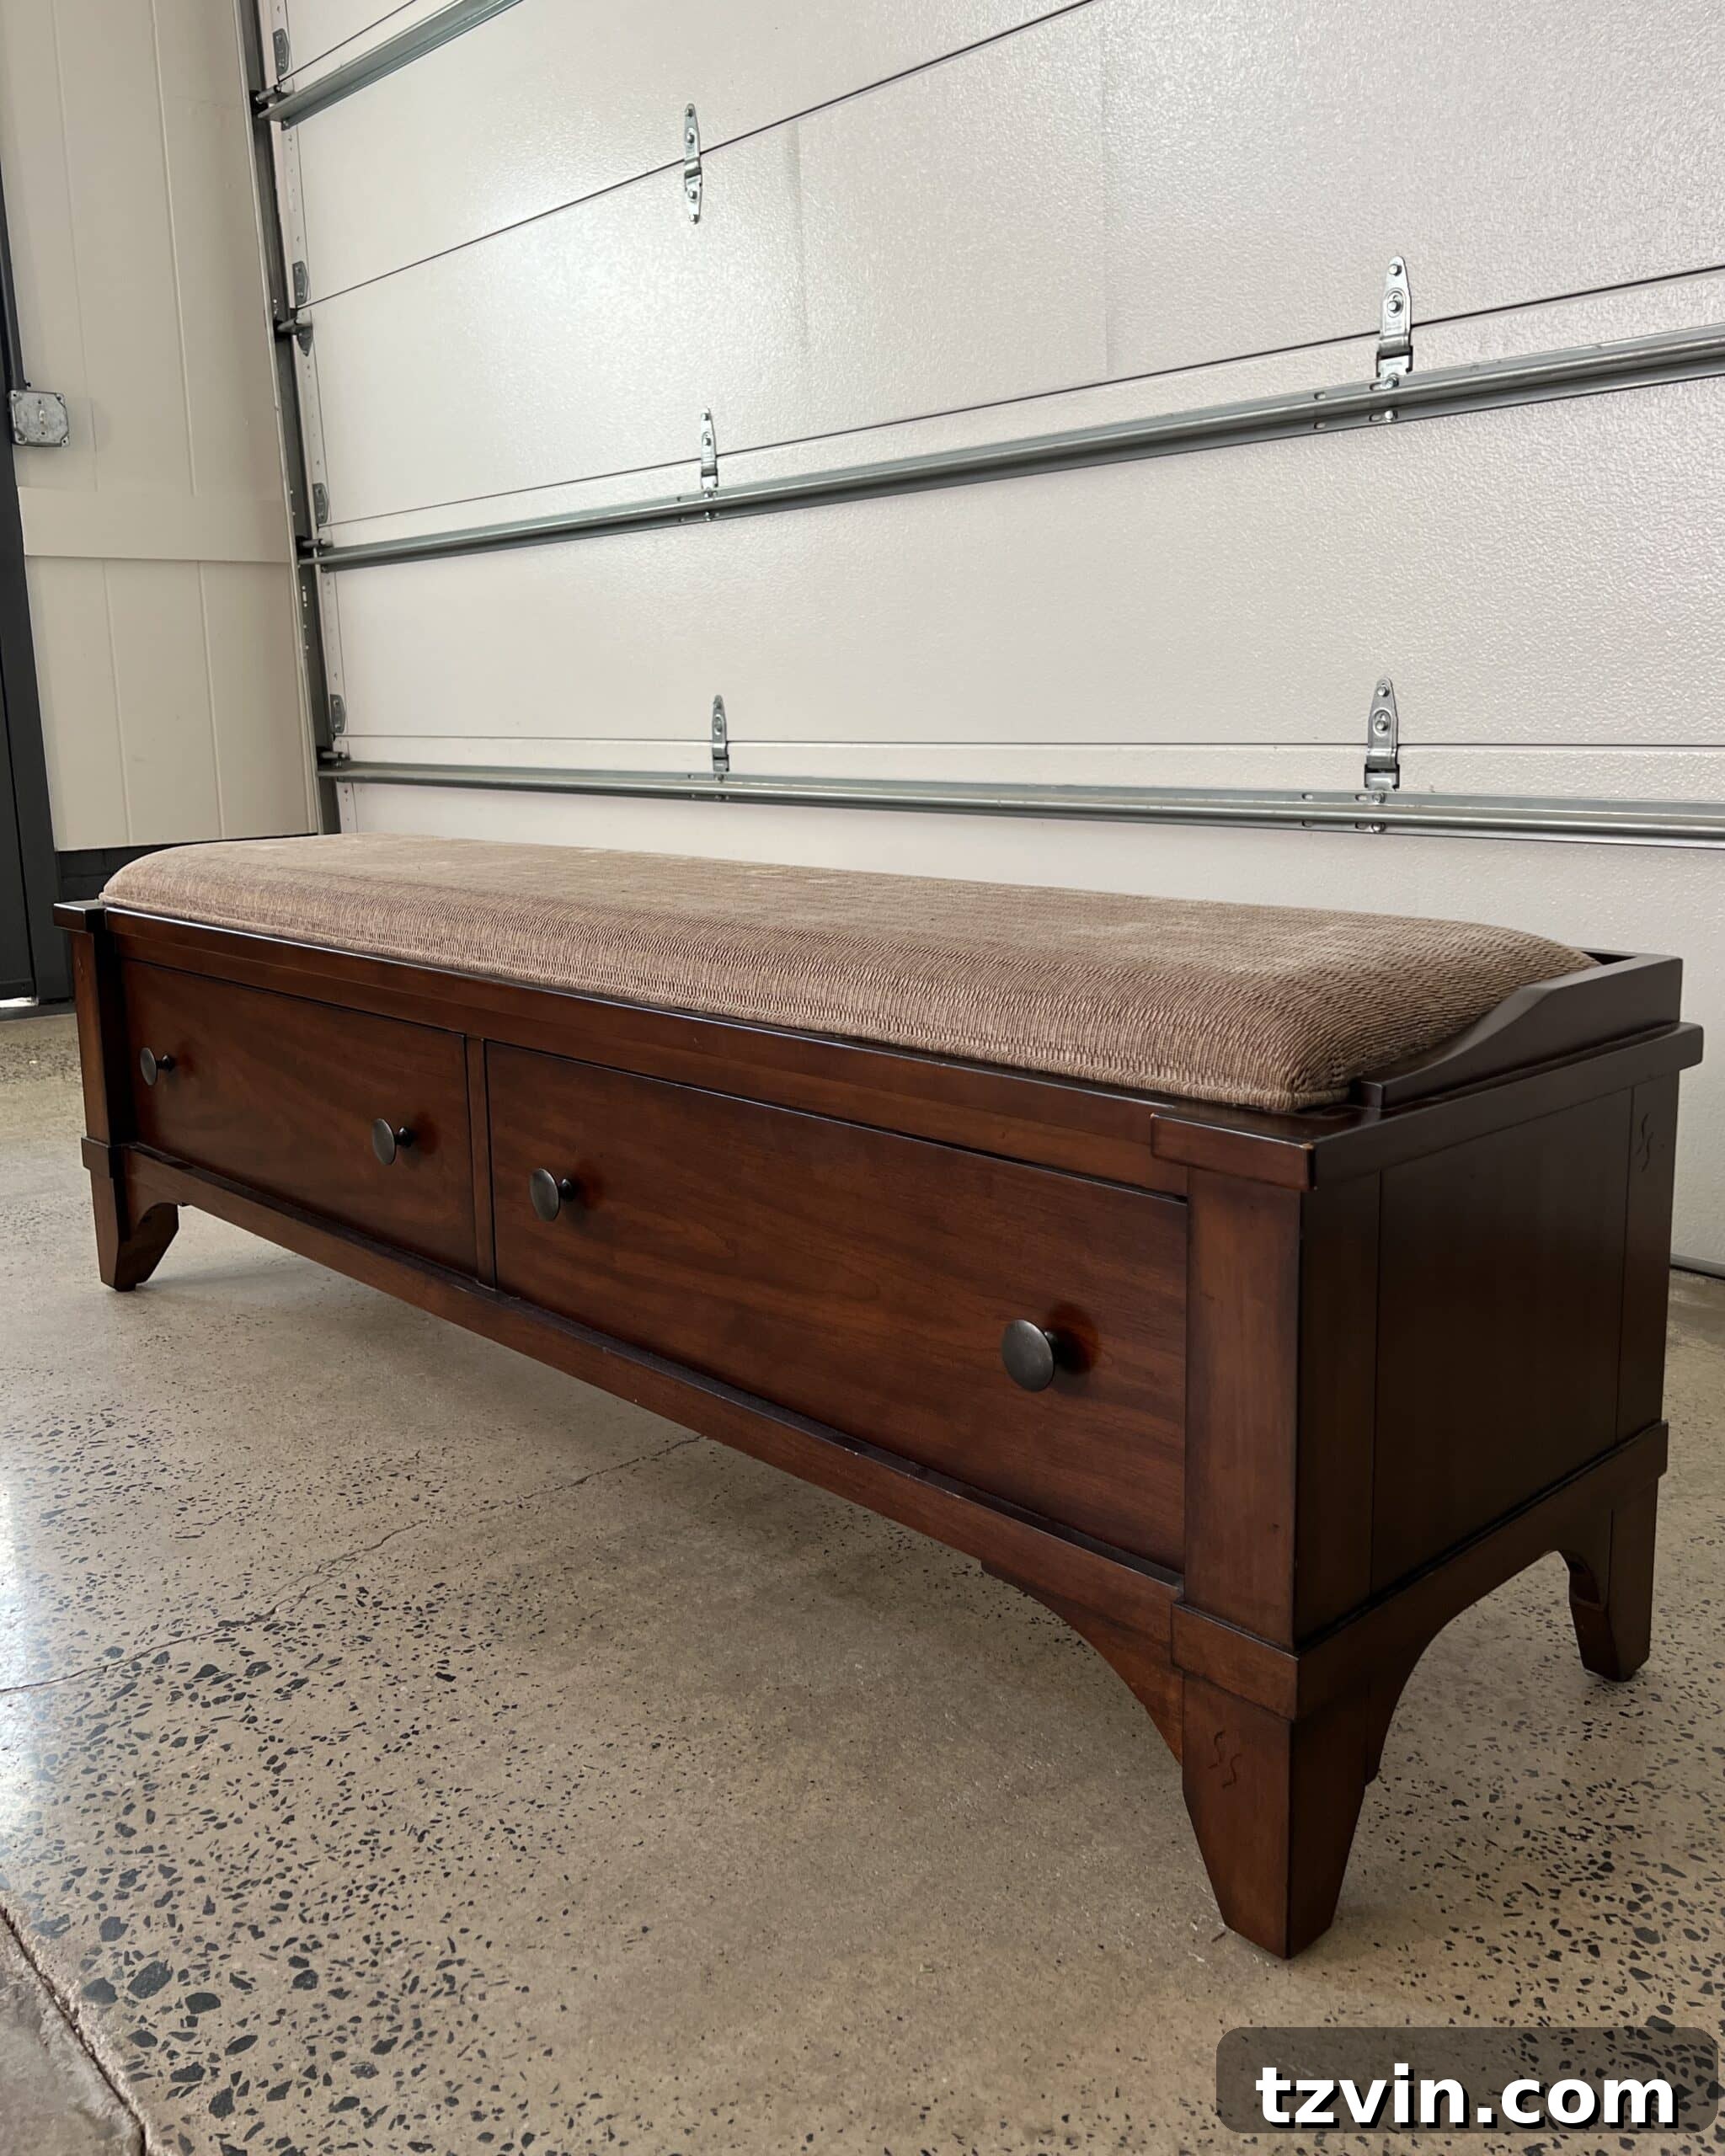
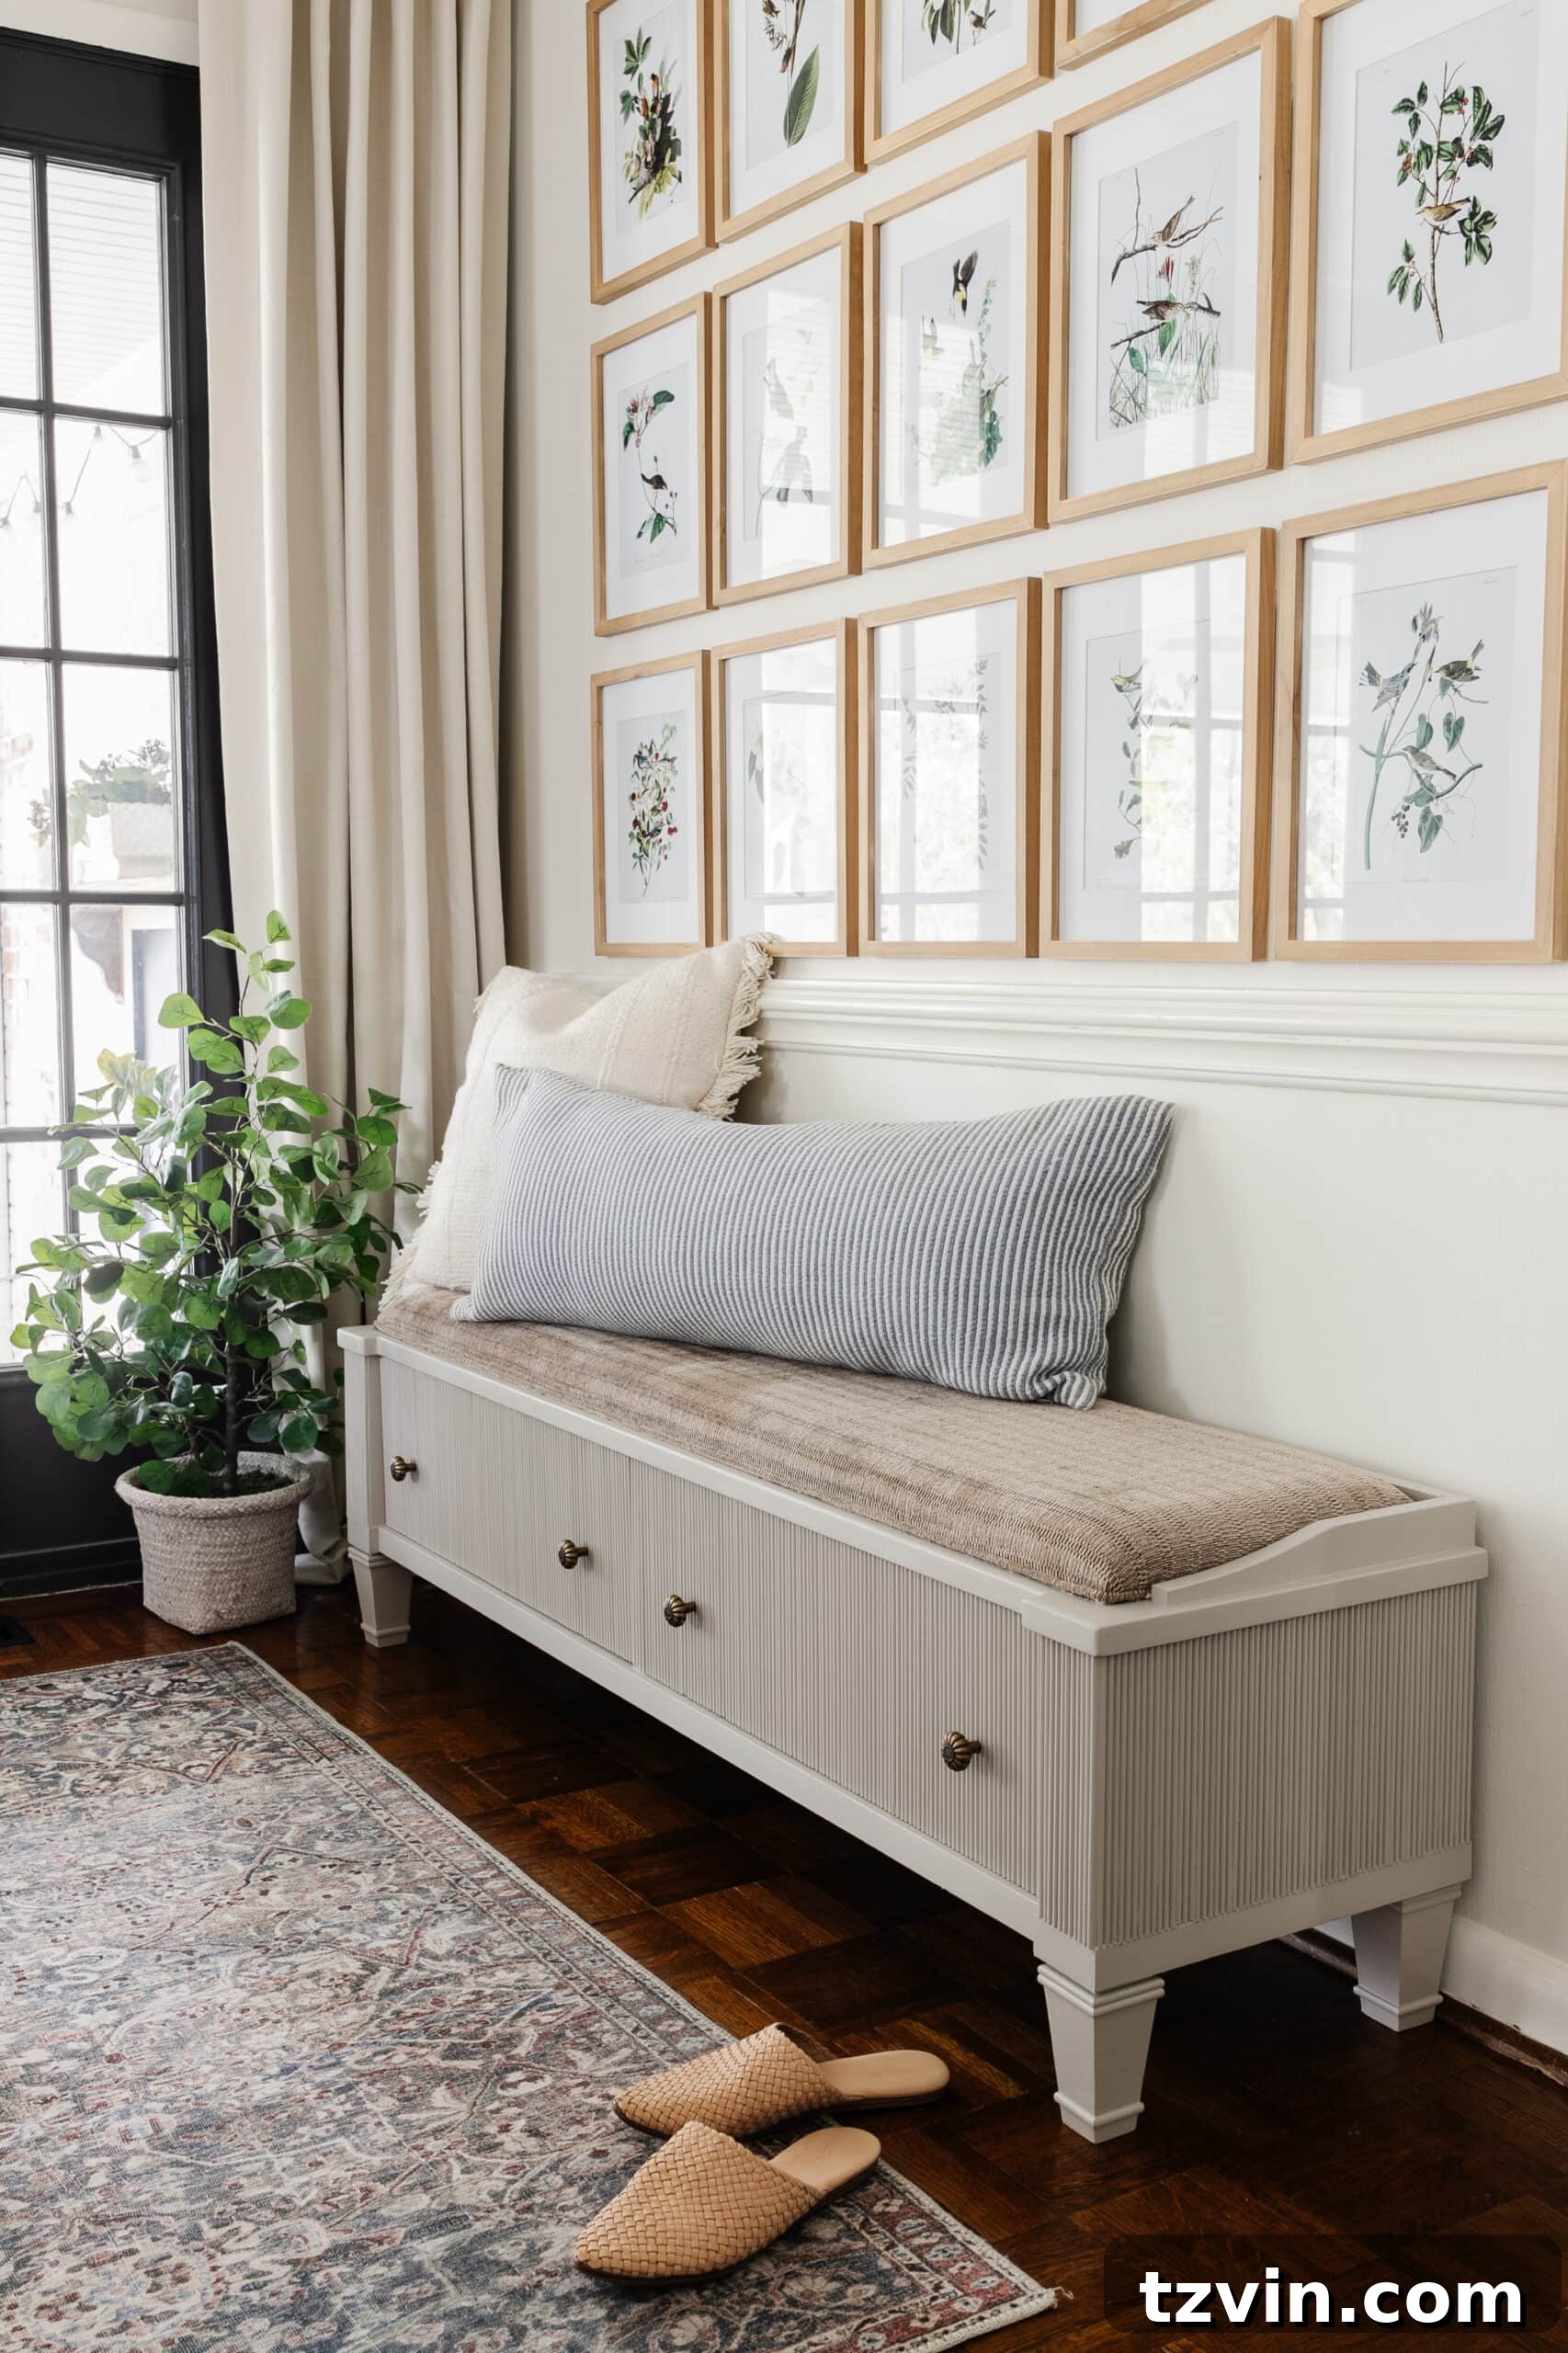
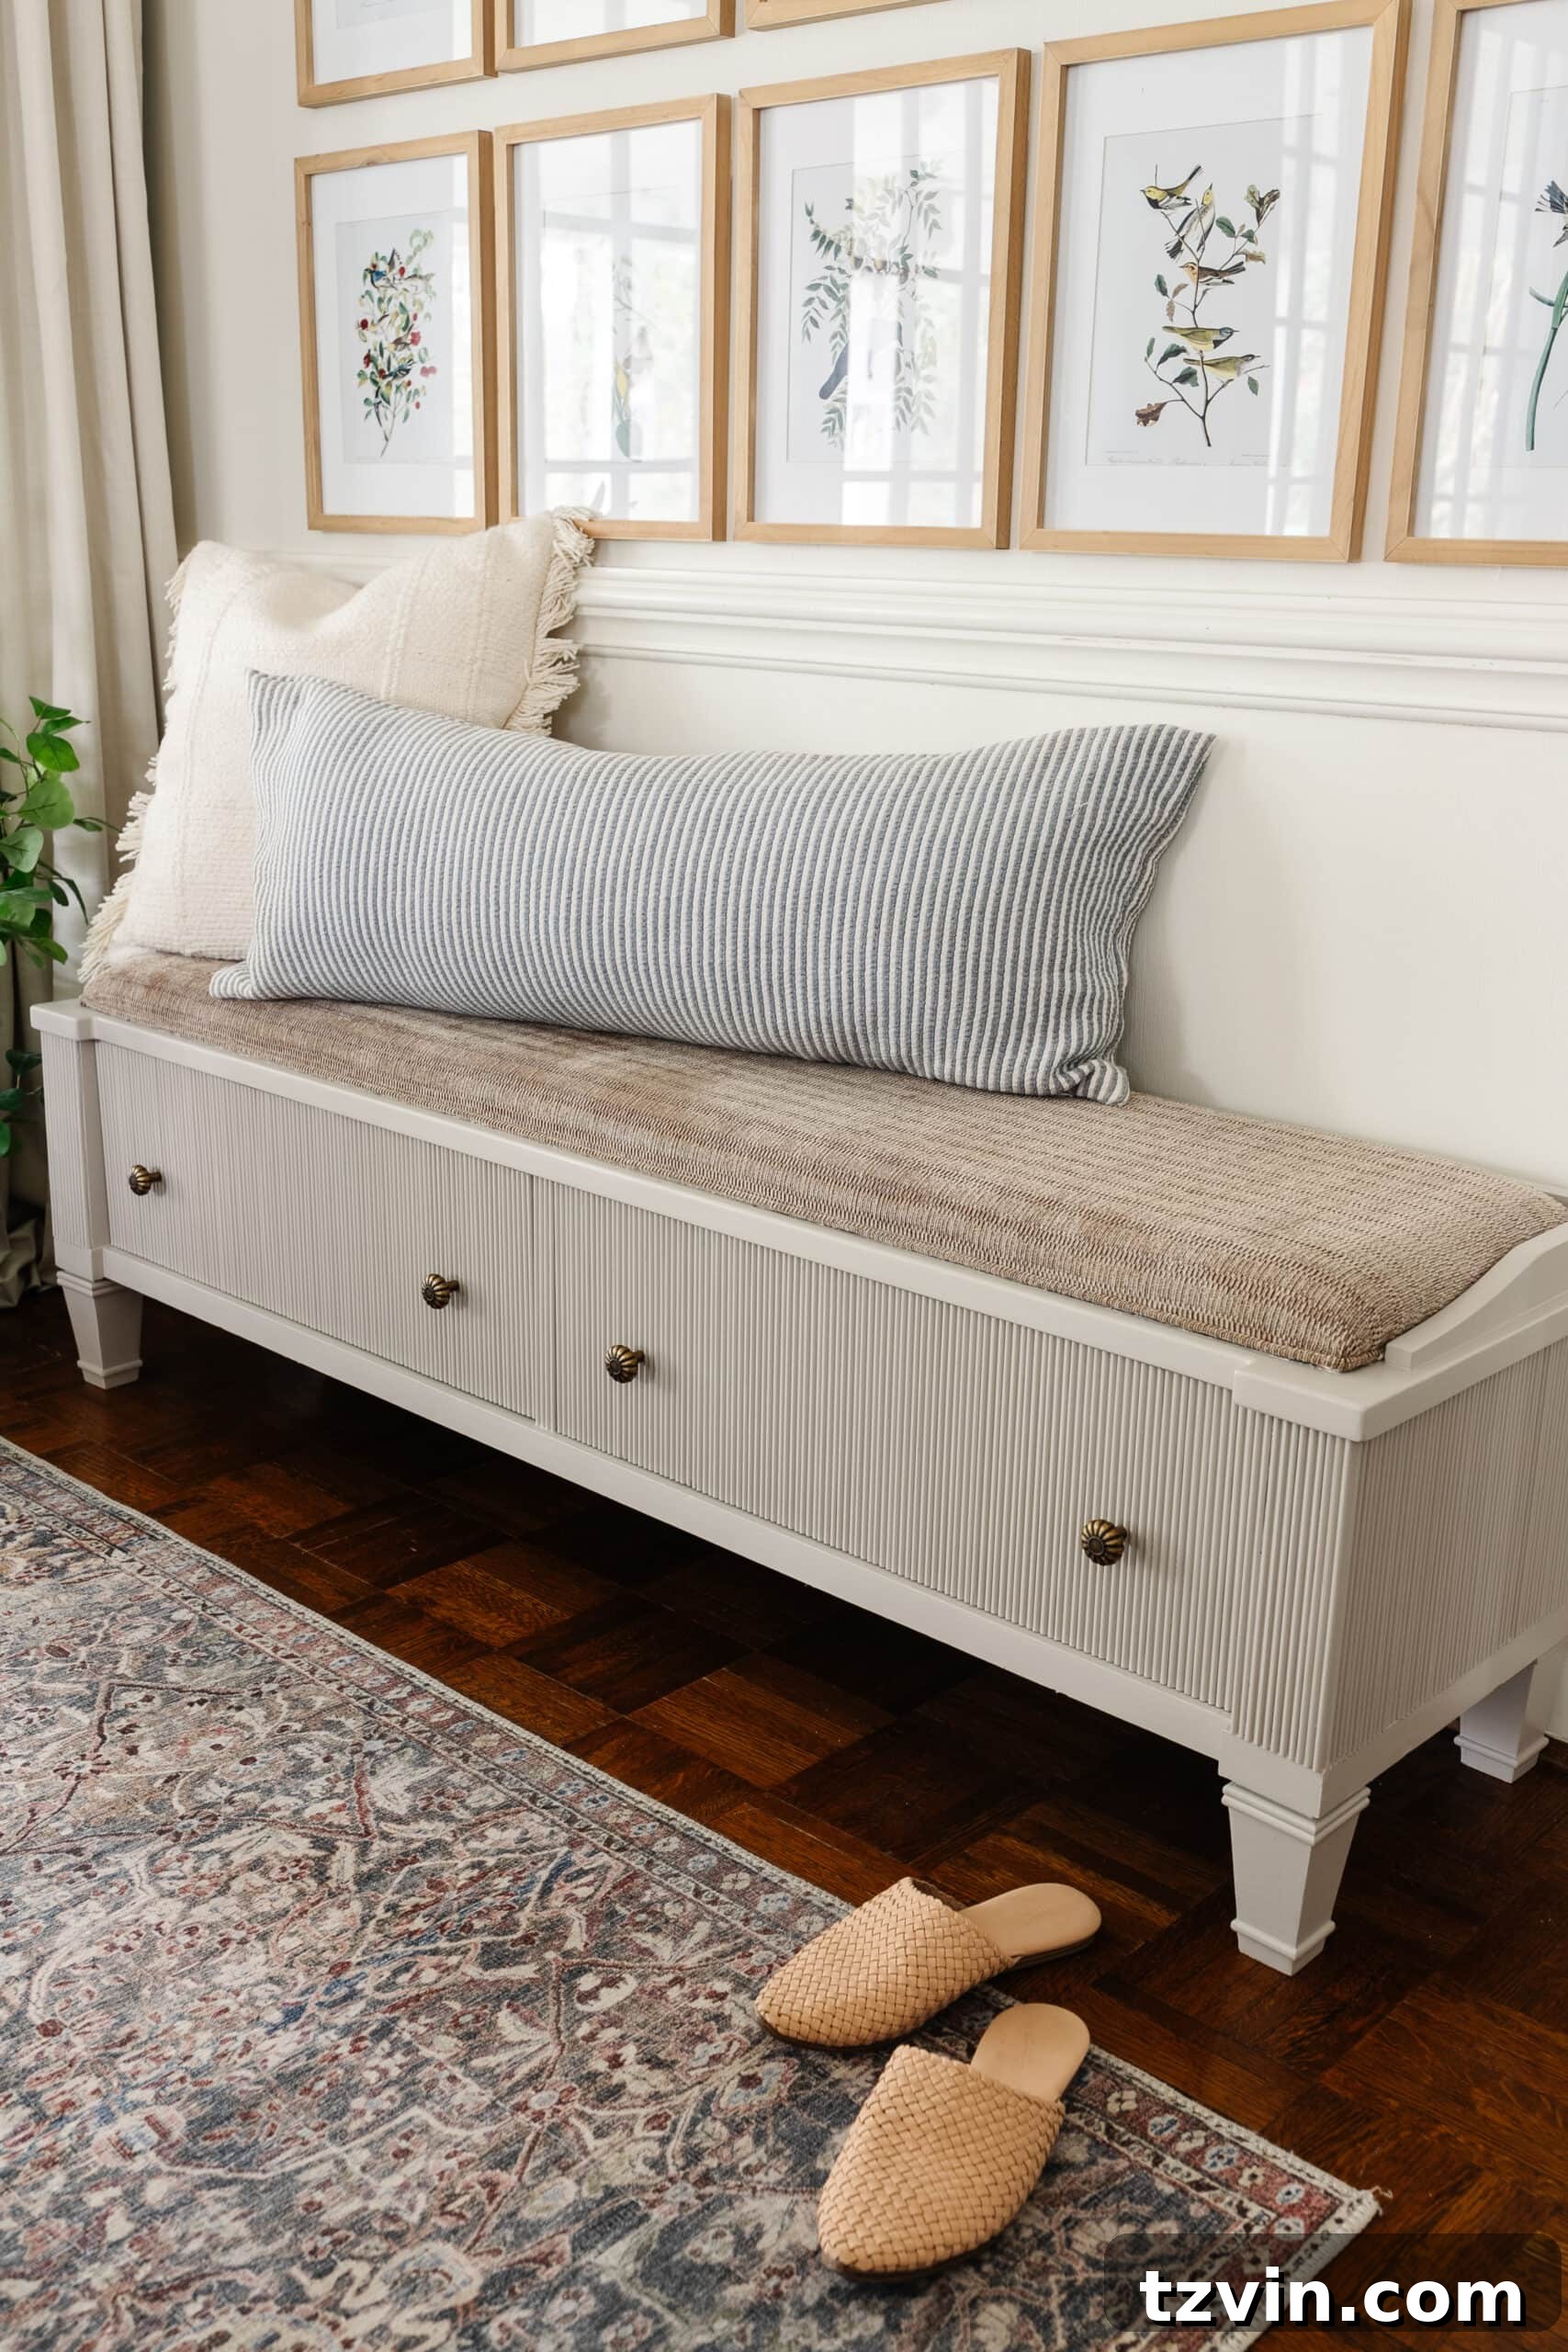
The transformation was remarkable: new pyramid-shaped feet, meticulously applied reeded molding, and a fresh coat of warm taupe paint completely reinvented this humble storage bench. While the idea of reupholstering or painting the fabric cushion still crosses my mind for a future update, the current changes alone have made an incredible impact.
Adding decorative reeding to furniture is a design trend that has surged in popularity across DIY blogs and home decor channels. While various methods and materials are employed, our approach utilizes readily available supplies to achieve a sophisticated, custom look. This technique allows for stunning textural depth, turning flat surfaces into dynamic design elements.
Understanding Reeding and Fluting: Adding Elegant Texture to Furniture
Before diving into the tutorial, let’s clarify the terms. What exactly is reeding, and how does it differ from fluting? Both are types of decorative molding that add architectural interest and texture to furniture and architectural elements, but their profiles are distinct.
Reeding refers to a type of ornamental detail characterized by small, convex, semicylindrical shapes carved or applied to a surface. Imagine a series of tiny, raised half-cylinders running parallel to each other. This creates a visually appealing textured effect that catches the light beautifully, adding depth and sophistication.
Fluting, on the other hand, is the opposite. It features similar semicylindrical shapes, but these are concave, meaning they are grooved or channeled into the surface. Think of the classic columns of ancient Greek and Roman architecture—those vertical grooves are fluting. Both reeding and fluting offer a refined, classic aesthetic that can elevate any piece of furniture, making it feel more substantial and luxurious.
The tutorial we’re sharing today focuses on using reeded molding. However, the exact same steps and principles can be applied to create a fluted look on your furniture. Simply substitute the reeded molding with fluted molding, and you’ll achieve a similar, equally elegant textured effect.
Step-by-Step Reeded Storage Bench Makeover Tutorial
Ready to give your furniture a stunning makeover? Here’s everything you’ll need and the steps to follow for adding decorative reeding and replacing furniture legs.
Essential Supplies & Tools for Your Furniture Transformation
Gathering all your materials beforehand will ensure a smooth and efficient DIY process. Here’s a detailed list of what you’ll need:
- Miter Saw: Essential for making precise, straight cuts on your molding strips. Accuracy here ensures a seamless finish.
- Drill: Needed for removing old screws and attaching new furniture legs and hardware.
- Drill Bits: A variety of sizes to match your screws for furniture legs and new hardware.
- Electric Sander (with medium grit sanding pads): Crucial for smoothing surfaces, especially after cutting or to ensure even edges on your molding.
- Fine Tooth Hand Saw: Ideal for more delicate or precise cuts, especially when removing existing furniture legs.
- Speed Square: A handy tool for marking accurate perpendicular lines, ensuring your cuts and placements are perfectly square.
- Construction Adhesive: Your primary means of securely attaching the reeded molding to the furniture. Look for a strong, fast-drying formula.
- Painter’s Tape: Useful for temporarily holding molding strips together for cutting and securing them while the adhesive dries.
- Shellac-Based Primer: Absolutely essential if your furniture has a red-based wood stain (like cherry or mahogany) to prevent bleed-through.
- Acrylic Urethane Enamel Paint: Choose a durable paint for high-traffic areas. We used Sherwin Williams Door & Trim satin paint in Anew Gray for its excellent hardness and resistance.
- Paint Brushes: A standard brush for larger surfaces, and a specialized triangular brush or small artist’s brush for getting into the fine grooves and edges of the reeding.
- Reeded Molding: The star of the show! Source enough strips to cover all desired areas.
- Pull Knobs: Select new hardware that complements your updated furniture style.
Elevating Style: How to Replace Furniture Legs for a Fresh Look
One of the quickest ways to dramatically alter the look and feel of a furniture piece is by changing its legs. We began our bench transformation by replacing the original, somewhat clunky mission-style legs with sleek, pyramid-shaped ones. This simple modification can instantly update a piece from dated to modern, or from casual to elegant, as we discovered with our dining room buffet makeover a few years back.
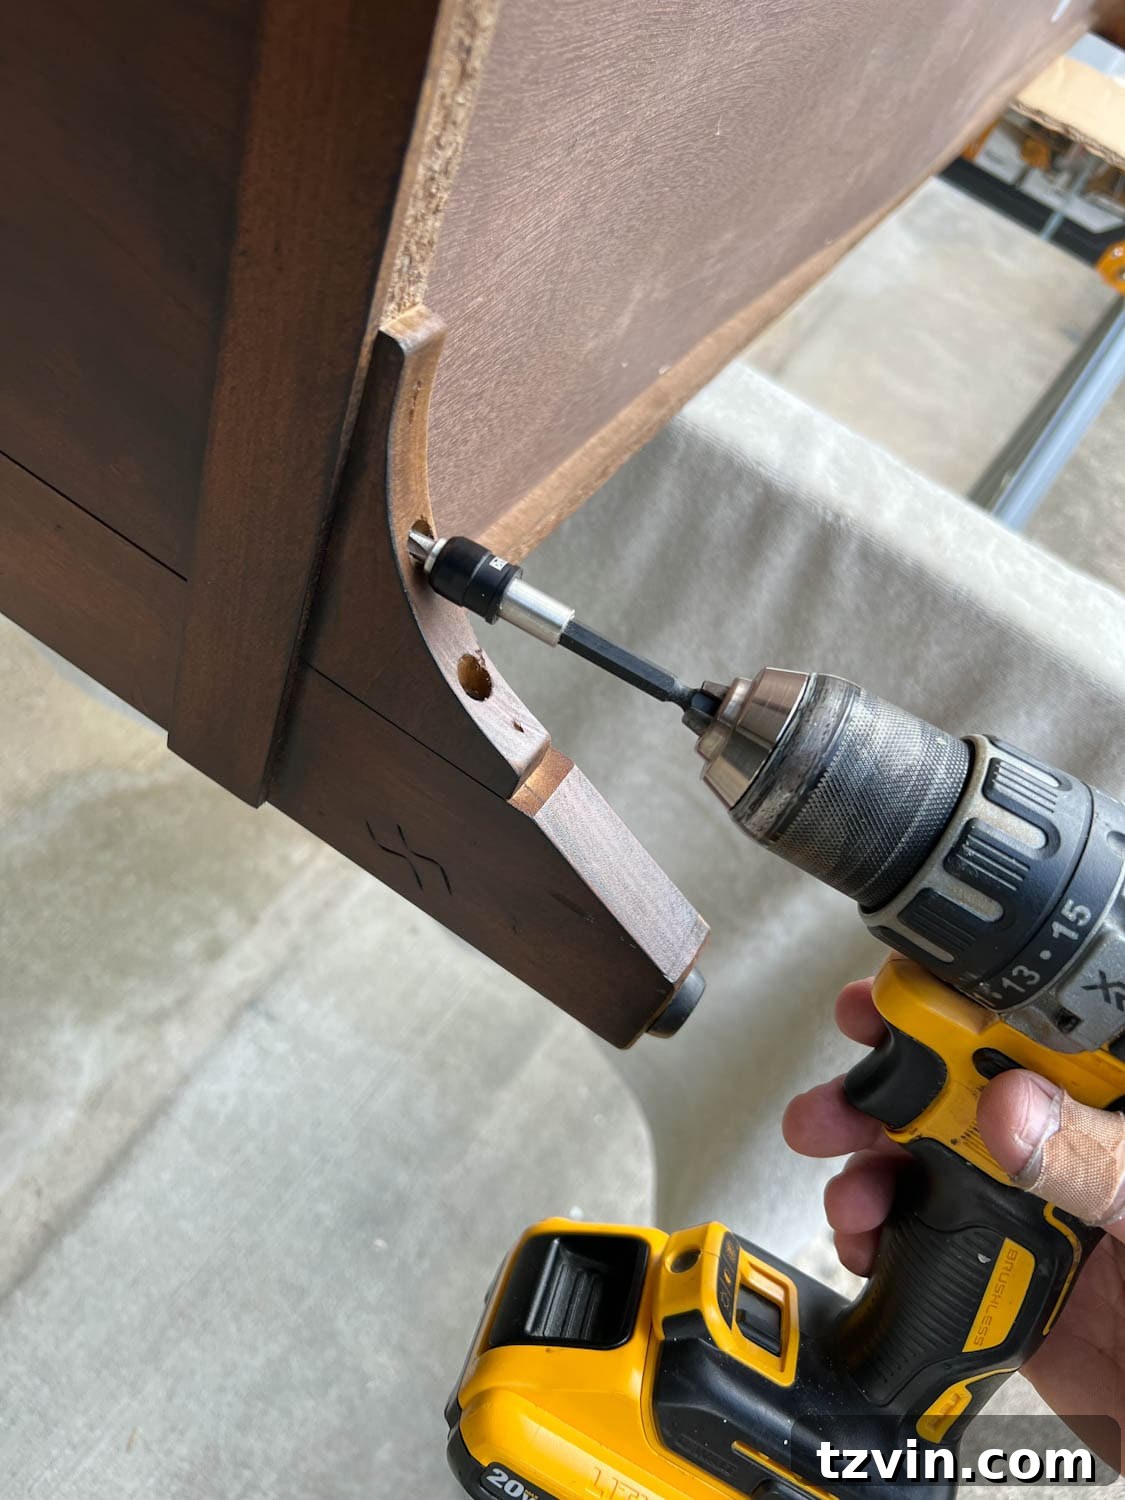
Step 1 – Carefully Remove Existing Screws
Many furniture pieces have legs securely attached with screws. Before attempting to cut or force anything, carefully inspect how your existing legs are fastened. Using your drill, systematically remove all screws holding the old legs in place. This will make the subsequent removal process much easier and cleaner.
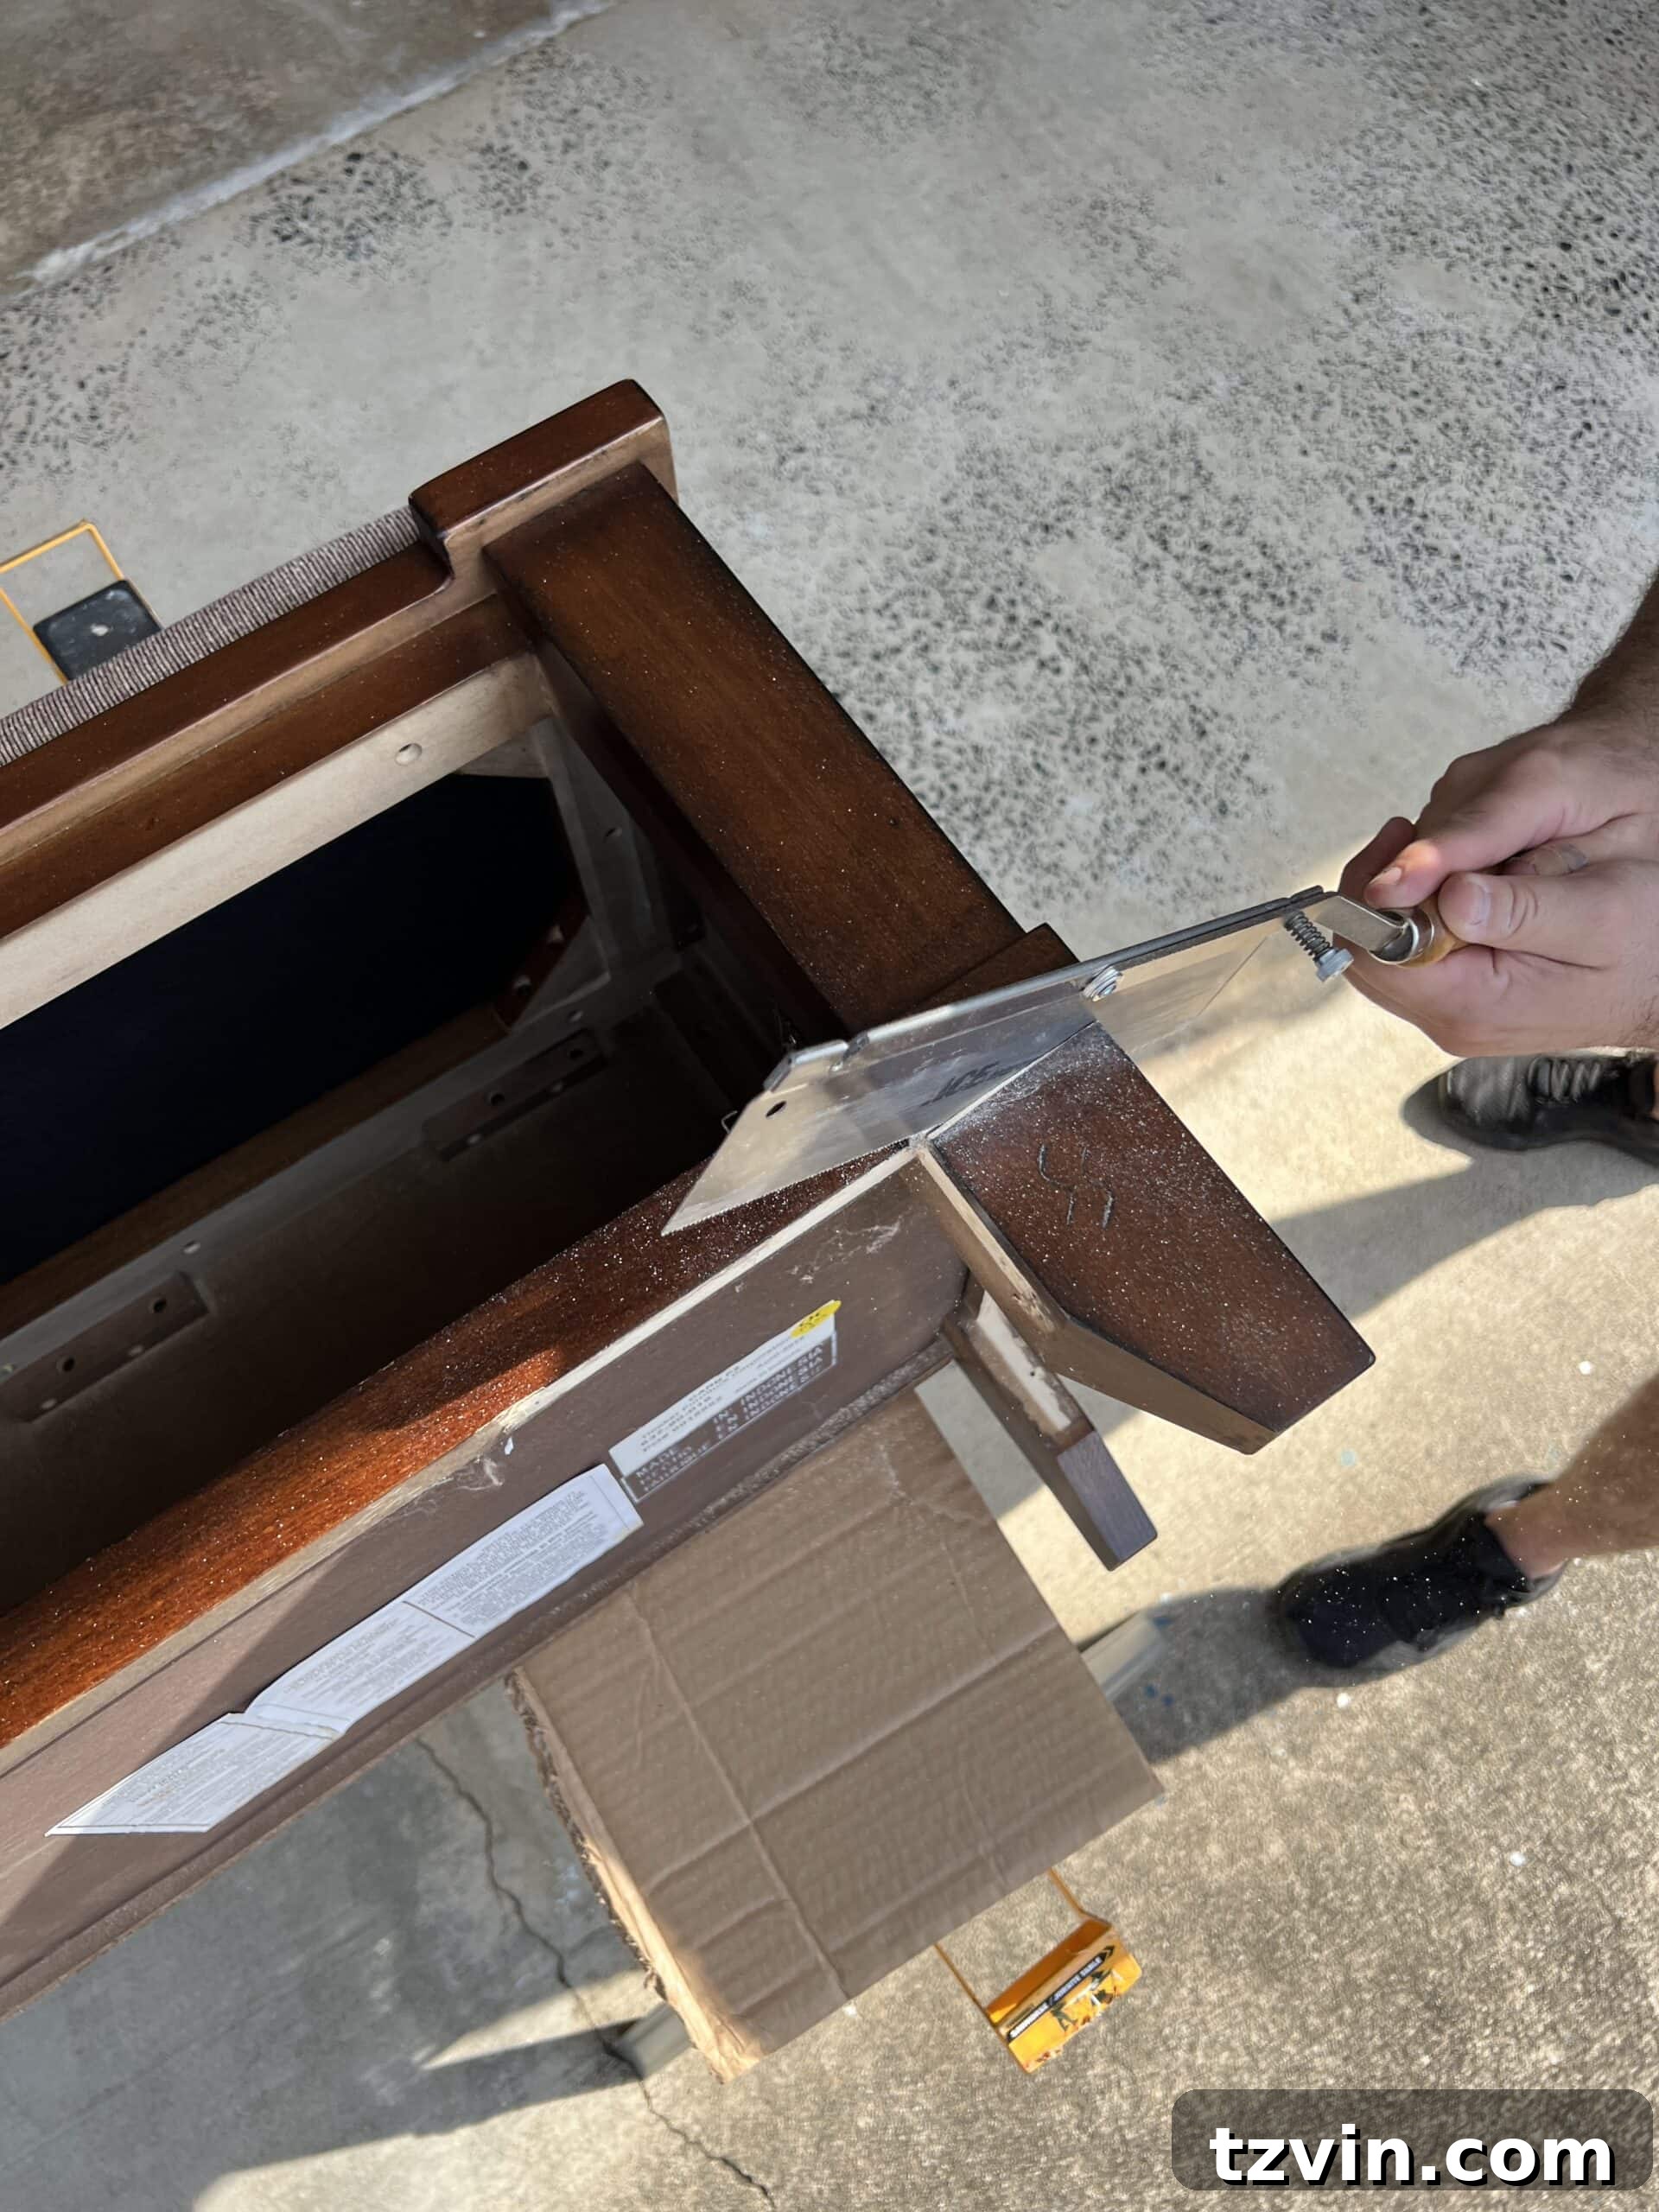
Step 2 – Precisely Cut Off Old Furniture Legs
Once the screws are removed, the next step is to carefully cut off the existing furniture legs. For this task, we opted for a fine-tooth hand saw. While a circular saw could also be used, our bench featured particularly thick and chunky legs, demanding a slow, controlled, and precise cut. A hand saw allowed us the necessary precision, minimizing the risk of errors since there’s typically no going back once a cut is made. Take your time to ensure a clean, level surface for your new legs.
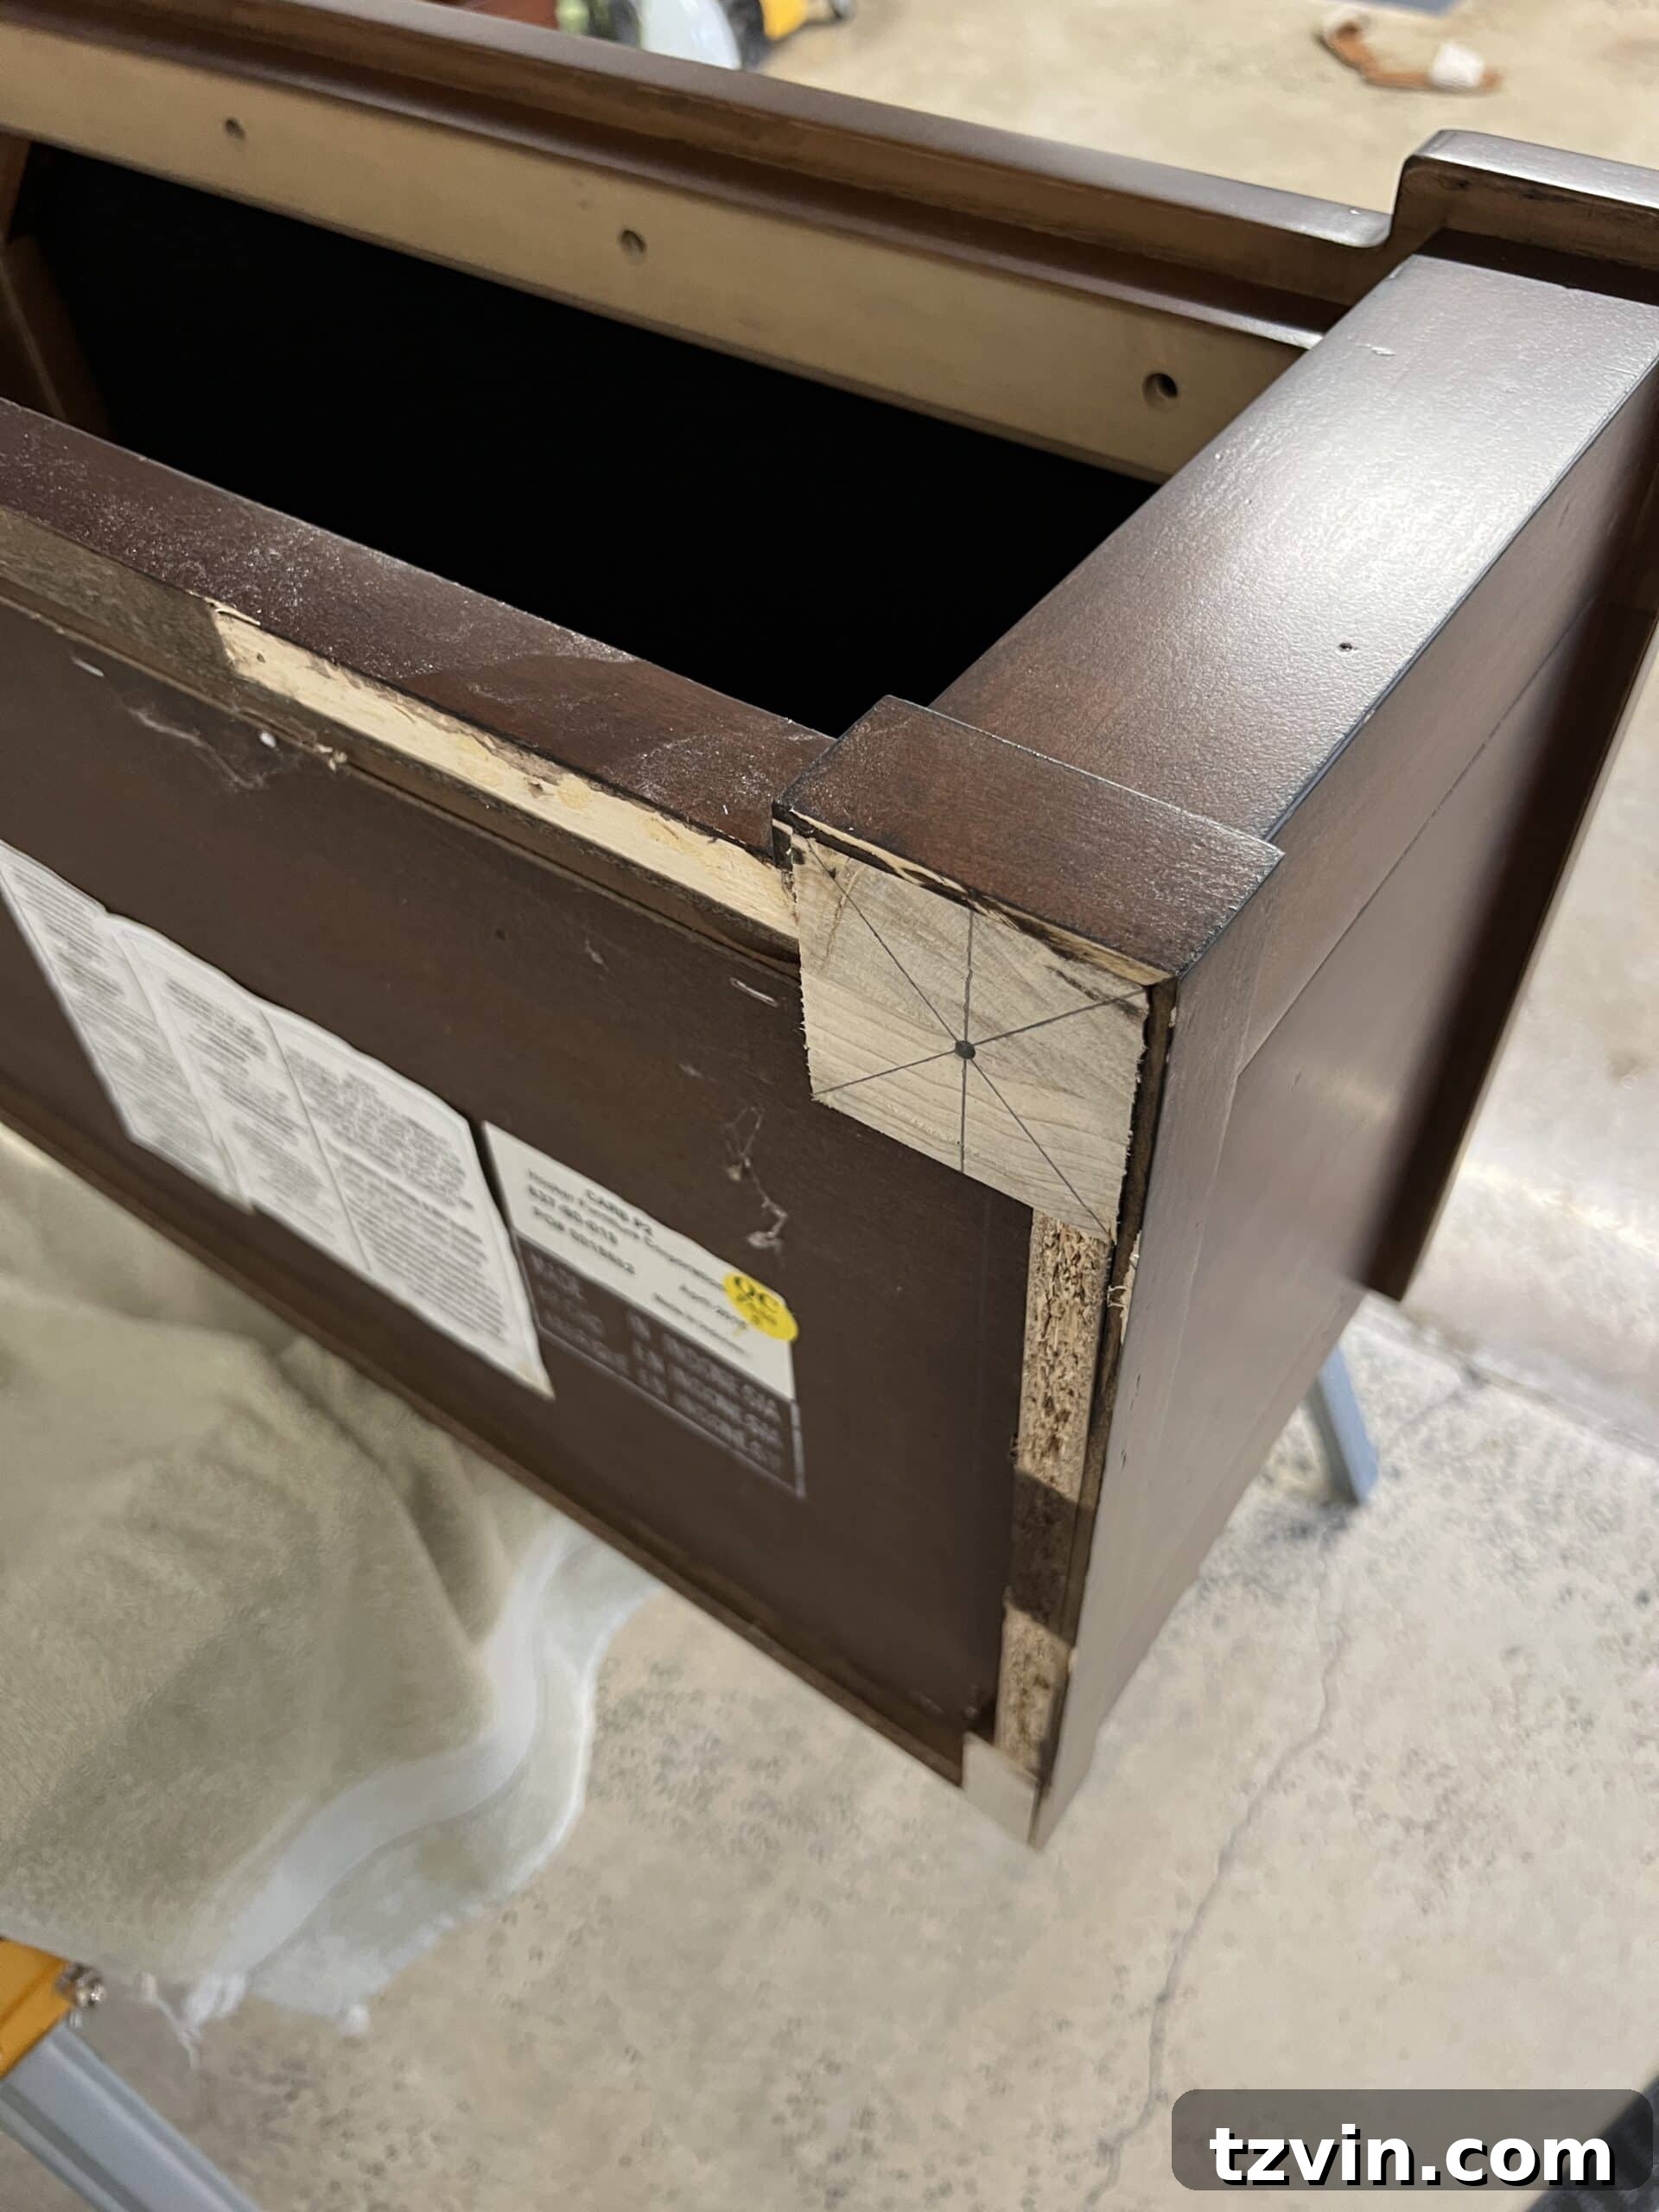
Step 3 – Mark Exact Placements for Your New Legs
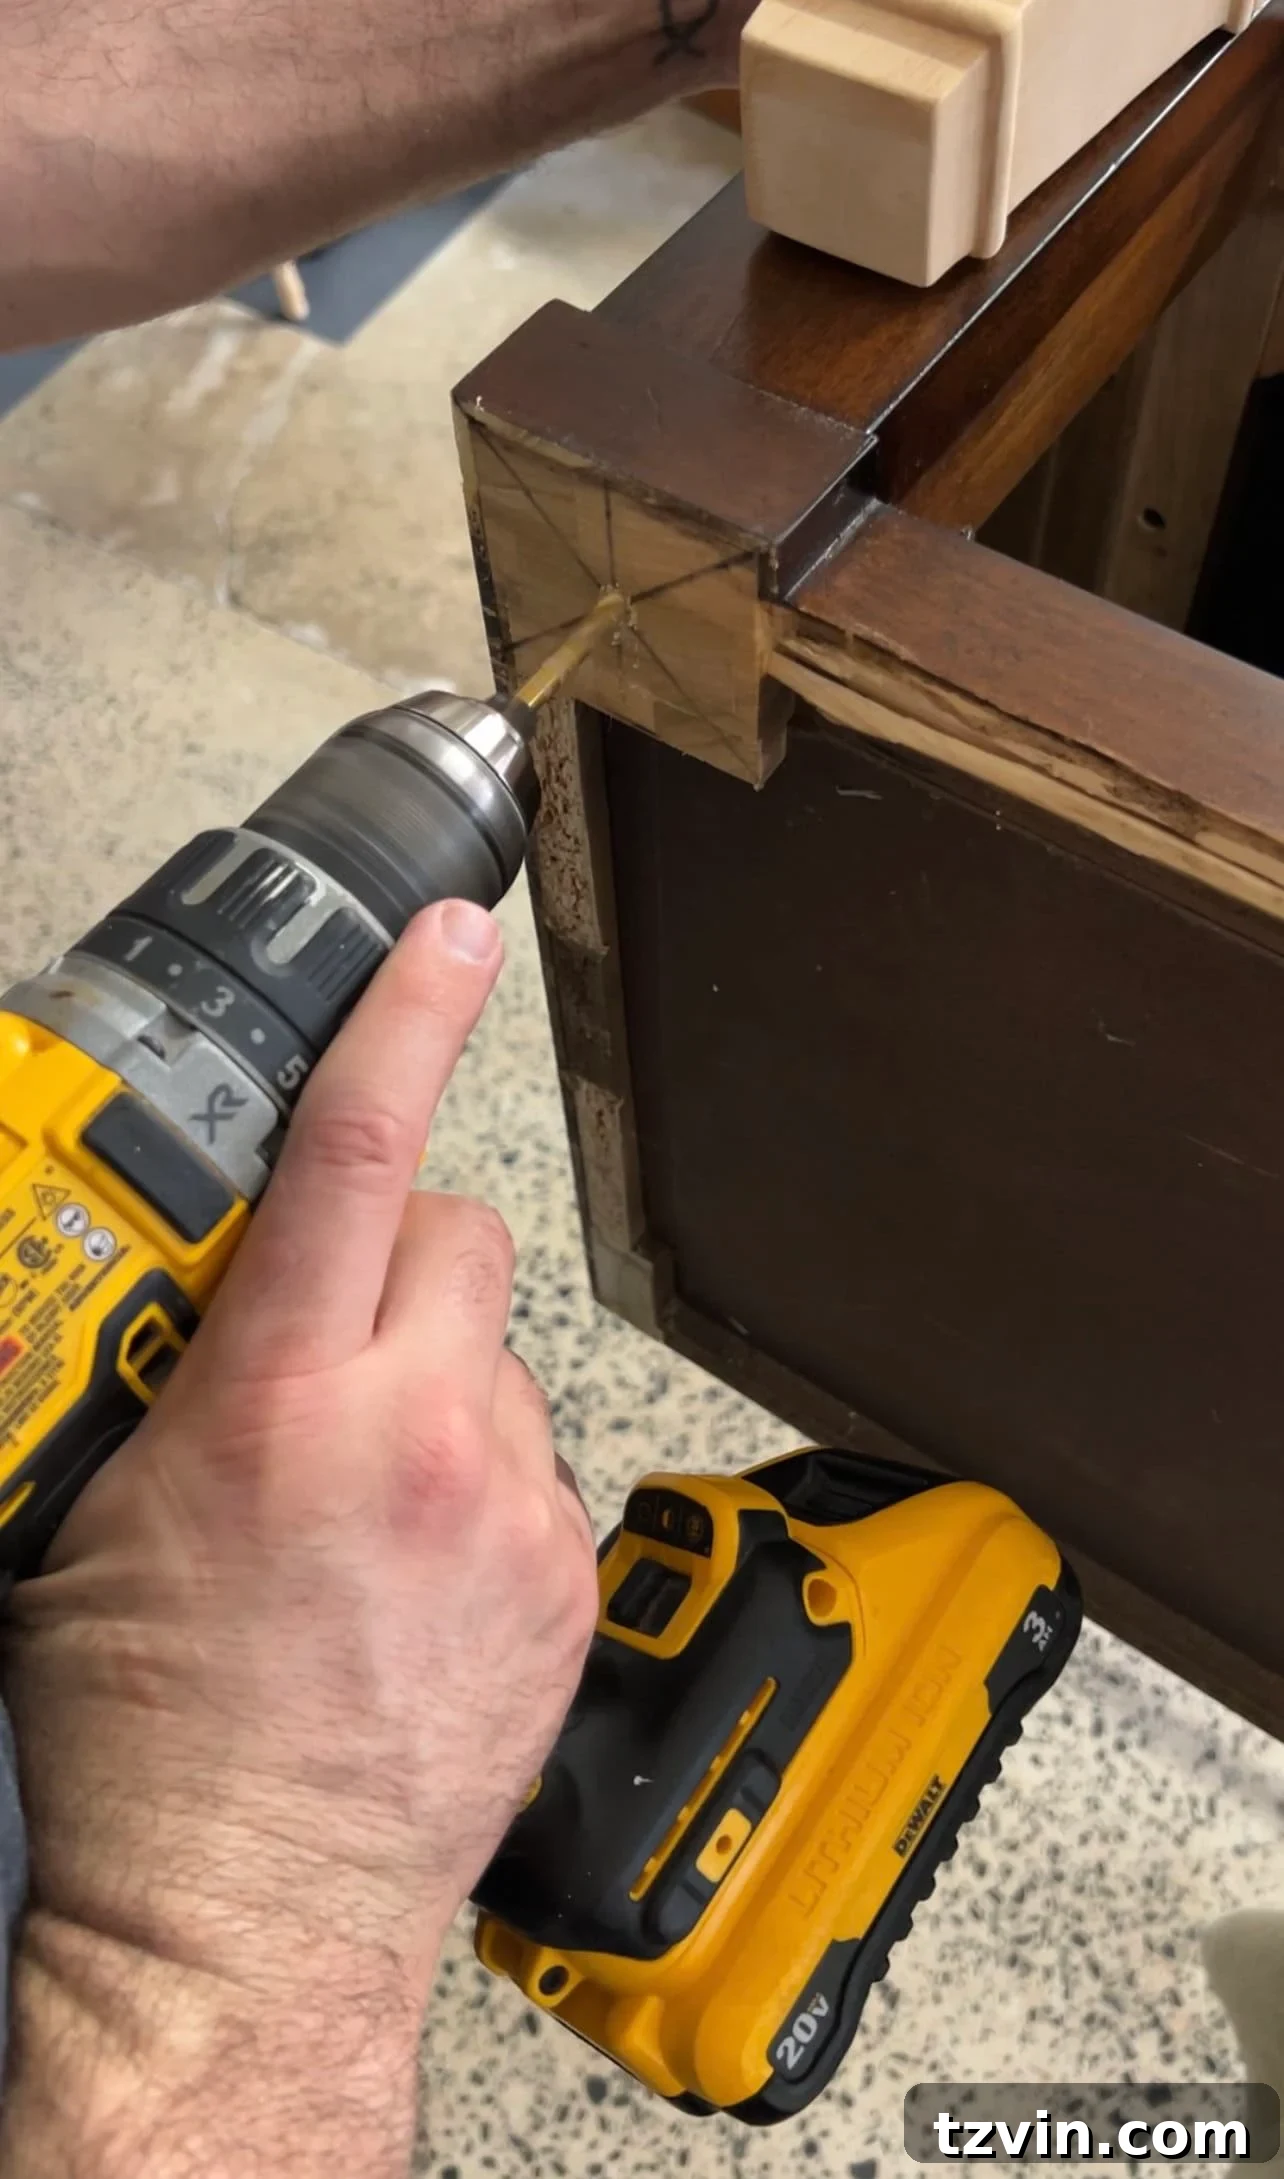
Accuracy is key when attaching new legs. Once the old ones are removed, turn your furniture piece upside down. Use a pencil to carefully mark the exact spots where your new legs will be positioned. We found a speed square to be an invaluable guide for this step, helping us to mark a precise “X” at the base of each new leg’s intended location. This ensures consistency and symmetry across all four legs, providing a stable and professional finish.
The world of furniture legs offers an astonishing variety of styles, making it incredibly easy to refresh dressers, side tables, benches, accent chairs, or even sofas. A simple change can completely redefine a piece’s aesthetic. I’ve had great success finding unique and stylish furniture legs for our DIY projects on platforms like Etsy and Amazon. These sources offer everything from modern metal designs to classic carved wood, ensuring you can find the perfect match for your vision. For this particular project, we used unfinished wood pyramid legs, which perfectly complemented our desired aesthetic. While they were sold out at the time of writing, I’m hopeful for a restock for future projects!
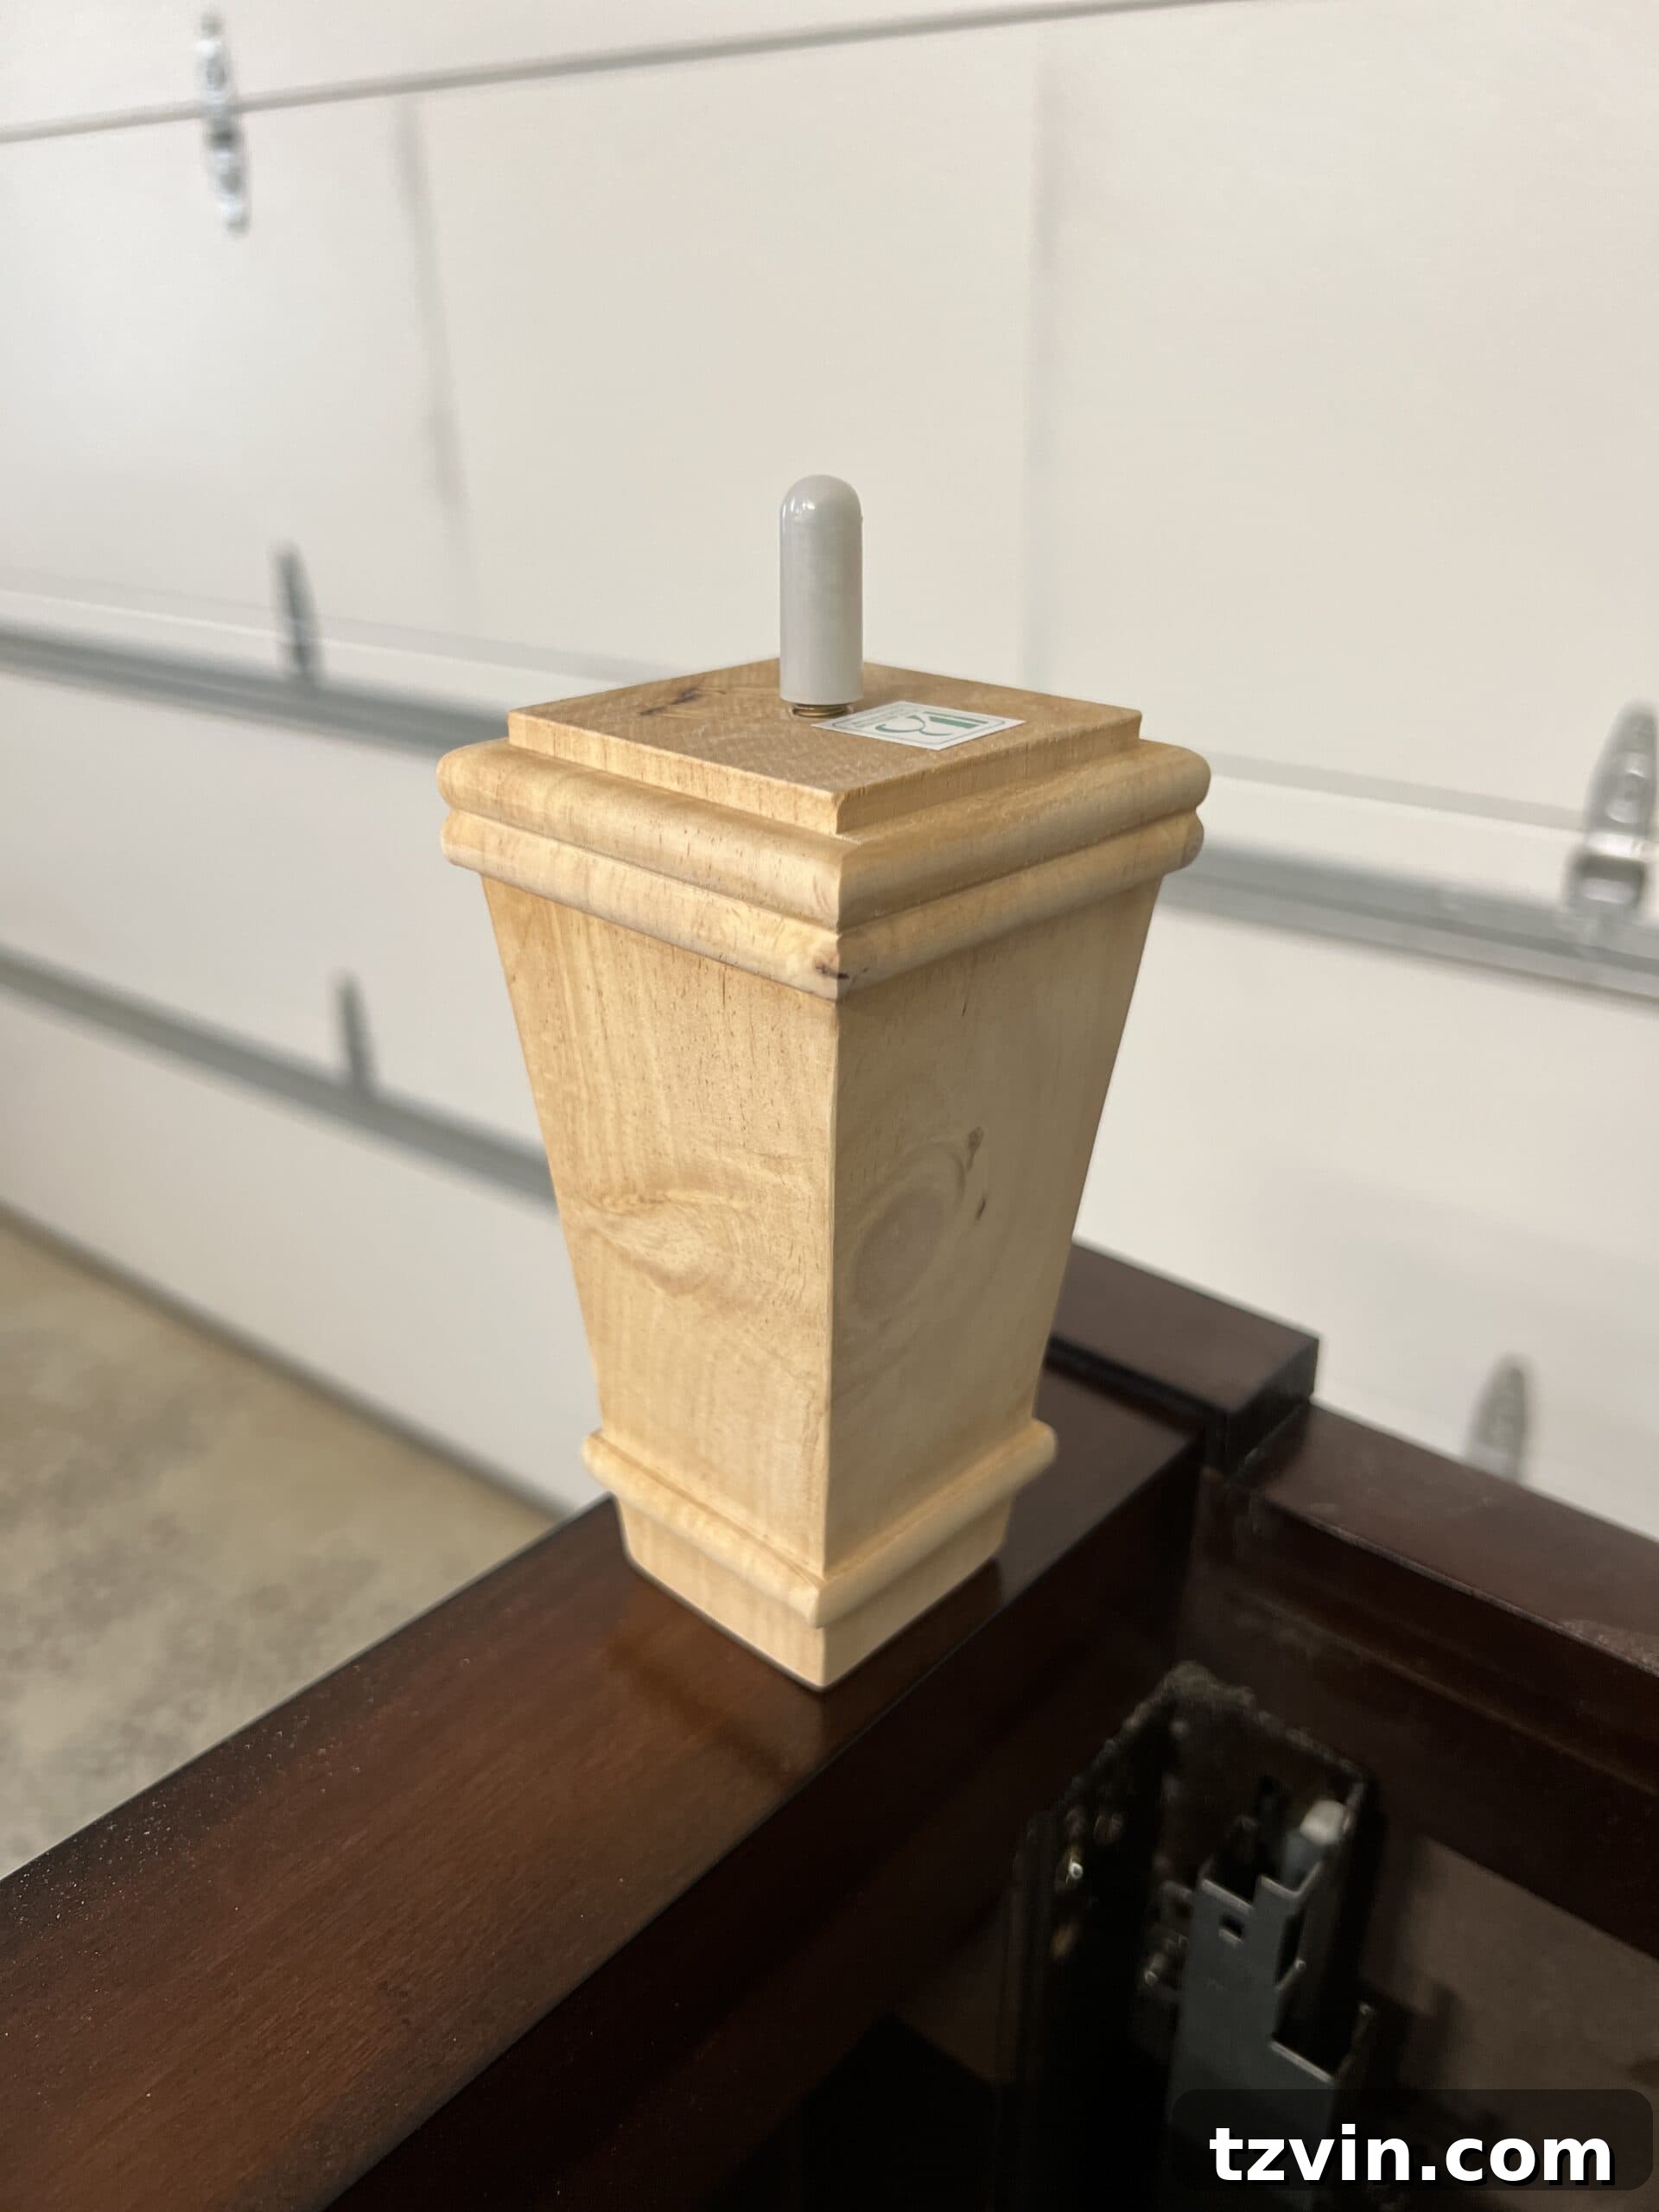
Step 4 – Drill Pilot Holes and Secure New Legs
Before attaching your new legs, it’s crucial to drill pilot holes. First, examine the screws on your new legs to determine the appropriate drill bit size. Select a bit that is slightly smaller than the screw’s diameter to create a snug fit without splitting the wood. Drill into the “X” marks you made in Step 3, ensuring the holes are deep enough to accommodate the full length of the leg screws. For added durability and a truly secure hold, apply a small amount of construction adhesive around the screw before tightening the new legs into place. This extra step provides excellent stability, ensuring your updated furniture piece will stand strong for years to come.
Crafting Elegance: How to Add Reeded Molding to Plain Furniture
Now for the truly transformative part: adding the decorative reeded molding that will give your furniture that custom, high-end appeal. The market offers a variety of materials for this purpose, each with its own advantages. You might have seen many furniture flippers utilize pole wrap to achieve a reeded style on everything from dressers to cabinets and doors. Pole wrap is a popular choice for its ease of use and ability to cover large areas quickly. However, due to its recent surge in popularity, pole wrap has become increasingly difficult to find and its price has risen significantly with demand.
As a fantastic and often more accessible alternative, we discovered elegant reeded molding during a stroll through our local Lowe’s. This individual molding offered a refined look and allowed for more precise application, perfect for our bench project. We used 13 strips of this molding for our bench, each priced at $7.98, bringing the total cost for the molding to $109.96. While an investment, the impact on the final piece was absolutely worth it, creating a sophisticated texture that mimics bespoke furniture.
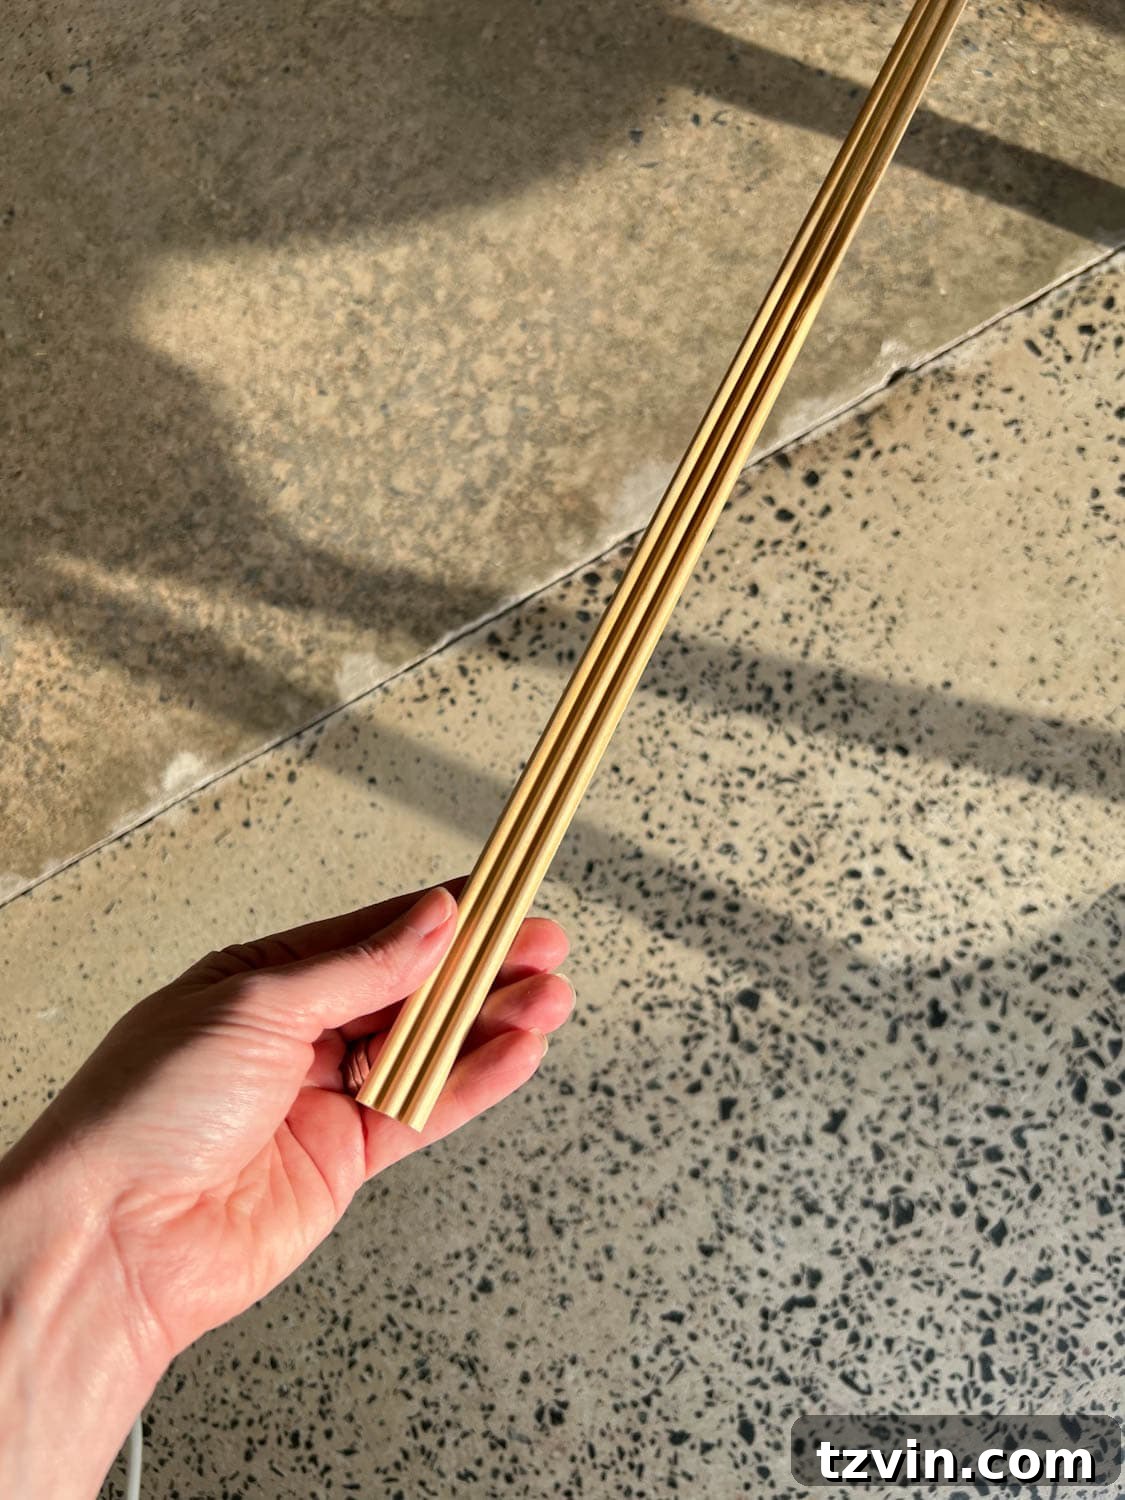
Step 1 – Measure and Plan Your Reeded Sections
The first step in applying your reeded molding is meticulous measurement. Carefully assess the areas on your furniture piece where you intend to add this decorative detail. Decide how many molding strips will be needed to cover each section completely and aesthetically. Using a pencil, mark directly on the molding strips where they will need to be cut to perfectly fit these dimensions. For our shoe storage bench, we applied reeding to the drawer fronts, side panels, and front panels, ensuring precise measurements for each area to achieve a seamless, tailored look.
Step 2 – Batch Cut for Efficiency: Tape Molding Strips Together
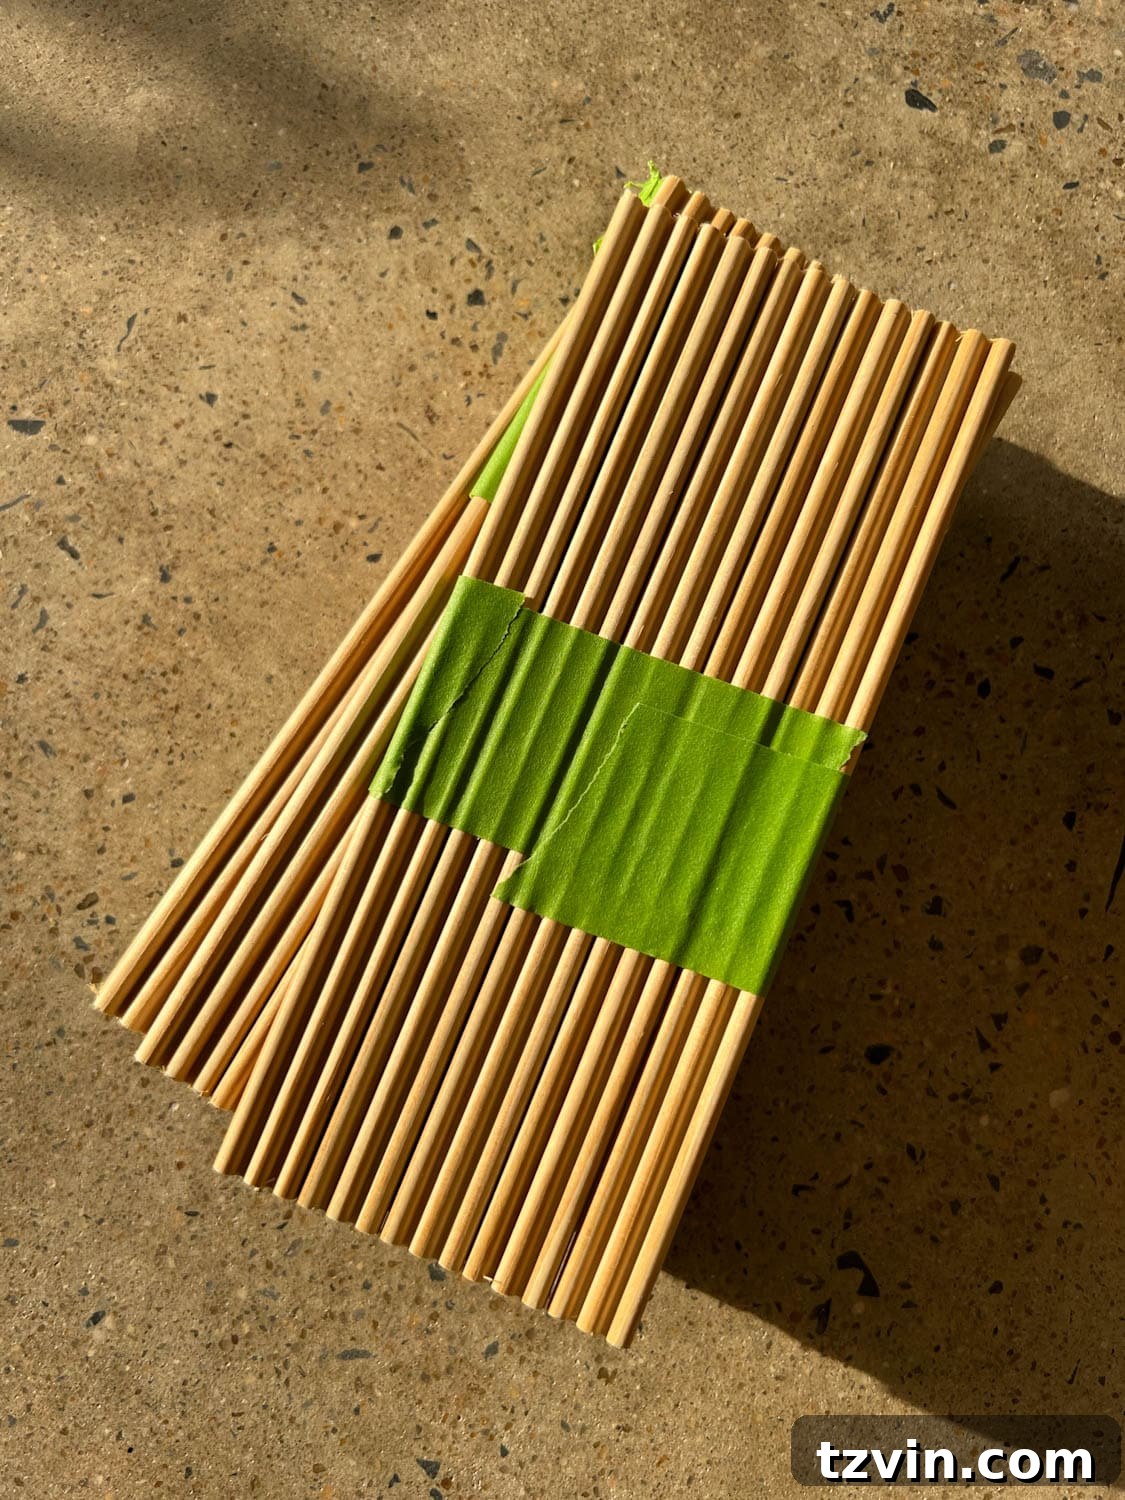
To streamline the cutting process and ensure consistent lengths, here’s a smart trick: take approximately four molding strips and align them side-by-side. Use painter’s tape to firmly secure them together, wrapping the tape around every 6-8 inches along their length. This simple step allows you to cut multiple strips simultaneously, saving time and ensuring all pieces for a given section are exactly the same length. This method drastically improves efficiency and accuracy, especially for larger projects with many strips.

Step 3 – Precisely Cut Your Reeded Molding Strips
With your molding strips securely taped together and marked, it’s time to make your cuts. Using your miter saw, carefully cut along the pencil marks you made in Step 2. This batch-cutting technique ensures all your strips are of the exact desired length, which is crucial for a clean, professional finish. Continue this process until you have enough custom-cut molding pieces to cover all the designated areas of your furniture. Always prioritize safety when using power tools and ensure your workspace is clear and stable.
Step 4 – Securely Attach Reeded Molding with Construction Adhesive
With all your molding strips cut to size, it’s time for attachment. Apply a consistent bead of construction adhesive to the back of each reeded molding strip. Carefully position the strips onto the designated sections of your furniture, ensuring they are perfectly perpendicular and that there are no visible gaps between strips or along the edges. Precision in this step is paramount for a professional look. Once placed, use painter’s tape pulled tightly across the newly adhered molding to hold the pieces firmly in place. Allow the adhesive to set overnight, ensuring a strong, lasting bond.
Optional Tip for Added Security: While construction adhesive is incredibly strong and often sufficient on its own, for exceptionally heavy pieces or areas subject to extra wear, you may consider using a pin nailer. If you choose this route, be prepared to apply wood filler to the tiny holes left by the pin nails before priming and painting. Sanding wood filler smooth within the delicate, tiny details of reeded molding can be quite challenging and time-consuming, so weigh this trade-off carefully. For most projects, adhesive alone will provide ample support.
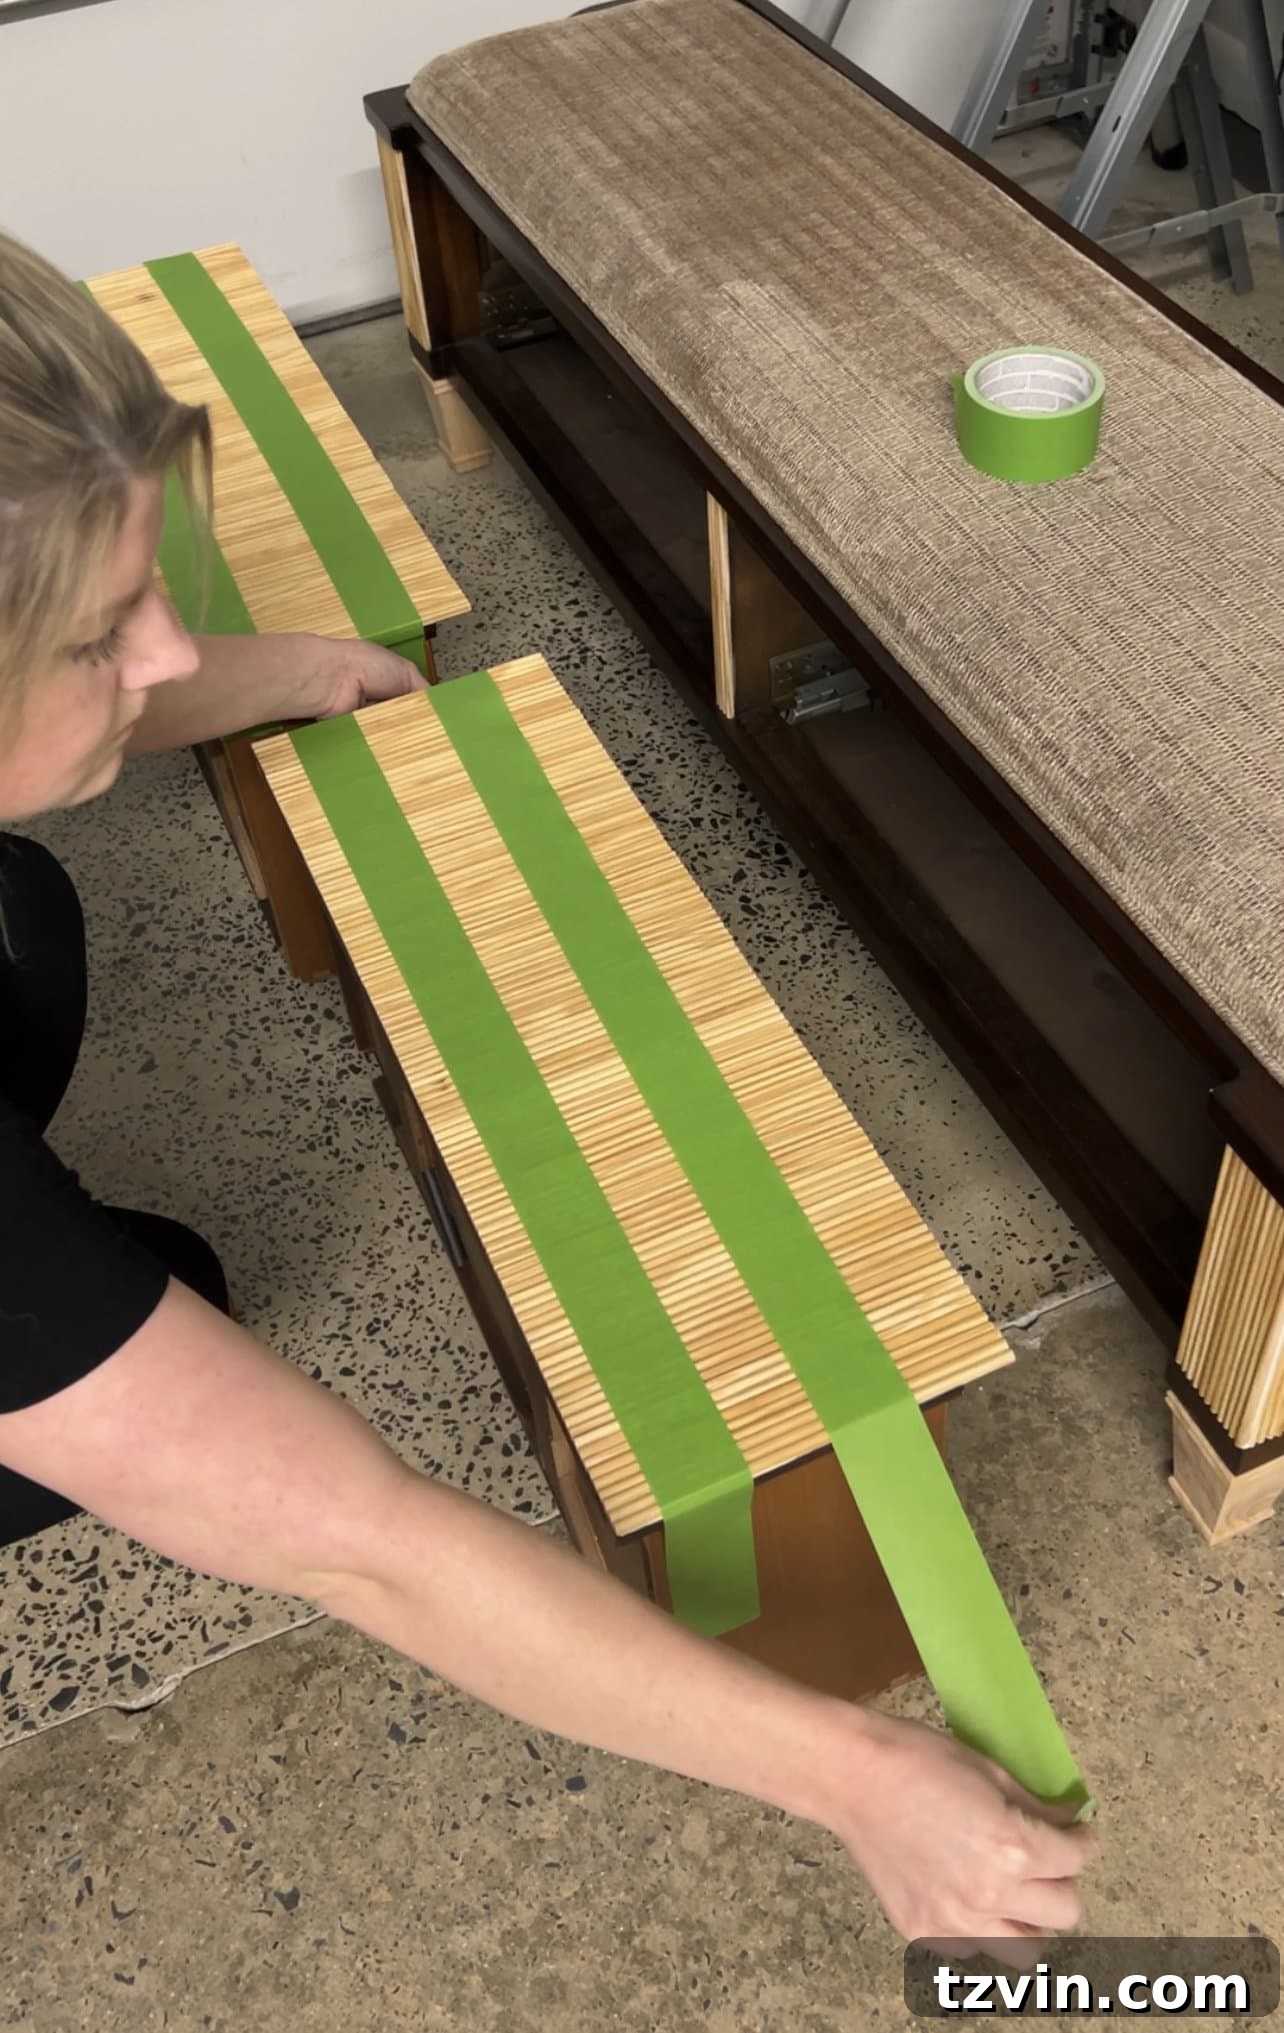
Step 5 – Achieve Smoothness: Sand Reeded Edges Level
Once the construction adhesive has fully dried—ideally after allowing it to cure overnight—inspect the edges of your reeded molding, especially on drawer fronts. It’s common for some strips to be slightly uneven along the top and bottom edges. To achieve a perfectly smooth and flush finish, use an electric sander equipped with a medium-grit sanding disc. Gently sand these edges until they are level with the furniture surface. After sanding, test all drawers to ensure they open and close properly without any scraping or sticking. If needed, sand a bit more to ensure smooth operation and prevent any friction between the molding and the furniture body.
Step 6 – Prime for Perfection: Applying a Quality Base Coat
Applying the right primer is a critical step for a professional and durable finish. Once your molding is secure and sanded smooth, apply a generous, even coat of primer to your entire furniture piece. The choice of primer is especially important if you’re working with furniture that has a red-based wood stain, such as cherry or mahogany. In such cases, it is absolutely worth investing in a shellac-based primer.
While shellac-based primers can be a bit “fumey” and smelly, their performance is unmatched for preventing stubborn wood stains from bleeding through. This type of primer effectively seals the wood, creating a barrier that stops those reddish hues from discoloring your final paint color. Trust me, learning this lesson the hard way (discovering your beautiful paint job turning pink!) is a frustrating experience you’ll want to avoid. A good primer ensures your chosen paint color looks true to shade and lasts longer.
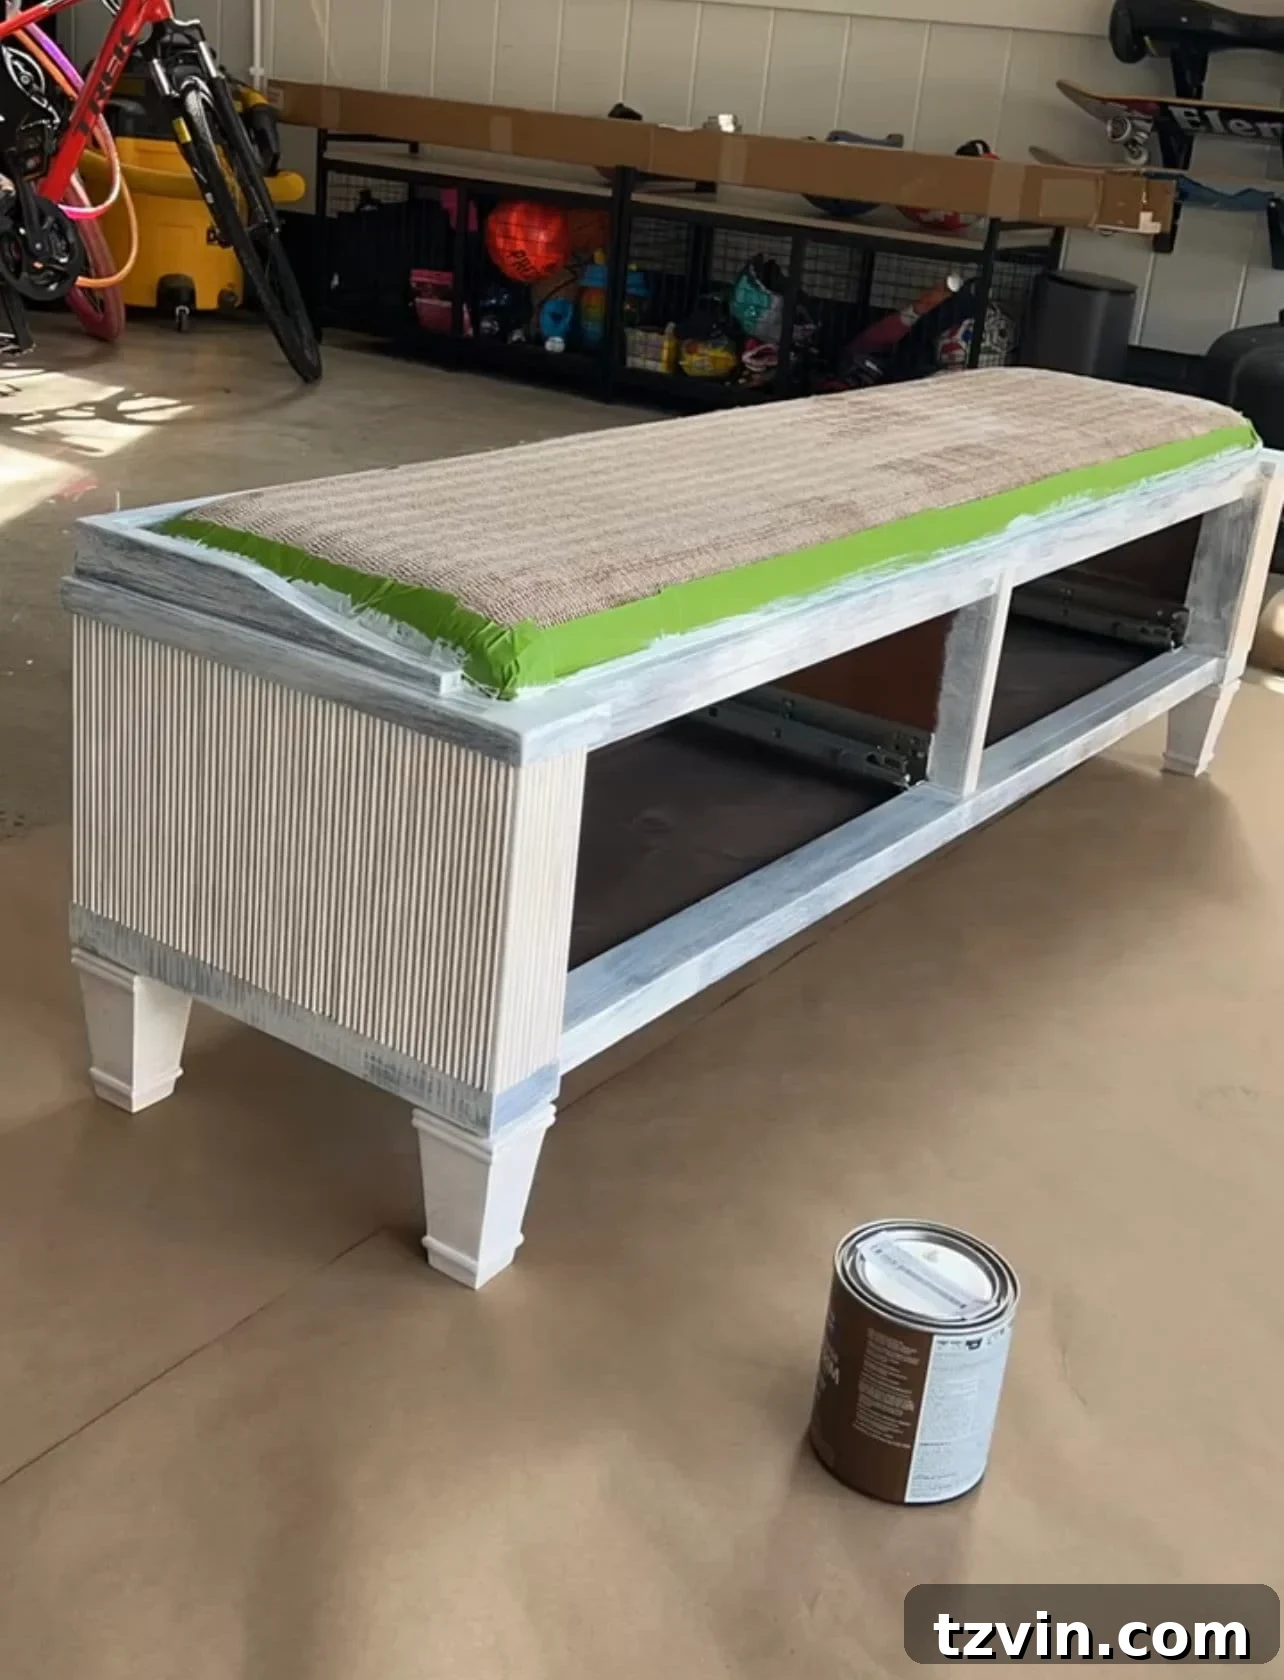
Step 7 – Paint Your Masterpiece: Achieving a Flawless Finish
With your furniture piece perfectly primed, it’s time for the exciting step of applying paint. Brush on two thin, even coats of your chosen paint, allowing adequate drying time between each coat. As you paint, pay close attention to the delicate reeded sections; rogue drips love to seep into these crevices. A specialized triangular brush or a small artist’s brush will be invaluable for getting into these deep grooves and ensuring complete, smooth coverage without excess paint buildup.
For this project, I opted for Sherwin Williams Door & Trim satin paint. My primary reason was the desire for an acrylic urethane enamel-based paint, known for its exceptional durability and ability to cure to a hard, resilient finish. Given that this bench would be in a high-traffic entryway, enduring daily wear and tear from active kids, choosing a robust paint was non-negotiable. While I often lean towards Benjamin Moore Advance for heavy-duty, high-traffic applications, this Sherwin Williams option proved to be a capable alternative. The chosen color, Sherwin Williams Anew Gray, is a beautiful taupe that provides just enough contrast to highlight the intricate shadows and textures of the reeded details, adding immense depth and visual interest to the piece.
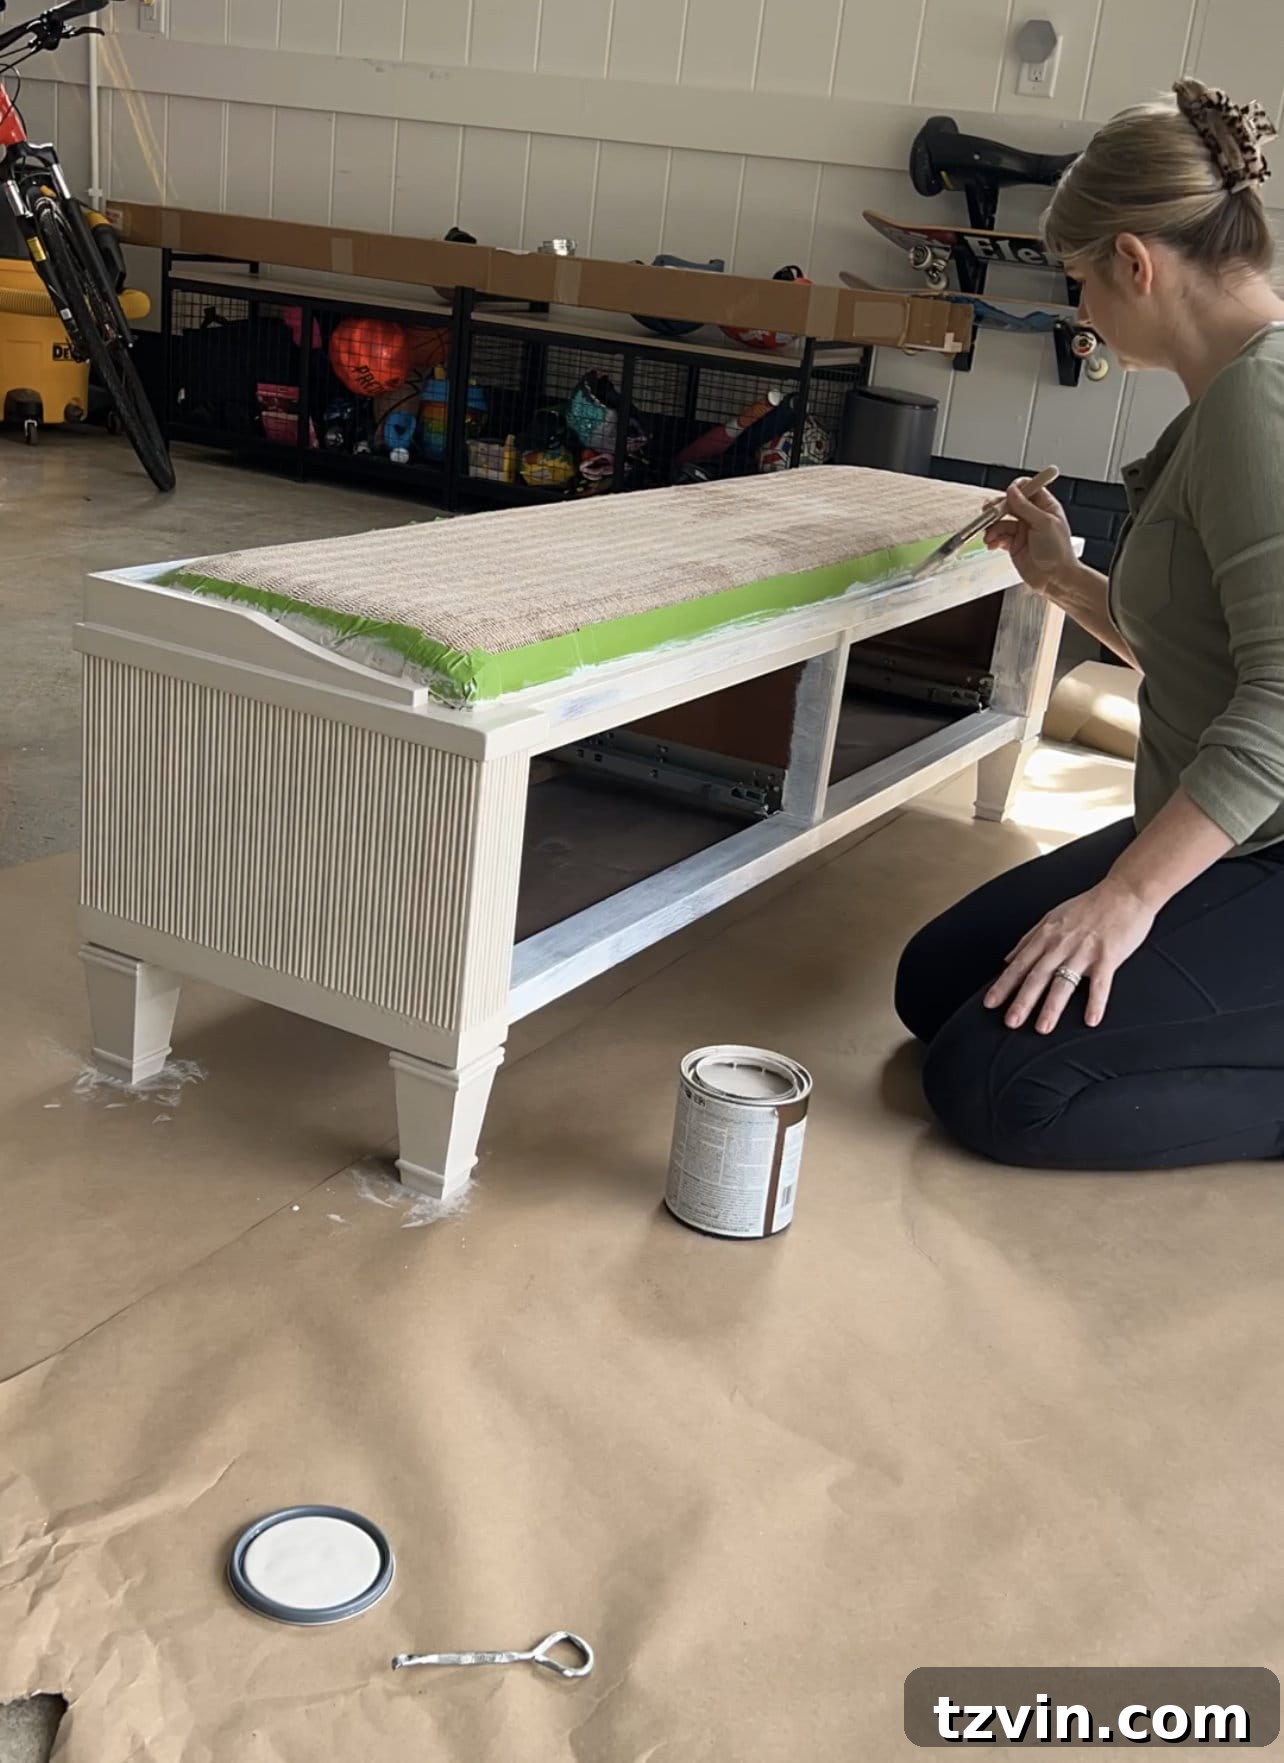
Step 8 – Final Touch: Installing New Hardware
Once your paint has completely dried and cured, it’s time for the final flourish: adding your new hardware. This step requires a steady hand and careful precision. Very slowly and deliberately drill holes through the newly applied molding to accommodate your chosen knobs or pulls. For our bench, we used the existing holes in the drawer fronts as our guide, drilling from the back of the drawer. This technique meant we only had to focus on carefully drilling through the reeding itself, minimizing potential damage to the finished paint job.
We absolutely adore these vintage brass knobs! At just $3.20 each, they offer an incredibly high-end look, reminiscent of unique finds you might discover at Anthropologie. The right hardware truly acts like jewelry for furniture, elevating the entire piece and providing that perfect finishing touch.
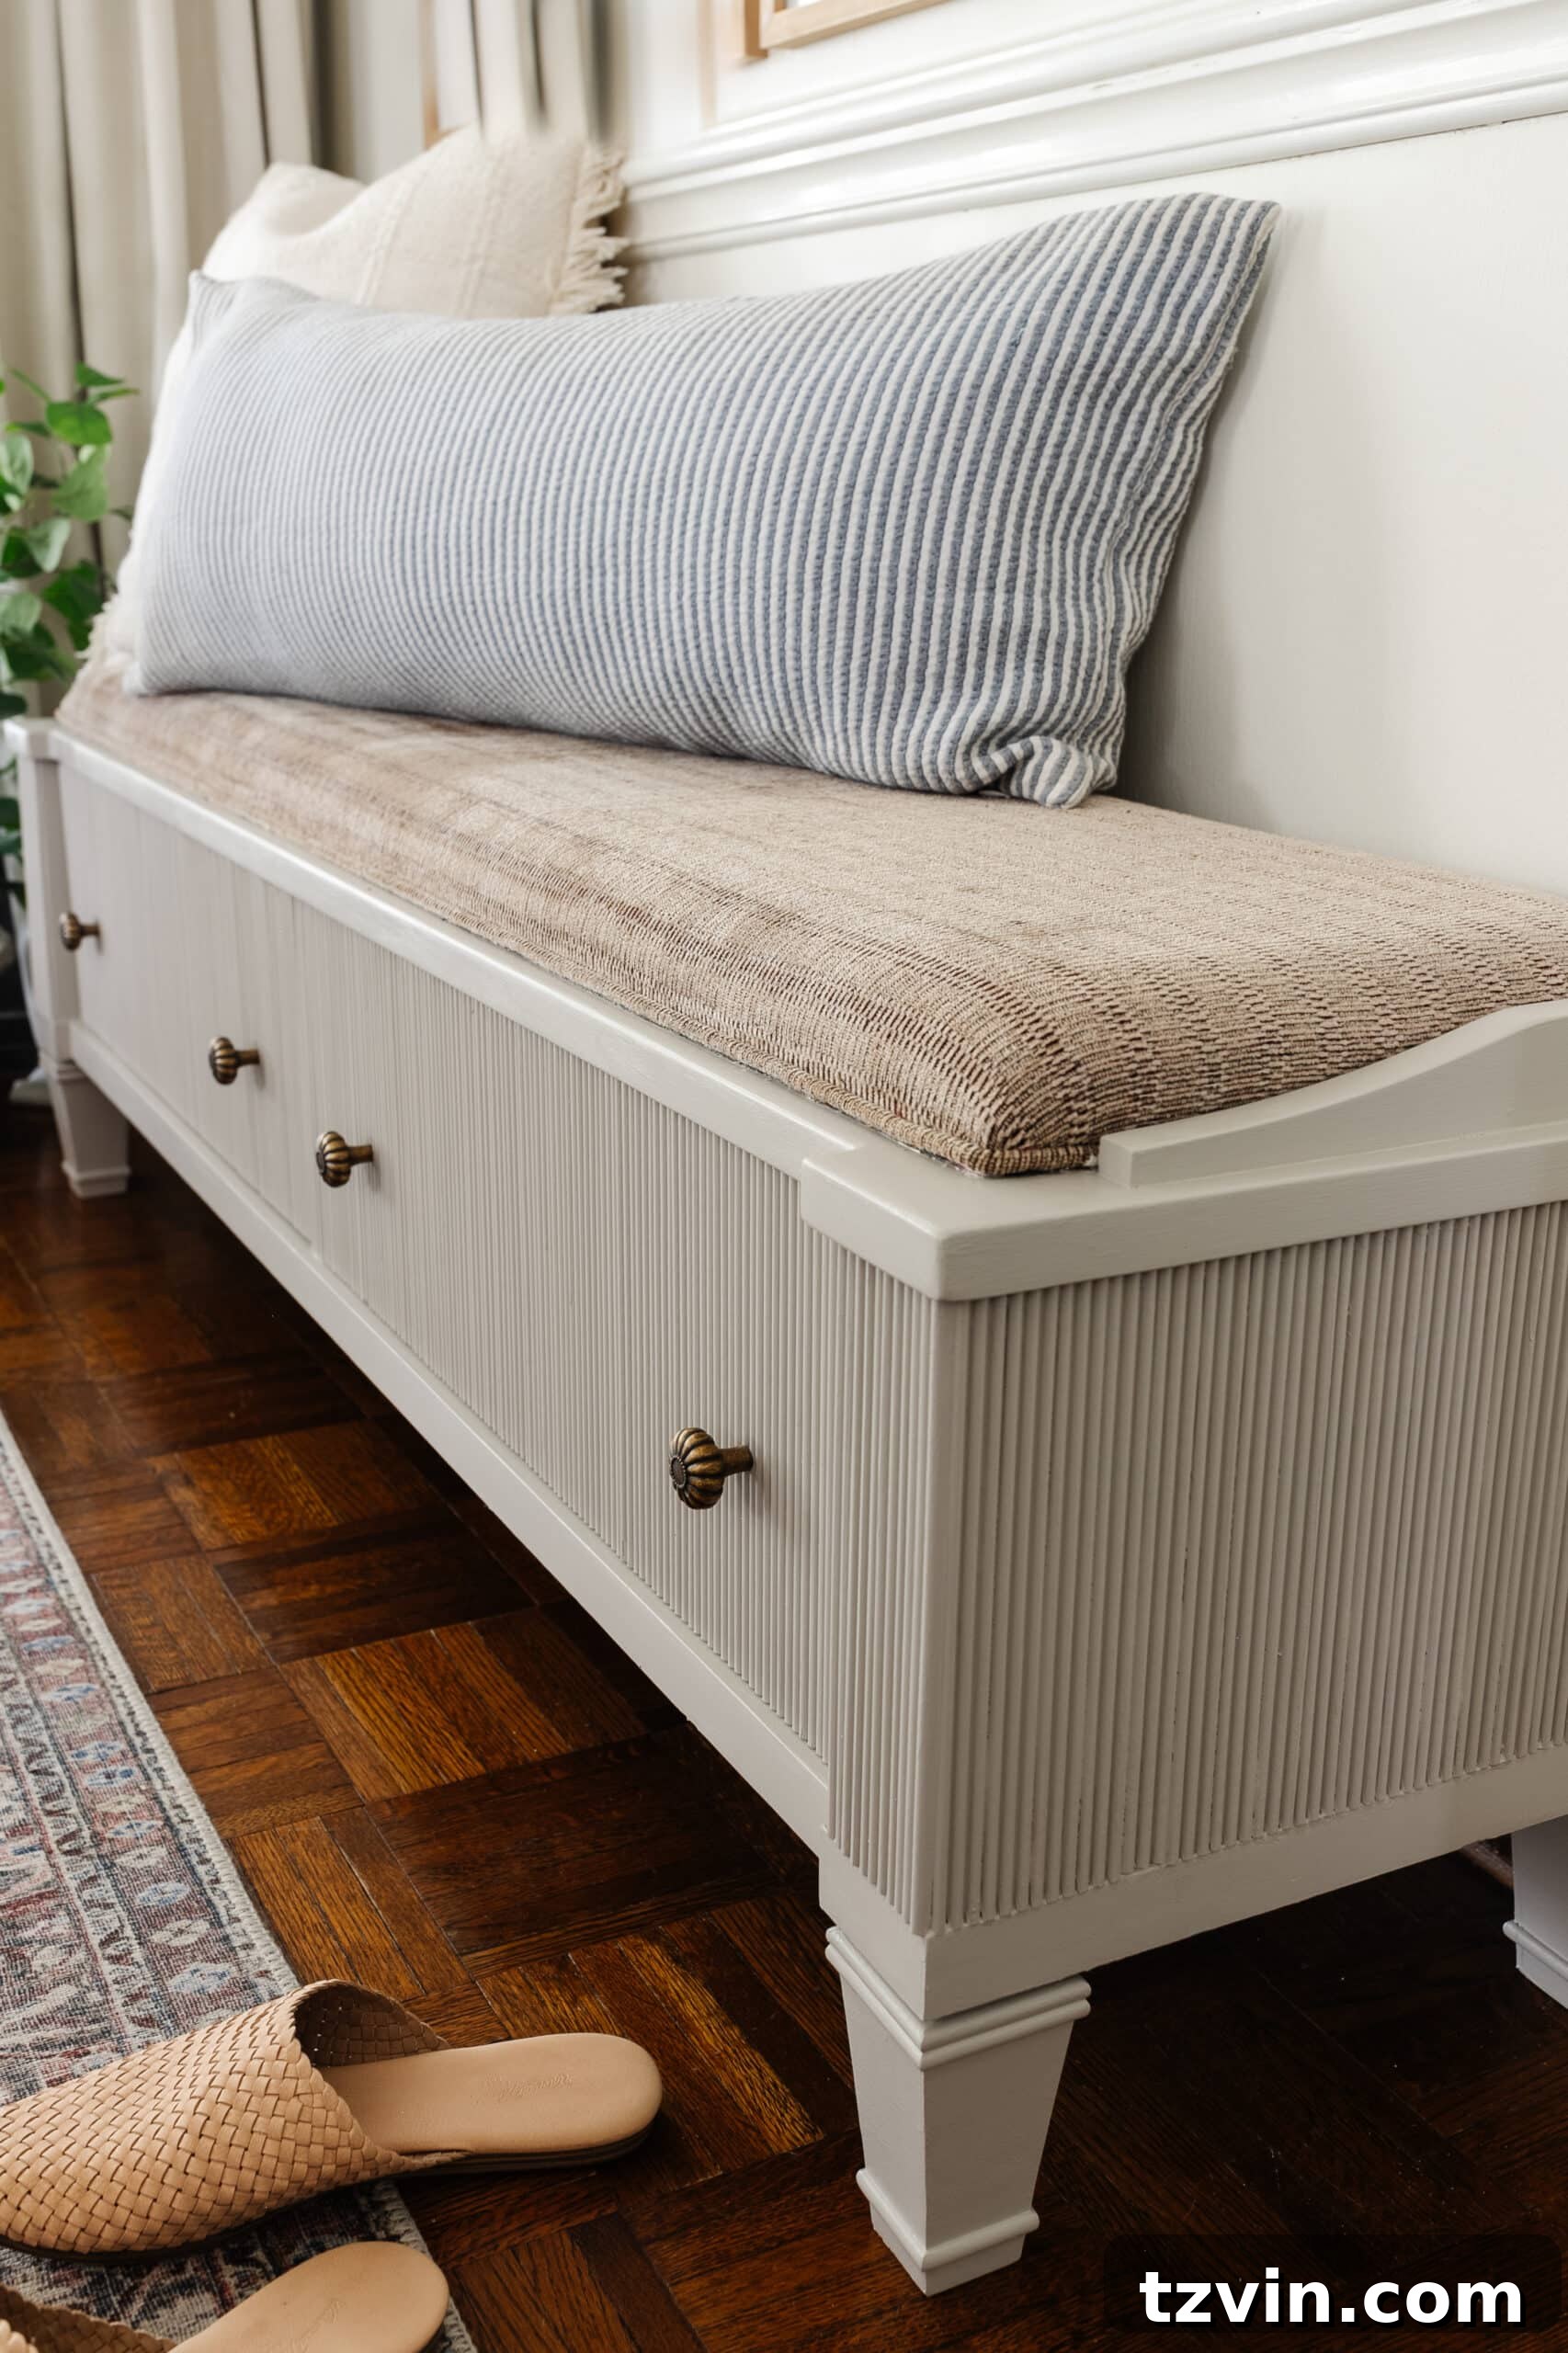
And just like that, our entryway gained not only much-needed shoe storage but also a stunning, customized piece of furniture that looks incredibly chic! The transformation from a plain, overlooked bench to a textured, elegant focal point is truly satisfying.
Now, the next (and perhaps greatest) challenge will be persuading my family to actually *use* this beautiful new storage solution. Wish me luck! 😉
Inspiring Designs: Reeded and Fluted Furniture Finds
After completing a furniture flip, it’s always fun to compare your DIY creation with store-bought versions, isn’t it? To spark your inspiration and show the versatility of this trend, I’ve curated a collection of beautiful reeded and fluted furniture pieces available across various budgets. These examples highlight how this timeless detail can elevate different types of furniture, from consoles to nightstands, demonstrating the high-end look you can achieve with a DIY approach or find ready-made.

- Conrad Hall Chest
- Prism Wood Credenza
- Isla Buffet
- Goforth Console Table
- Crestview Storage Console
- Wood Fluted Drum End Table
- Conrad Console Table
- Lewis 3-Drawer Nightstand
- Middlebrook Fluted Buffet
- Reeded Console Table
Curated Entryway Decor Sources
Achieving a cohesive and inviting entryway often involves a blend of functional pieces and decorative accents. If you loved the look of our transformed entryway, you’re in luck! You can create your own stunning gallery wall with our free printable Audubon bird art set. These classic prints evoke a sense of timeless charm and always remind me of my mom, who used to frame them all over our house when I was growing up.
Here are the sources for other elements that brought our entryway to life:
- Wall Color: Benjamin Moore Swiss Coffee – a soft, warm white that provides a serene backdrop.
- Trim Color: Benjamin Moore Simply White – a crisp, clean white that beautifully contrasts the walls and highlights architectural details.
- Door Color: Benjamin Moore Wrought Iron – a deep, dramatic charcoal that adds sophistication and anchors the space.
- Bench Color: Sherwin Williams Anew Gray – the perfect taupe that provides depth and elegance to our reeded bench.
- Picture Frames: Simple yet elegant frames that let the art shine.
- Rug: A durable and stylish rug that adds warmth and texture to the floor.
- Cream Pillow: A soft, inviting touch for the bench cushion.
- Striped Pillow: Adds a subtle pattern and visual interest.
- Faux Linen Curtain: Provides light filtering and a soft texture.
- Curtain Rod: A simple yet sturdy rod to complement the window treatment.
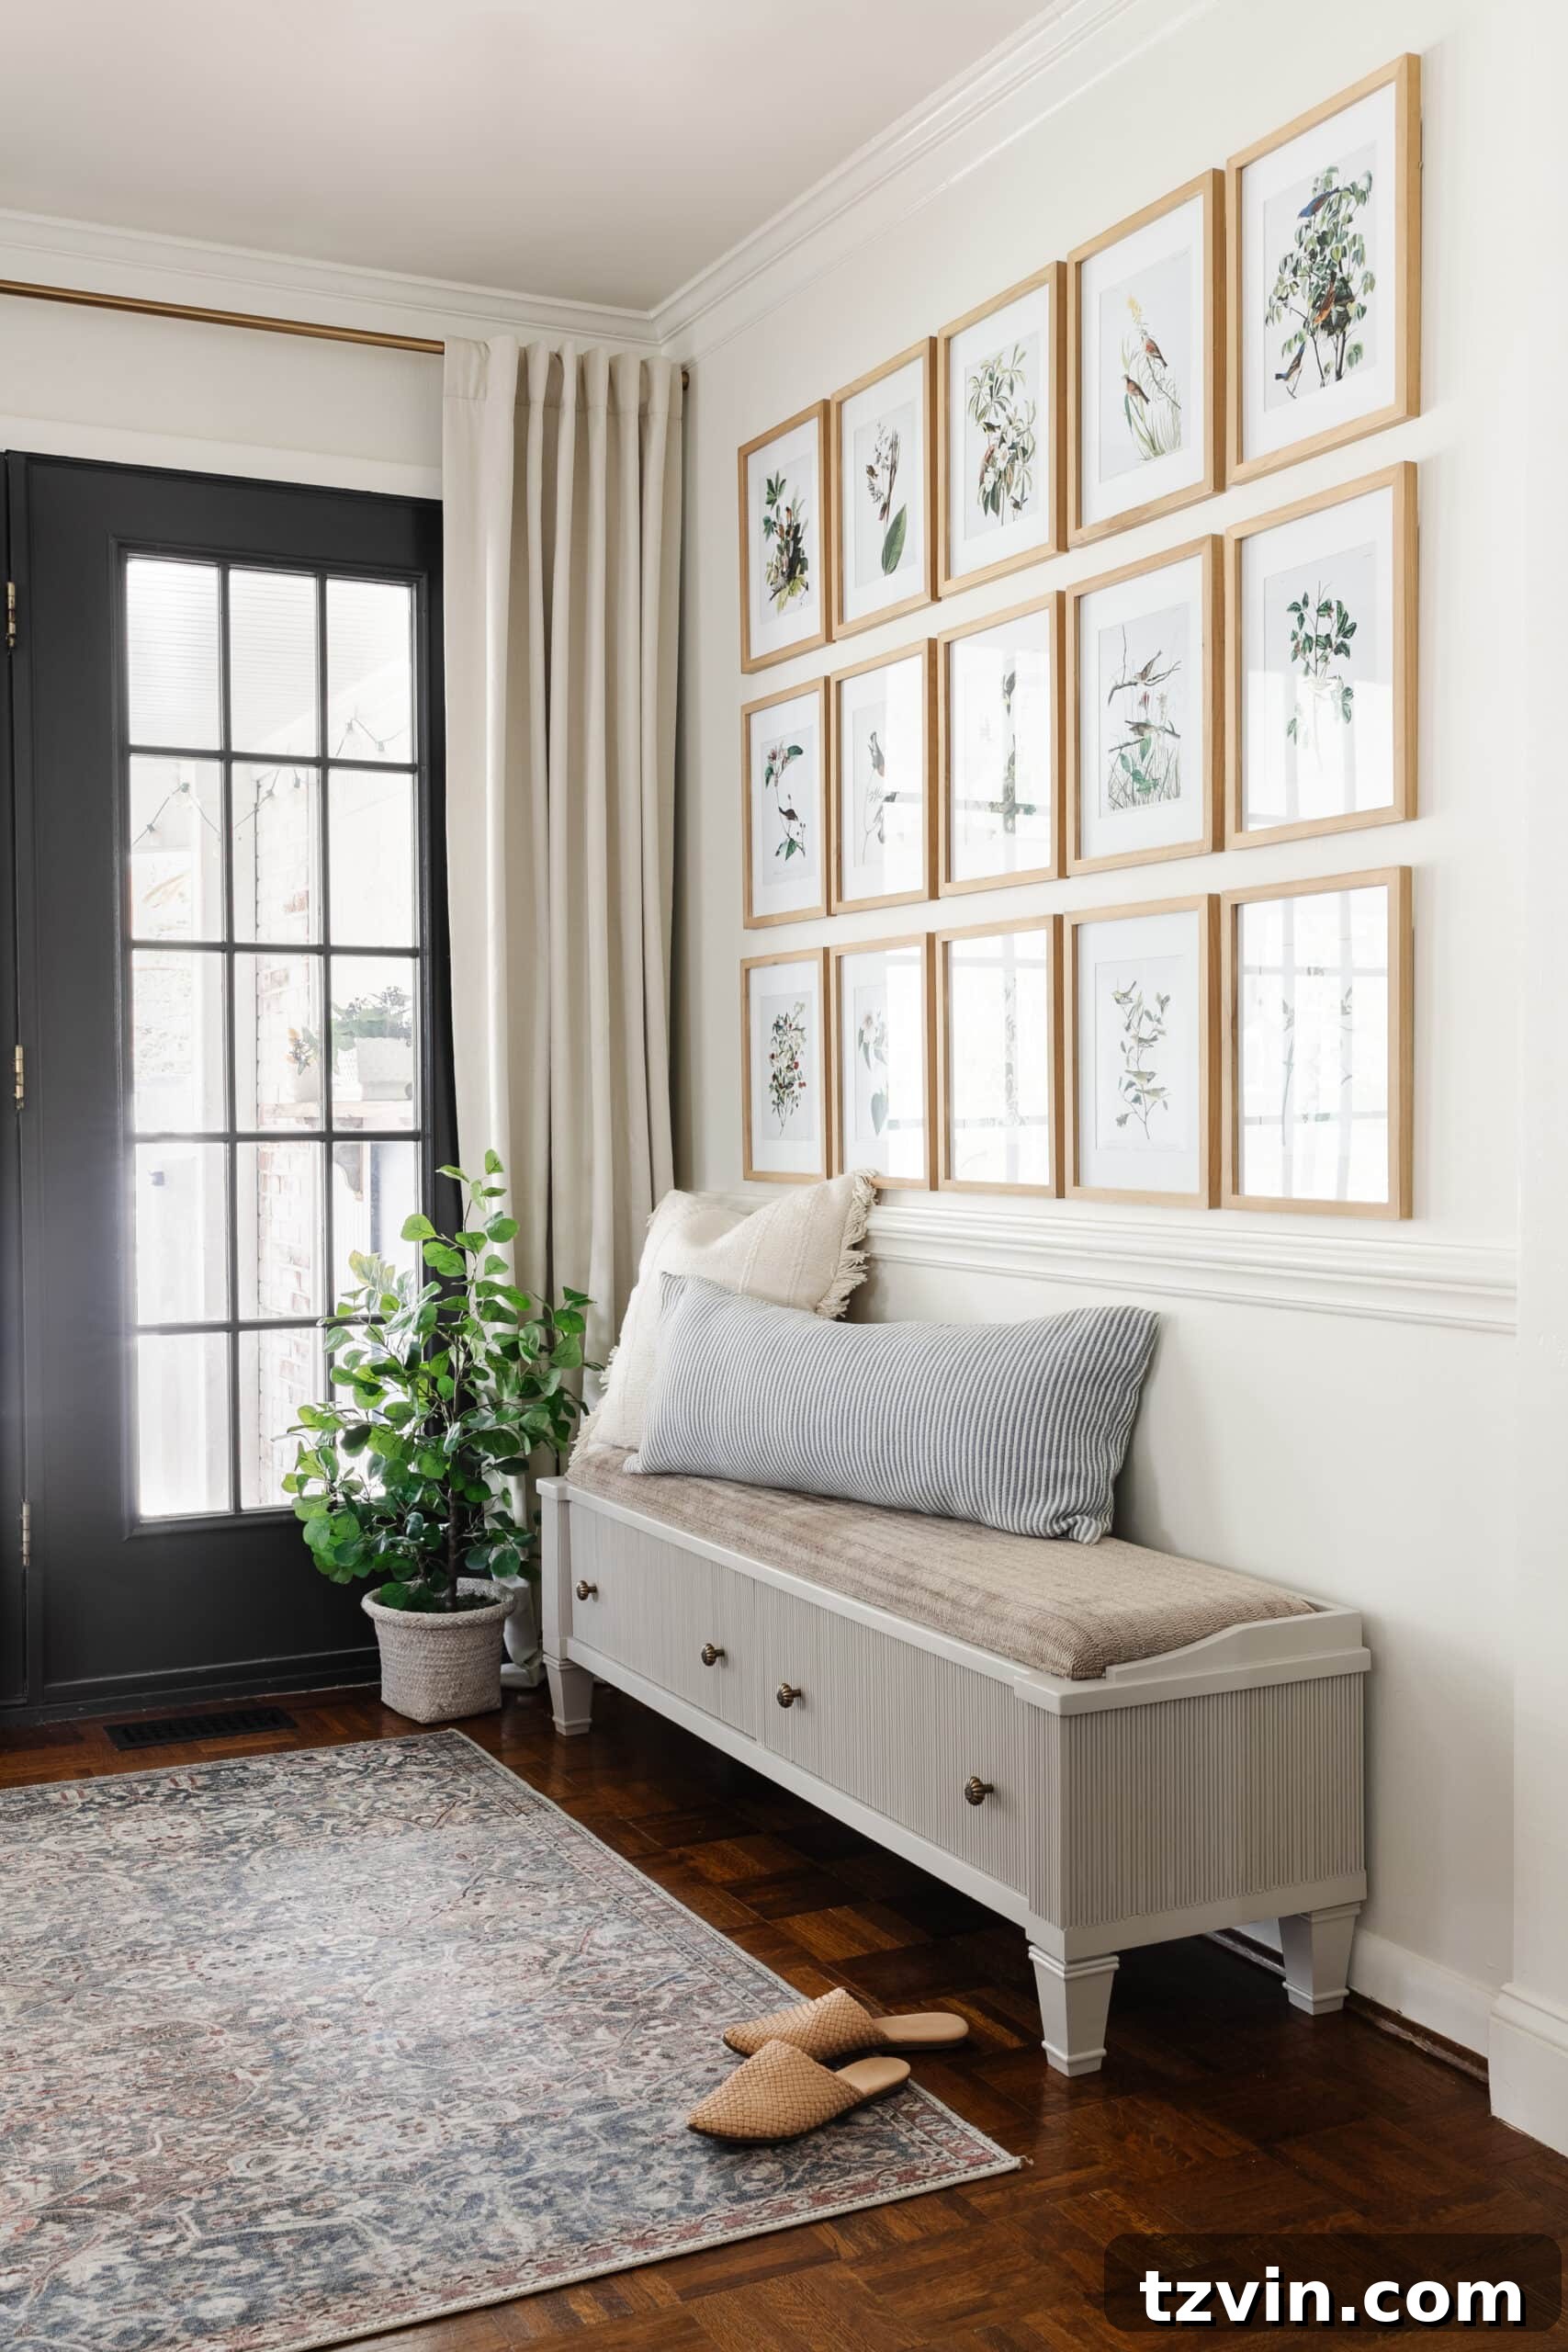
Now that the reeded bench makeover is complete, I find myself contemplating the upholstered cushion. I did give it a thorough steam clean and scrubbed it with upholstery cleaner, making a significant improvement. However, I can’t shake the idea of taking it one step further. We have a couple of major home renovation projects on the horizon in the coming weeks, so I’ll have to revisit this thought in due course. But the question remains:
What do you think? Should I paint the upholstered cushion, or leave it as is? If painting, what color would best complement the newly transformed bench and entryway? I’ve even entertained the idea of a faux leather look for added durability and a touch of modern rustic charm, or perhaps a rich deep rust brown, similar to this captivating bench. I think I’ve just talked myself into it! The possibilities are endless, and sometimes, the best part of DIY is the continuous evolution of a space.
Explore More DIY Furniture Renovation Ideas
If this reeded bench makeover has inspired you to tackle your own furniture projects, you’re in the right place! Diving into DIY furniture can be incredibly rewarding, allowing you to customize pieces to your exact style and needs while often saving money. Here are some additional resources and ideas to help you on your furniture transformation journey:
- Beginner’s Guide to Painting Furniture: A perfect starting point for anyone new to furniture painting, covering all the fundamentals.
- DIY Burl Wood IKEA Dresser Hack Using Contact Paper: Learn how to achieve a high-end, textured look with a simple and affordable material.
- How to Clean Wood Furniture to Make It Look New: Essential tips for restoring the natural beauty of your wooden pieces before any major transformations.
- Applique IKEA Hemnes Dresser Hack: Discover how to add intricate, decorative details to plain furniture with appliques for an elevated aesthetic.
- Best Places to Buy Furniture Hardware and Kitchen Cabinet Pulls: Find the perfect finishing touches to complement your newly renovated furniture.