Transform Your Bathroom: A Comprehensive Guide to Replacing Builder-Grade Mirrors with Vintage Charm and Affordability
Few design elements possess the transformative power of a well-chosen mirror, especially when upgrading a bathroom. One of the most common questions that lands in my inbox, illustrating this very point, is always: “Where did you get those stunning vintage mirrors in your bathroom?!” It seems many are eager to infuse their personal spaces with the unique character and timeless elegance that only a vintage piece can offer.
The acquisition of the Venetian vintage-style mirrors for our bathroom remodel last year was, in fact, an unexpected but delightful turn of events. Amidst the chaos of supply chain delays, backorders, and last-minute layout changes, these mirrors emerged as a serendipitous discovery. They swiftly became one of our favorite features, instantly imbuing the space with a rich narrative and unparalleled charm that a standard mirror simply couldn’t provide.
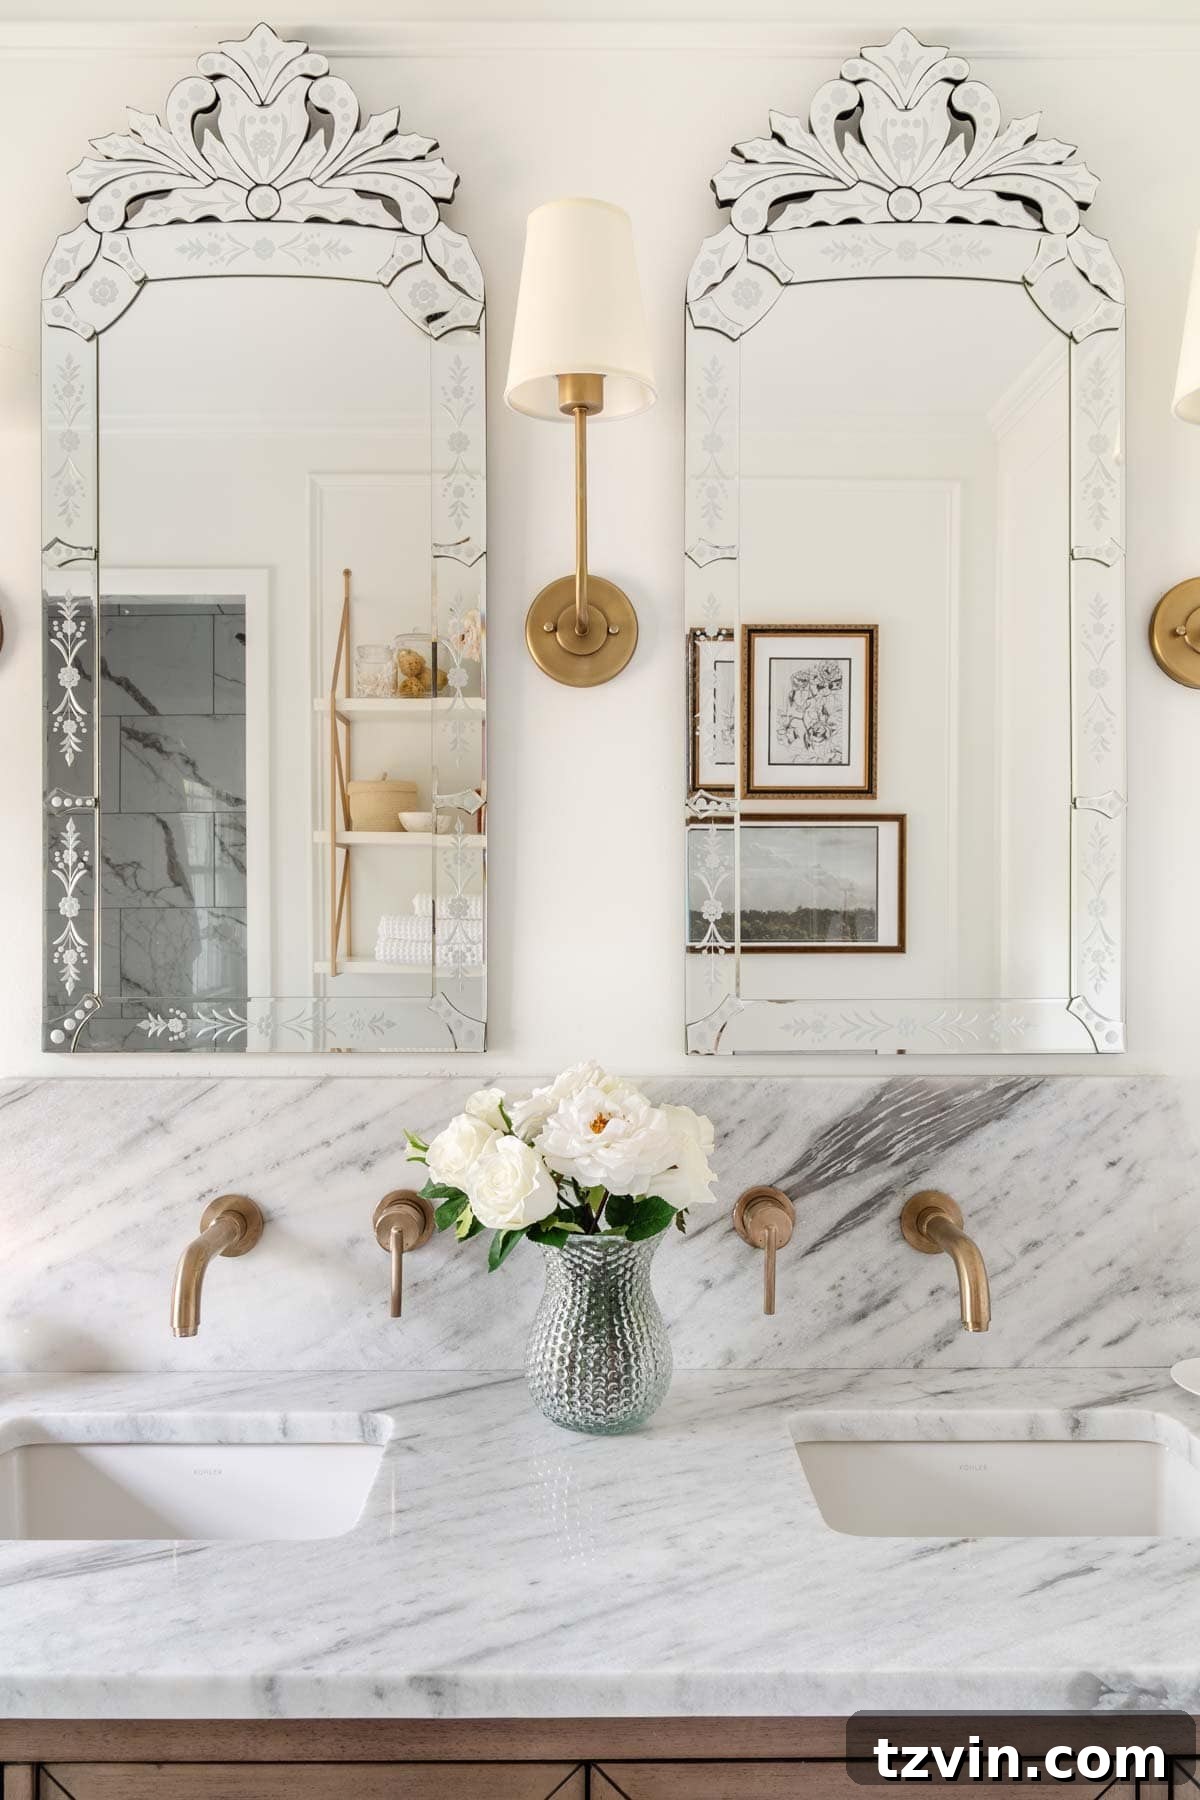
Swapping out a generic, frameless builder-grade mirror for a beautifully aged vintage piece is arguably one of the most effective and gratifying ways to instantly elevate your bathroom’s aesthetic. This simple update can dramatically transform the entire feel of the room, often requiring just an hour or two of your time. If you’re ready to say goodbye to bland and embrace a bathroom filled with personality and history, this comprehensive guide will walk you through every step: from safely removing your old mirror to expertly sourcing unique vintage finds, and even offering creative DIY solutions for those on a tight budget.
Seamlessly Removing Your Builder-Grade Bathroom Mirror
The first crucial step in your bathroom’s vintage mirror transformation is the careful removal of the existing builder-grade mirror. The process can vary significantly depending on its installation method, typically falling into two categories: mirrors attached with clips or those glued directly to the wall with adhesive. Understanding your mirror’s attachment will prepare you for the task ahead.
How to Remove Mirrors Attached with Clips: The Easy Way
If you’re lucky, your builder-grade mirror will be held in place by metal or plastic clips. This is generally the most straightforward removal scenario. These mirrors are designed for relatively easy installation and de-installation, making them a DIY dream. Here’s a simple breakdown of the steps:
- Preparation is Key: Begin by laying a thick blanket, several old towels, or a moving pad over your vanity countertop and sink. This will protect these surfaces from accidental drops or debris during the removal process.
- Locate and Loosen Top Clips: Inspect the mirror for clips, typically found at the top and bottom edges. The top clips usually secure the mirror to the wall. Some might have visible screws that need to be loosened or removed, while others might be designed to pivot or slide open. Carefully disengage these top fasteners.
- Lift and Tilt: Once the top clips are no longer holding the mirror, gently lift the mirror upwards from the bottom clips. Most mirrors are designed to sit in a channel or rest on bottom clips, allowing for vertical movement. As you lift, tilt the top edge of the mirror away from the wall.
- Carefully Extract: With a firm and balanced grip, slowly lower the mirror completely free from the bottom clips. Always ask for help, especially for larger or heavier mirrors. An extra set of hands drastically reduces the risk of injury or breakage.
For a detailed visual walkthrough, this tutorial provides excellent guidance on how to remove a mirror secured with clips.
How to Remove Mirrors Attached with Adhesive: A Patient Approach
Mirrors affixed directly to the wall with construction adhesive (often referred to as mirror mastic) require a more cautious and deliberate approach. The goal is to detach the mirror without damaging it or the drywall excessively. Safety and patience are paramount here.
- Prioritize Safety: Always wear heavy-duty work gloves and safety glasses. For added protection, cover the entire surface of the mirror with painter’s tape in a crisscross or grid pattern. This will help contain glass shards if the mirror accidentally breaks.
- Protect Your Surroundings: Lay down drop cloths or old blankets over your vanity, sink, and surrounding floor area to catch any adhesive residue or glass.
- Score Perimeter Sealant: If the mirror has any caulk or sealant around its edges, carefully cut through it with a sharp utility knife. This creates a clean break before you begin prying.
- Gentle Heat Application (Recommended): Applying heat can soften the adhesive. Use a hairdryer or a heat gun on a low setting, moving it slowly over the areas where the adhesive is likely applied (typically in spots on the back of the mirror). Be cautious not to overheat any single spot, which could damage the mirror or wall.
- Introduce Wedges and Pry Tools: Starting from a corner or edge, gently insert thin wooden shims, plastic wedges, or a putty knife between the mirror and the wall. Work slowly, gradually adding more wedges along the edges to create a small gap. Avoid forcing anything, as this can crack the mirror.
- Utilize a Mirror Wire or Piano Wire: For stubborn adhesive, a specialized mirror removal wire or a length of piano wire can be threaded behind the mirror. With a person holding each end of the wire, carefully use a sawing motion to cut through the adhesive spots. This technique requires coordination and a steady hand.
- Slow and Steady Removal: Continue these steps until the adhesive points are sufficiently weakened and the mirror begins to pull away from the wall. Once it’s loose, carefully lift and remove the mirror with the assistance of a second person.
This helpful tutorial demonstrates the more involved process of removing adhesive-backed mirrors. Remember, patience and careful execution will minimize damage and ensure a successful removal.
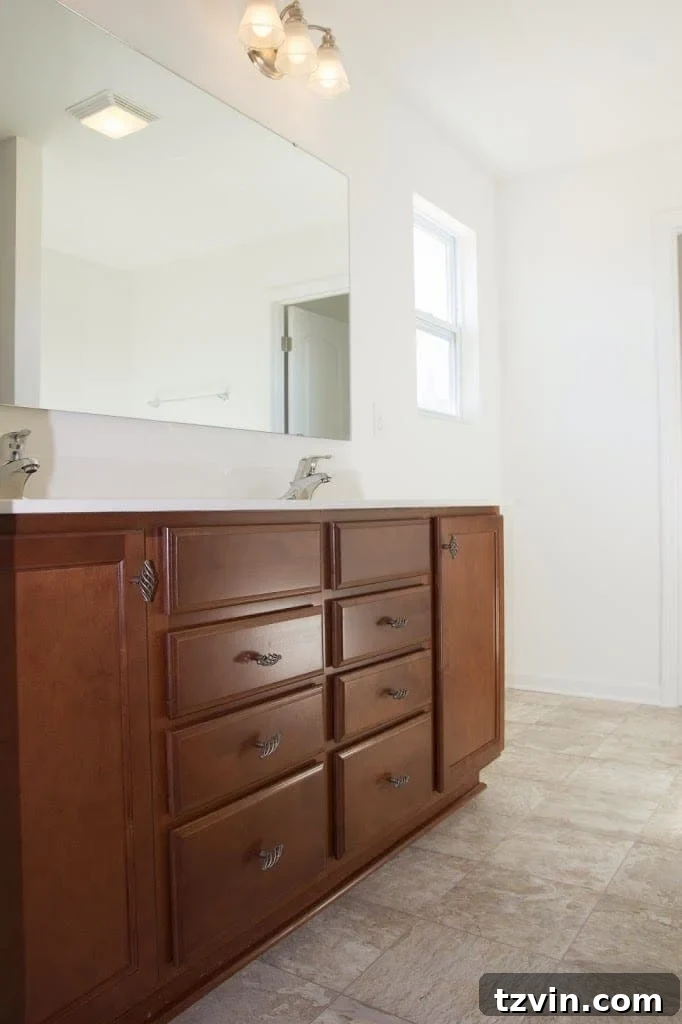
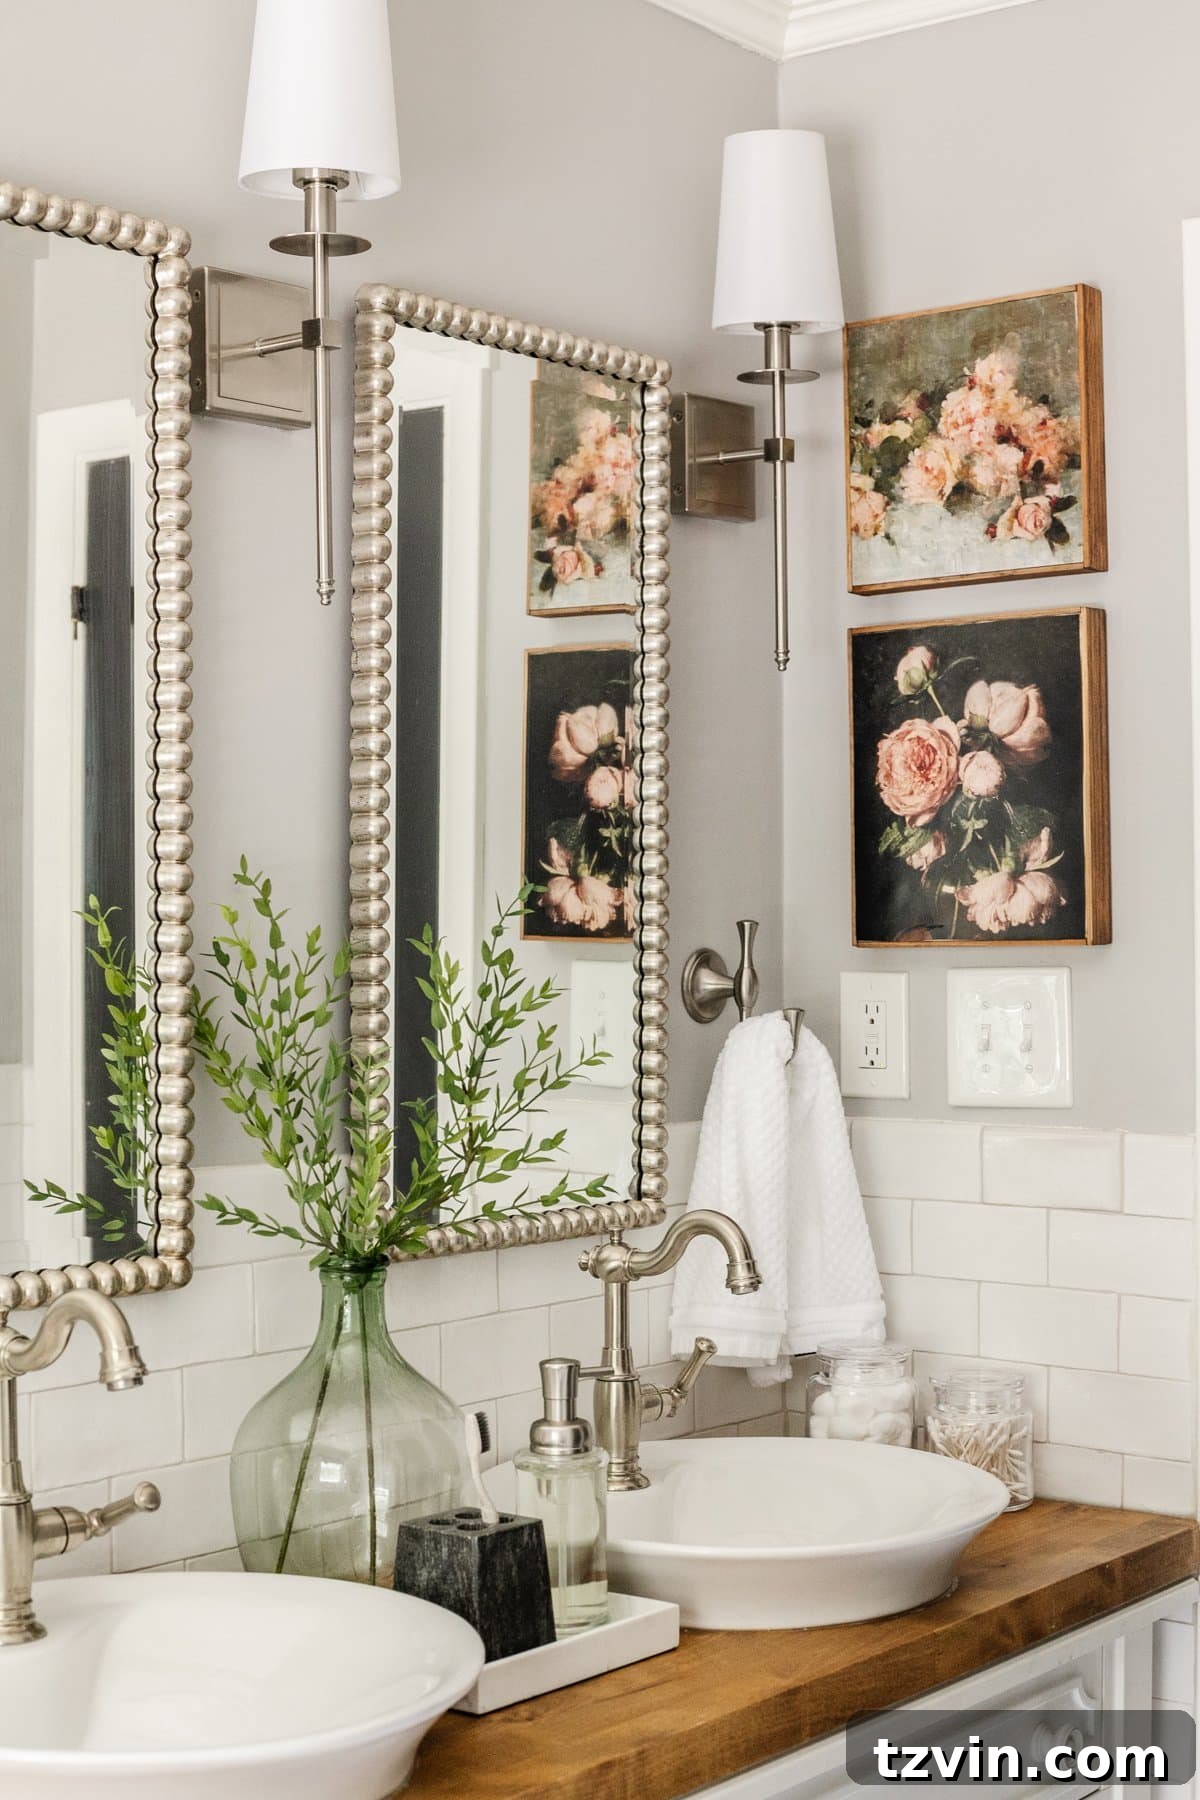
The gratifying transformation achieved by simply replacing a plain, builder-grade mirror with a character-filled vintage piece is profound. It requires no major home improvement skills, yet the dramatic difference is instantly rewarding! Even the most unimaginative builder-grade bathrooms can be imbued with style. Imagine swapping out a sterile, frameless rectangle for a mirror in an antique gold finish or a deep, traditional wood tone – these choices immediately introduce warmth, personality, and a sense of history to an otherwise cold and uninviting space. For instance, the addition of these charming beaded mirrors to our girls’ shared bathroom was exactly the whimsical and unique detail that space craved, proving that even a subtle vintage touch can make a huge impact.
Where to Find Authentic and Affordable Vintage Bathroom Mirrors
The quest for the perfect vintage mirror is often part of the fun – a true treasure hunt. While occasionally you might get lucky and stumble upon an incredible antique mirror at a local thrift store (I’ve even curated a stunning gallery wall entirely from thrifted frames before!), consistently finding exactly what you envision, especially two matching pieces for a double vanity, requires strategy, patience, and knowing where to look.
Here’s a comprehensive guide to increasing your chances of finding exceptional secondhand and affordable vintage-style mirrors, both through online platforms and in-person scouting:
Online Marketplaces: Your Digital Treasure Trove
Online platforms offer an expansive selection, allowing you to filter by style, size, and price from the comfort of your home. To optimize your search, use specific keywords such as “gilt mirror,” “Venetian mirror,” “ornate mirror,” “beveled mirror,” “antique gold mirror,” or the specific era you’re interested in (e.g., “Art Deco mirror”).
- eBay: This global marketplace is a goldmine for unique and antique items. Always meticulously review seller ratings, thoroughly examine all detailed photos, and factor in potentially high shipping costs for fragile items.
- Etsy: Celebrated for its handmade and vintage goods, many Etsy sellers specialize in curating specific vintage styles, often offering beautifully restored pieces or those with a distinct character.
- Facebook Marketplace: An outstanding resource for local finds. Make it a habit to search your geographic area regularly, as new listings appear constantly. You can often negotiate prices directly with sellers and arrange for local pickup, saving significantly on shipping. For more tips, explore how to find the best deals on Facebook Marketplace.
- Amazon Marketplace (Third-Party Sellers): While primarily known for new products, some third-party sellers on Amazon do offer vintage or vintage-inspired home decor. Exercise caution and scrutinize product descriptions and seller reviews carefully.
- OfferUp / Craigslist: Similar to Facebook Marketplace, these platforms are excellent for discovering local items available for pickup. Always prioritize safety by arranging to meet in a public location for transactions.
In-Person Sourcing: The Thrill of Discovery
There’s an undeniable joy and charm in finding a vintage piece in person. These venues allow you to physically inspect the quality, authenticity, and character of a mirror before making a purchase.
- Goodwill, Salvation Army, and Local Thrift Shops: These stores are true wild cards – some days you’ll find nothing, and other days you’ll unearth incredible, budget-friendly treasures. Frequent visits are key to increasing your success rate. Maximize your chances by learning Goodwill shopping secrets.
- Habitat for Humanity ReStore: These unique stores sell new and gently used home improvement items, including a variety of mirrors, often donated from home remodels. You might find a modern piece with a vintage feel or a genuinely old find.
- Yard Sales / Garage Sales: Arriving early on the first day of a sale can give you an edge. Keep an eye out for advertised estate or multi-family sales, which often yield a wider selection of home goods.
- Estate Sales: Typically conducted when a home is being cleared out, estate sales are fantastic opportunities to find authentic antique and vintage pieces. Prices are often negotiable, especially towards the end of the sale.
- Antique Shops / Consignment Shops: These establishments specialize in curated vintage and antique items. While prices might be higher than at a thrift store, the quality, authenticity, and uniqueness of the pieces are often guaranteed. They’re also wonderful places to gather inspiration and understand different vintage styles.
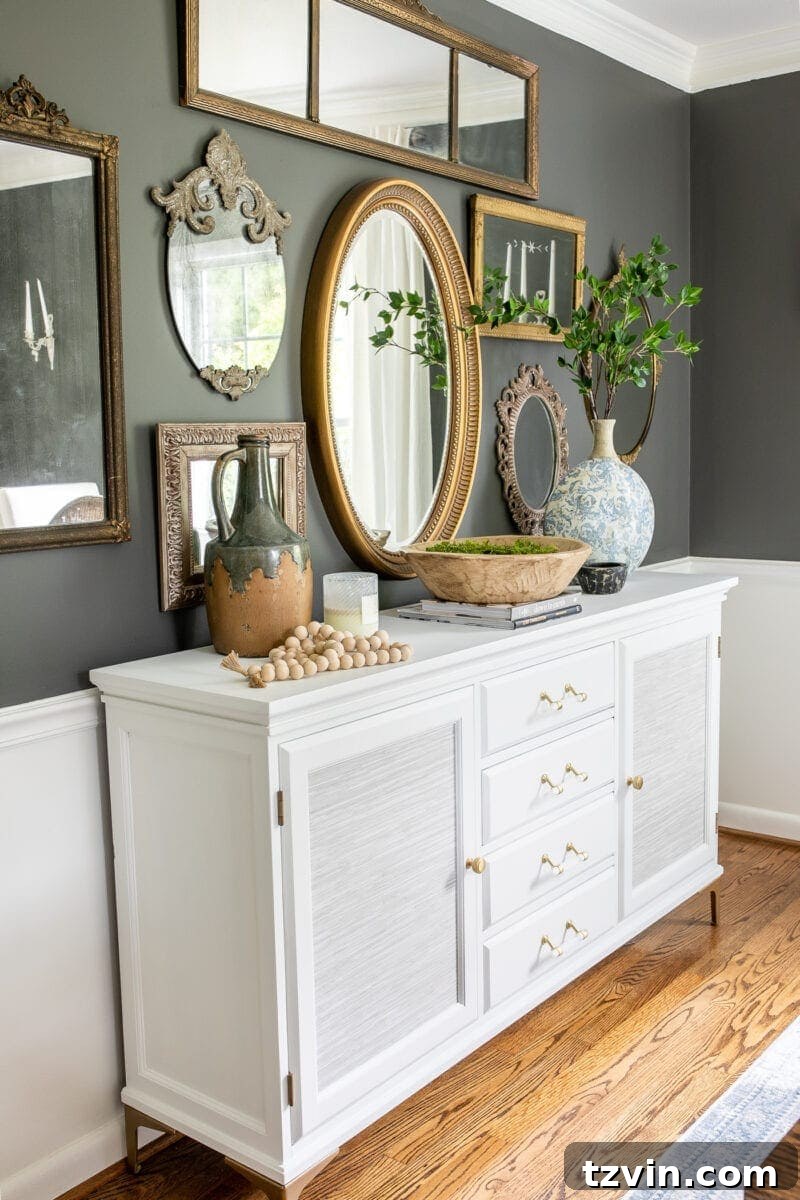
Curated Selection: Affordable Vintage Bathroom Mirrors Under $300
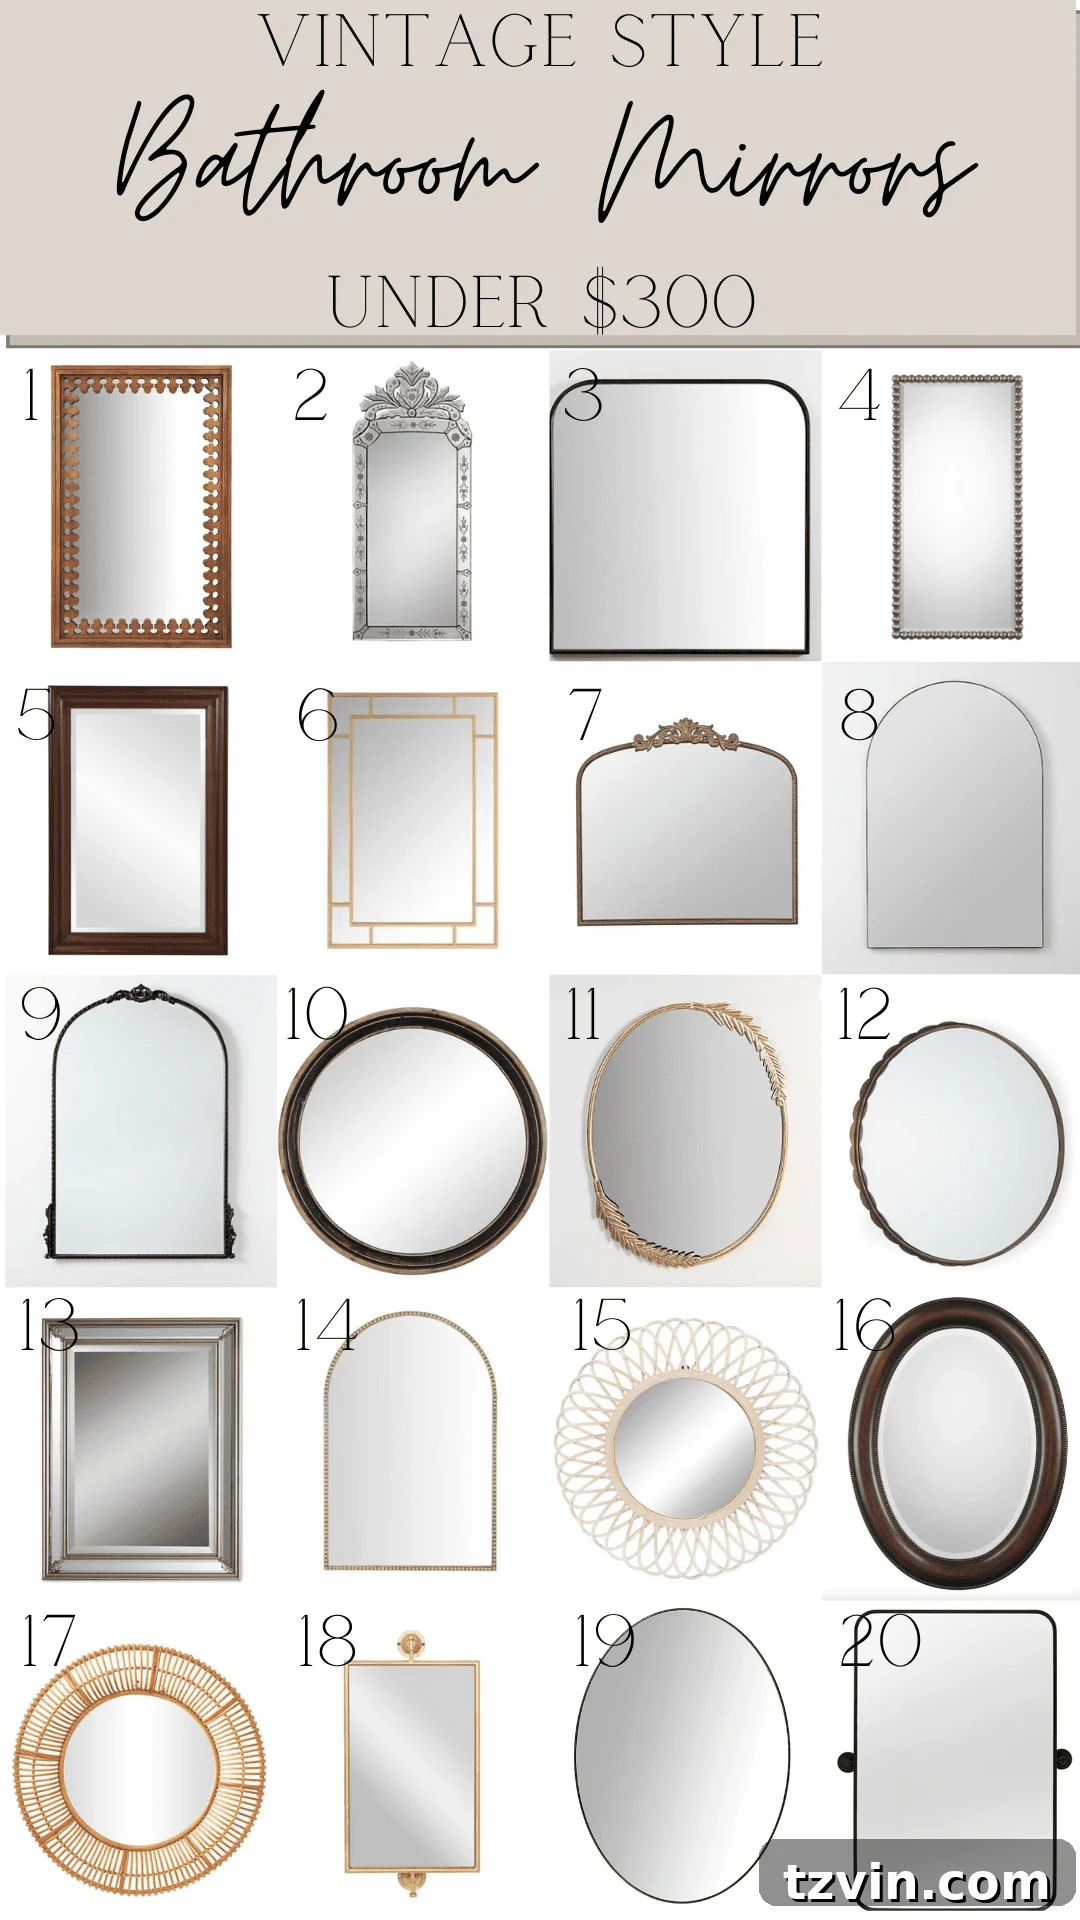
While the excitement of finding an authentic antique at a bargain price is unparalleled, sourcing two perfectly matching vintage mirrors for a double vanity can be an exceedingly rare and time-consuming endeavor. Sometimes, the practical choice is to opt for new vintage-style mirrors that offer the desired aesthetic with modern convenience and affordability. To assist you in achieving that coveted vintage look without exceeding your budget, I’ve diligently compiled a selection of my absolute favorite bathroom mirrors. All of these options are priced under $300, with many incredibly stylish choices available for around $100 or even less.
1 |
2 |
3 |
4 |
5 |
6 |
7 |
8 |
9 |
10 |
11 |
12 |
13 |
14 |
15 |
16 |
17 |
18 |
19 |
20
Click any image in the gallery below to shop these stylish and affordable vintage-inspired mirrors via affiliate links.
DIY Vintage Mirror Makeover: Transform Your Existing Frame with Paint
If you already have a framed bathroom mirror but long for a more aged, characterful aesthetic, purchasing a brand new vintage piece isn’t your only option. A simple dry-brushing paint method can work wonders, magically transforming your current mirror to look authentically vintage, often for no more than the cost of a sample pot of paint. This budget-friendly DIY project is an ideal way to inject a touch of antique charm and warmth without a major investment.
Mastering the Dry-Brushing Technique for Vintage Charm
Dry brushing is an artistic painting technique characterized by applying very little paint to the brush, which is then lightly dragged across a surface. This method purposefully allows the base color or existing texture to show through, creating a distressed, aged, highlighted, or subtly layered effect. It’s perfectly suited for achieving that coveted vintage look on mirror frames.
- Frame Preparation: Thoroughly clean your mirror frame to ensure it’s completely free of dust, grime, and grease. If the surface is glossy, a light sanding with fine-grit sandpaper will help the paint adhere better. Don’t forget to meticulously mask off the mirror glass with painter’s tape to protect it from stray paint.
- Paint Selection: Chalk paint or milk paint are excellent choices for achieving a vintage effect due to their matte finish and superior adhesion, often without the need for extensive priming. Acrylic craft paint can also be used effectively. Select a paint color that harmonizes with your bathroom decor – deep tones like charcoal gray, classic black, or rich bronze typically yield striking and authentic vintage results.
- Brush Loading (Crucially Sparingly): Dip just the very tip of a stiff-bristled brush into your chosen paint. The key is to then offload almost all of the paint onto a paper towel, a piece of scrap cardboard, or a dry rag. Your brush should feel noticeably dry, leaving only a subtle whisper of paint.
- Light and Feathery Application: Gently drag the almost-dry brush across the mirror frame. Follow the natural grain of the wood or the contours of the frame’s details. Use light, feathery strokes rather than heavy, continuous ones. The objective is not full, opaque coverage but rather to highlight the frame’s texture and allow glimpses of the original finish to peek through, creating an aged appearance.
- Layering for Depth and Authenticity: For added depth and a more authentic vintage look, you can apply multiple thin layers, ensuring each layer is completely dry before adding the next. Consider dry-brushing a lighter, perhaps metallic, shade (like soft gold, antique bronze, or silver) over a darker base coat to simulate wear and patina.
- Sealing for Durability: Once your paint layers are fully dry and you’re satisfied with the vintage finish, apply a clear matte or satin sealer. This protective coat is essential, especially in a humid bathroom environment, to shield the paint from moisture, chipping, and everyday wear, ensuring your beautiful makeover lasts.
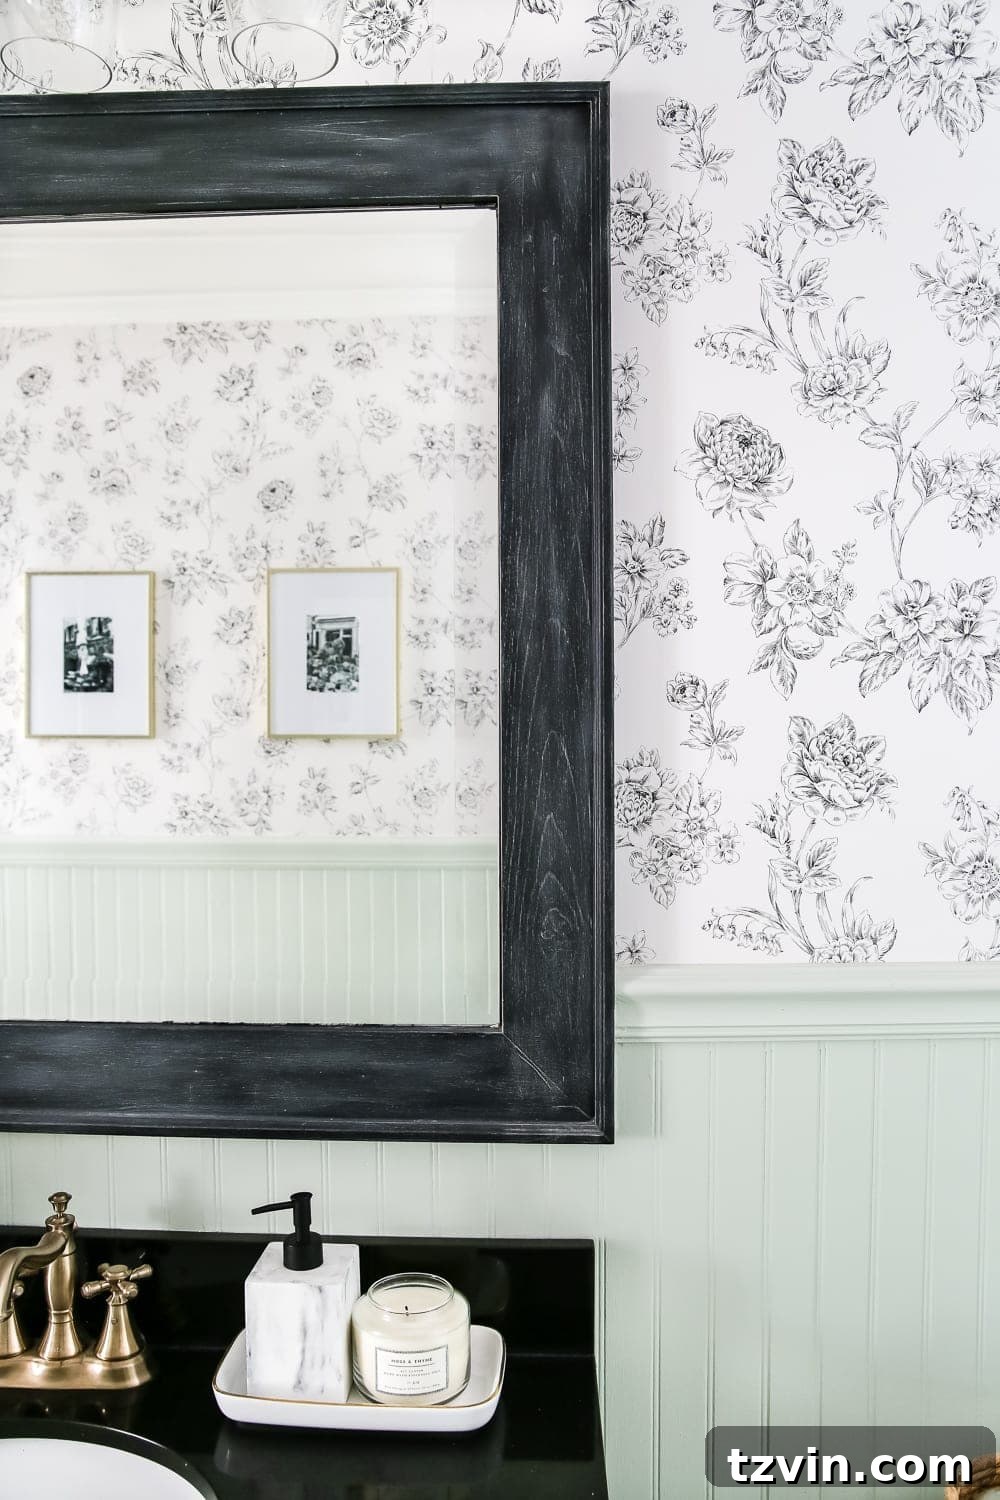
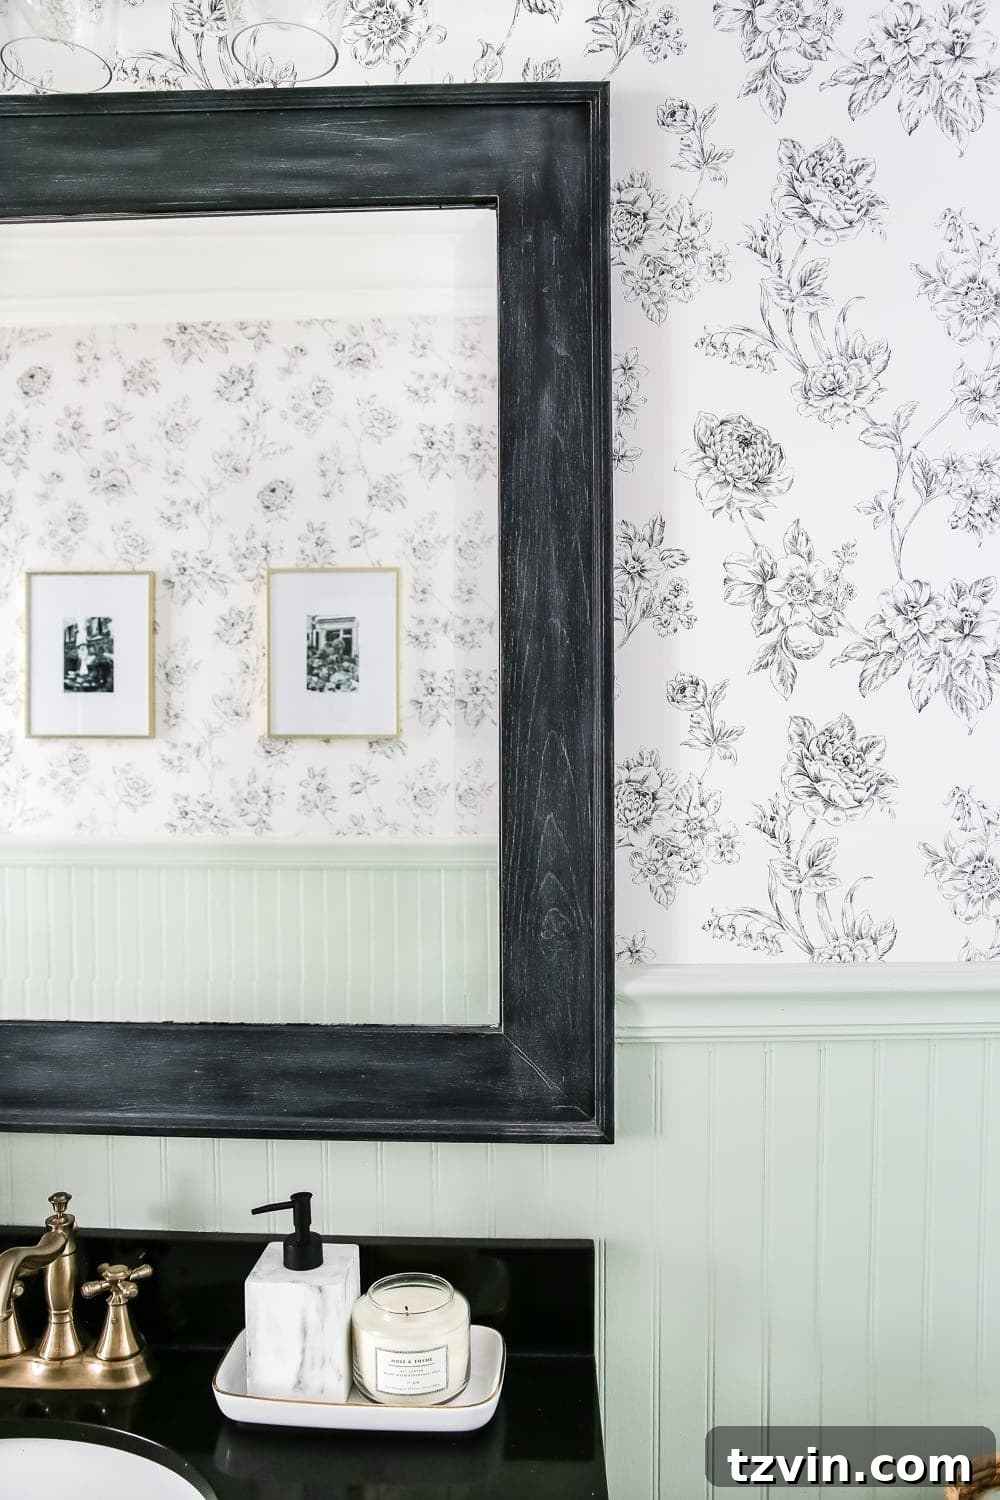
I absolutely love the transformation of our existing powder room mirror after simply painting it using this dry-brushing method. Notice how that lovely wood grain subtly peeks through the dry-brushed black paint? It truly accentuates the frame’s inherent texture and infuses it with incredible character, making it appear genuinely vintage and adding a personalized touch to the space.
Elevate Your Existing Mirror: DIY Frame a Builder-Grade Mirror
Perhaps the thought of removing your existing builder-grade vanity mirror feels like too large a project, or you simply prefer to work with what you already have. The good news is that you can still achieve a custom, high-end, and vintage-inspired look by adding a frame directly to an existing frameless builder-grade mirror. This DIY project is surprisingly straightforward and delivers stunning results, instantly upgrading the entire aesthetic of your vanity area without the hassle of full mirror replacement.
Step-by-Step DIY Framing for a Builder-Grade Mirror
This method involves carefully cutting and finishing wood to create a beautiful, custom frame that attaches directly onto your mirror glass.
- Precise Measurements: Begin by accurately measuring the exact length and width of your mirror. Next, decide on the desired width of your frame. Common choices include 1×4 (actual size approximately 0.75″ x 3.5″) or 1×6 boards, depending on the visual impact you want to achieve.
- Cut Your Wood Pieces: Purchase four pieces of wood – pine, oak, or even MDF (if you plan to paint) are popular choices – to form the perimeter of your frame. Using a miter saw, carefully cut the ends of each board at a perfect 45-degree angle. Precision here is paramount to ensure tight, seamless mitered corners when assembled.
- Finish the Boards: Before attaching them, it’s essential to finish your wood pieces. You can stain them in a rich, traditional tone for a classic look, or paint them to complement your bathroom’s existing color scheme. Consider applying a distressed finish or using the dry-brushing technique mentioned earlier for a truly vintage aesthetic.
- Crucial Sealing for Humidity: This step cannot be overstated in a bathroom environment. Apply several generous coats of a marine-grade polyurethane or a similar high-quality, water-resistant sealant to all sides of your finished wood pieces. This protective barrier is vital to shield the wood from the inevitable humidity and moisture in a bathroom, preventing warping, swelling, or other damage over time.
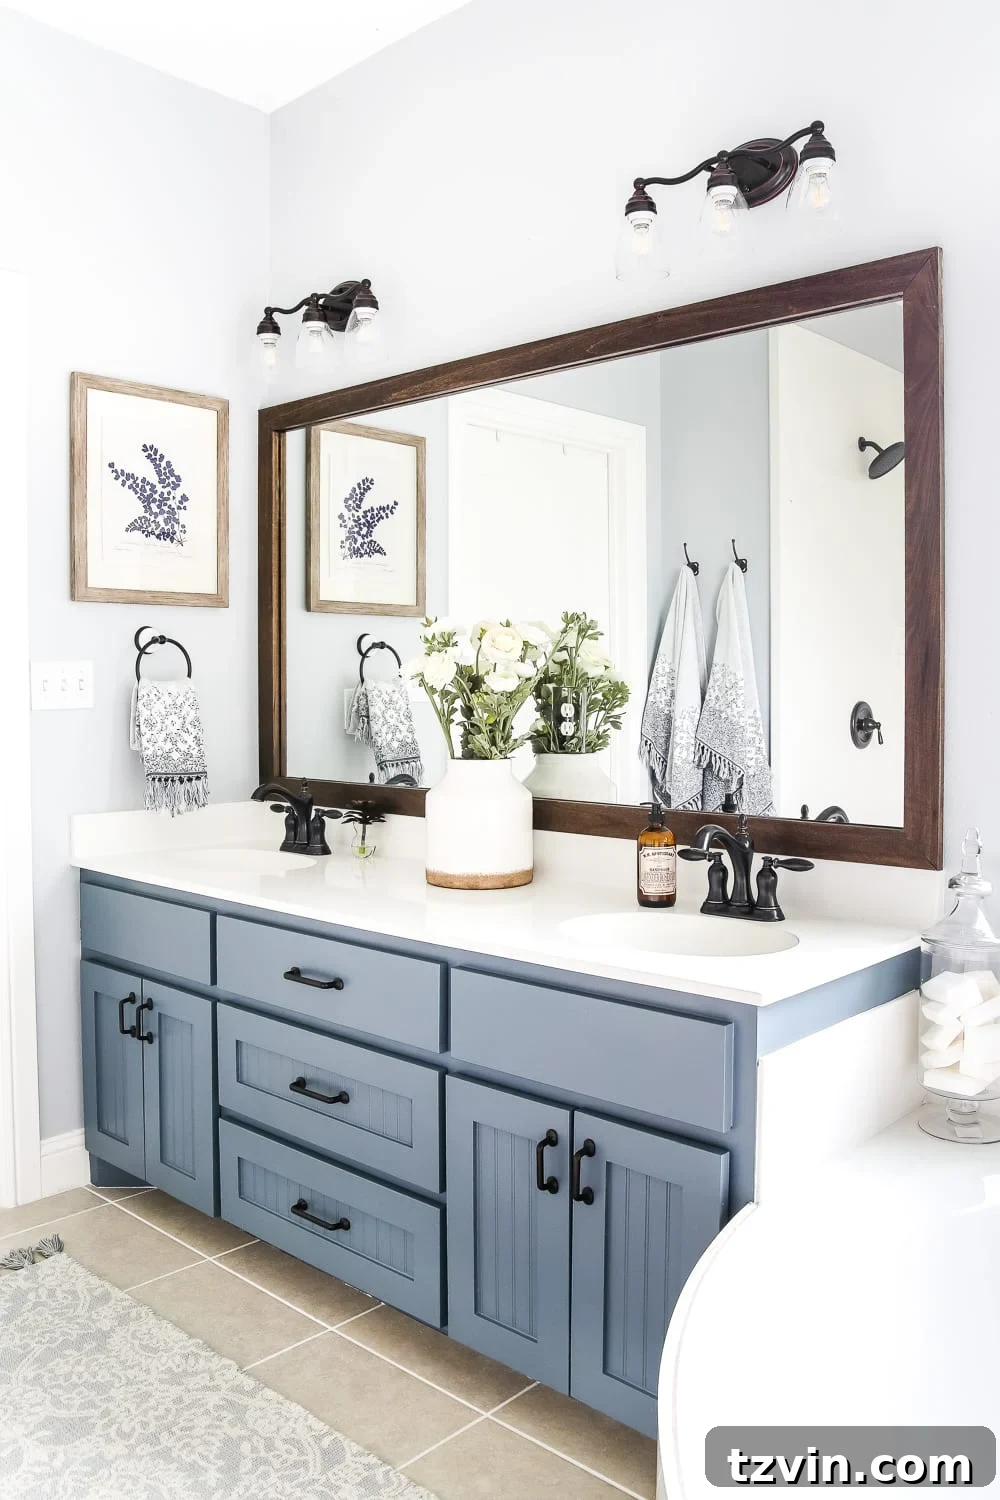
- Attach the Frame Pieces with Adhesive: Once the sealant is completely dry, it’s time for assembly. Apply a strong, construction-grade adhesive (such as a silicone-based adhesive or liquid nails specifically formulated for mirror and wood applications) to the back of each frame piece. For the best visual blend, choose an adhesive color that closely matches your wood finish – for example, we successfully used black adhesive for framing this vanity mirror during our 2-day bathroom makeover, which perfectly complemented the dark wood.
- Secure and Cure: Carefully align each frame piece to the mirror, ensuring the mitered corners meet precisely to form a tight joint. Use painter’s tape to firmly hold the wood in place. For larger or heavier frames, clamps can provide extra security. Allow the adhesive to cure completely overnight, or according to the manufacturer’s specific instructions, to ensure a strong, lasting bond.
If the prospect of cutting and finishing wood from scratch seems a bit daunting, there’s an excellent and convenient shortcut available. Companies like Mirror Mate specialize in creating custom-sized frames that are designed to simply attach directly to your existing builder-grade mirror. This option eliminates most of the measuring and cutting work, providing a professional-looking result with significantly less DIY effort.
Styling Your New Vintage Mirror: Harmonizing Your Bathroom Decor
Once your beautiful vintage or vintage-inspired mirror is expertly installed, consider how it integrates with and enhances the rest of your bathroom decor. A vintage mirror is more than just a reflective surface; it’s a stunning focal point that draws the eye, infusing the space with instant character and a touch of curated elegance. Here are a few tips to maximize its impact and ensure a cohesive design:
- Thoughtful Lighting Pairings: The right lighting can significantly enhance your vintage mirror. Antique brass or wrought iron sconces often beautifully complement classic gold or dark wood frames, creating a cohesive, traditional, or transitional look. Conversely, minimalist black or sleek chrome sconces can create a striking and sophisticated contrast with an ornate vintage piece, ideal for a modern vintage or eclectic aesthetic.
- Complementary Vanity Choices: If you’re also in the process of upgrading your vanity, consider how the mirror’s style will play off of it. A weathered wood vanity can beautifully enhance a rustic vintage mirror, while a sleek, contemporary vanity with clean lines can create an intriguing juxtaposition with an opulent antique frame, adding depth and interest to the room.
- Balanced Accessories: Maintain a sense of balance with your other bathroom accessories. If your chosen mirror is highly ornate and decorative, opt for simpler, understated soap dispensers, towel racks, and decorative items to prevent the space from feeling cluttered or overwhelming. If the mirror itself is more subtly vintage, you have more freedom to introduce bolder or more intricate decorative accents elsewhere.
- Impact of Wall Color and Treatment: The wall directly behind the mirror plays a crucial role in its presentation. A deep, rich paint color (such as a jewel tone or a moody dark hue) can make a light-framed or gilded mirror truly pop, creating a dramatic backdrop. Conversely, a delicate wallpaper pattern, particularly one with a subtle texture or vintage-inspired motif, can provide a beautiful, soft backdrop for a simpler vintage mirror, adding layers of visual interest.
Final Thoughts on Your Bathroom Transformation
Transforming your bathroom doesn’t necessitate an extensive overhaul or an exorbitant budget. Simply replacing a standard builder-grade mirror with a thoughtfully chosen vintage piece – whether it’s an authentic antique treasure or a cleverly created DIY project – is an incredibly powerful and accessible way to inject unparalleled personality, warmth, and timeless style into your space. It’s an upgrade that pays significant dividends in both aesthetics and personal satisfaction, making your bathroom a truly unique reflection of your taste.
Have you recently embarked on a similar journey to find or create the perfect vintage mirror for your bathroom? Perhaps you’ve uncovered some incredible local shops or online resources for scoring fantastic deals on vintage decor of any kind? I would genuinely love to hear about your discoveries, tips, and personal experiences! We truly have to stick together on this kind of stuff when it comes to creating beautiful, character-filled homes on a budget, and sharing insights benefits our entire community. Don’t hesitate to share your stories and recommendations in the comments below!
More Ideas to Inspire Your Bathroom Upgrade Journey
If you’re eager to continue enhancing your bathroom’s style and functionality, explore these related articles for additional inspiration, practical tips, and budget-friendly ideas:
- Best Places to Buy Furniture Hardware and Kitchen Cabinet Pulls
- How to Spray Paint Bathroom Fixtures for a Fresh, Updated Look
- 10 Spa Bathroom Ideas to Create Luxury for Less at Home
- Black and White Bathroom Decor Swaps for a Classic Refresh
- Smart Bathroom Organization Ideas for Every Family’s Needs
- The Best Vintage-Style Vanity Light Sconces for All Budgets
- Our Painted Sink, Countertop, Tub & Shower: An 8-Month Review