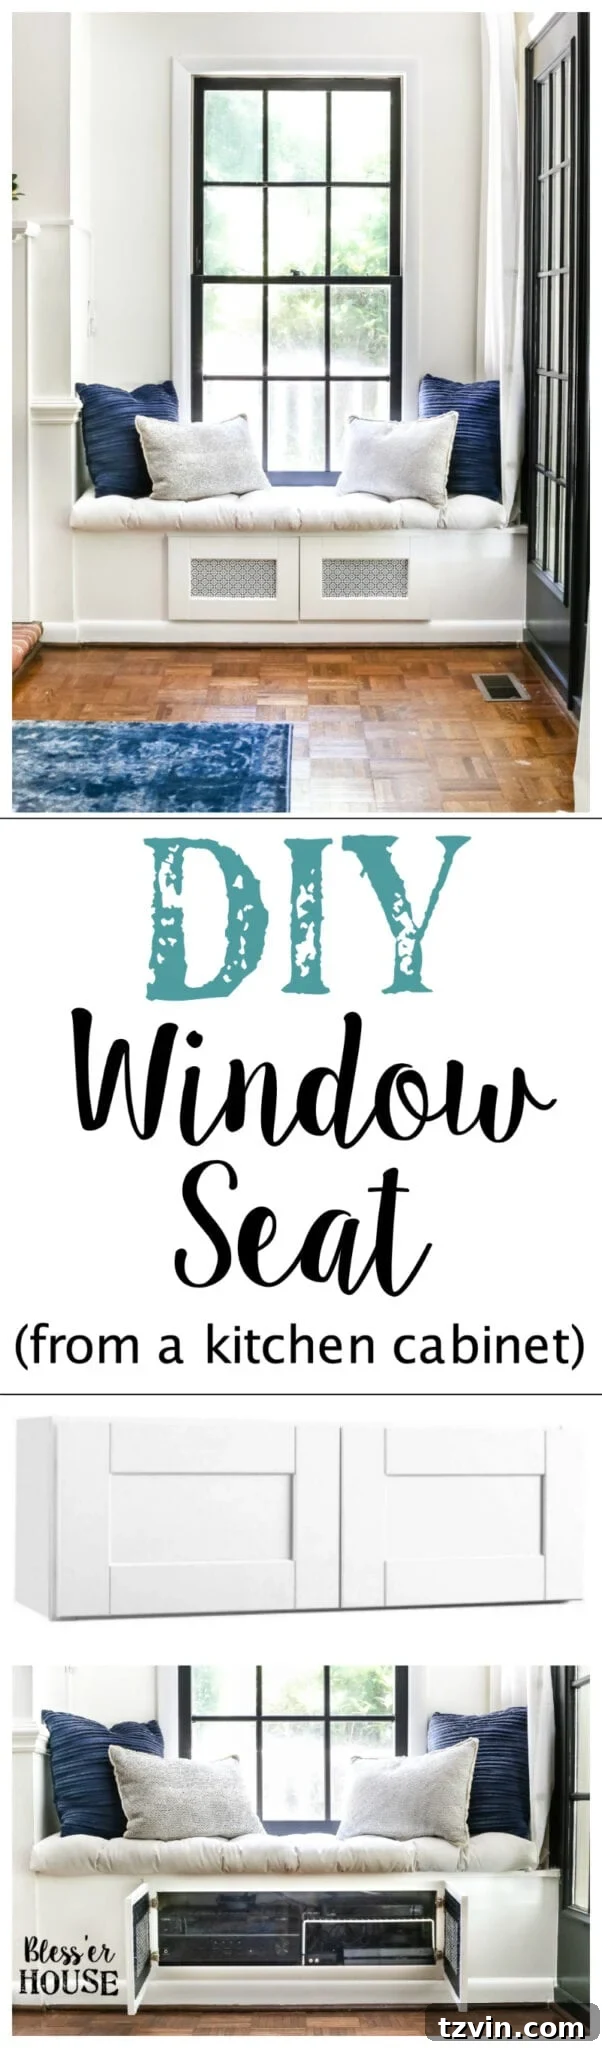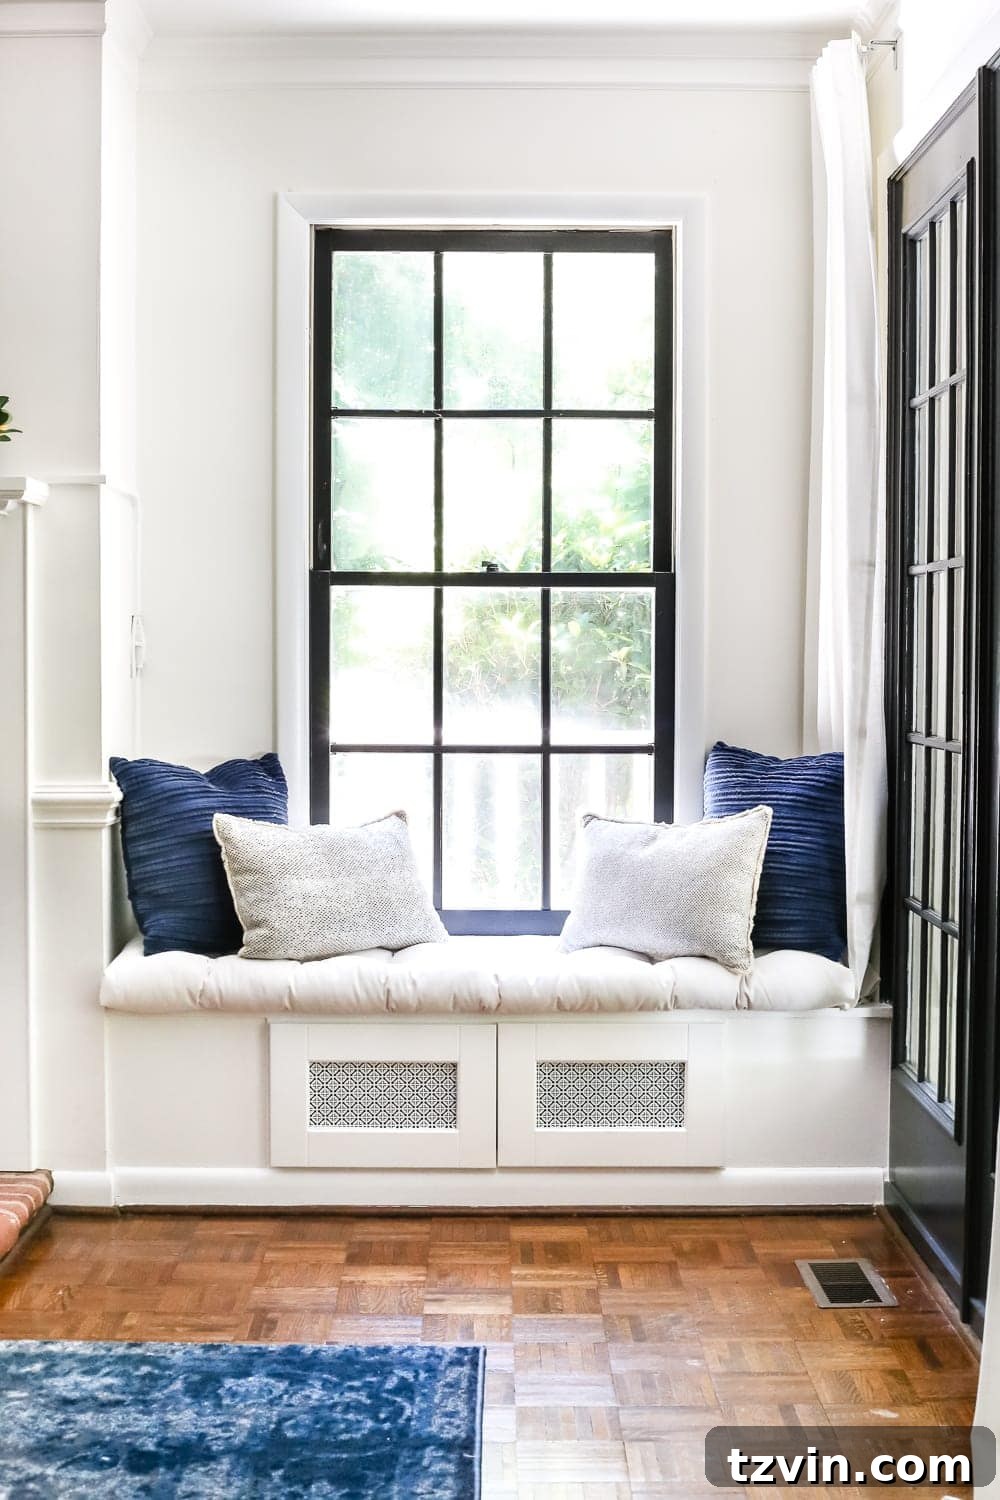
Welcome to our latest living room transformation update, where we’re making significant strides toward creating a space that is both beautiful and highly functional! My husband, Robert, and I recently tackled a notorious “chaos corner” that had been a persistent source of frustration since we first moved in. This area, once a cluttered eyesore, desperately needed a solution that would not only organize our electronics but also enhance the overall aesthetic of our favorite room in the house.
The infamous chaos corner:
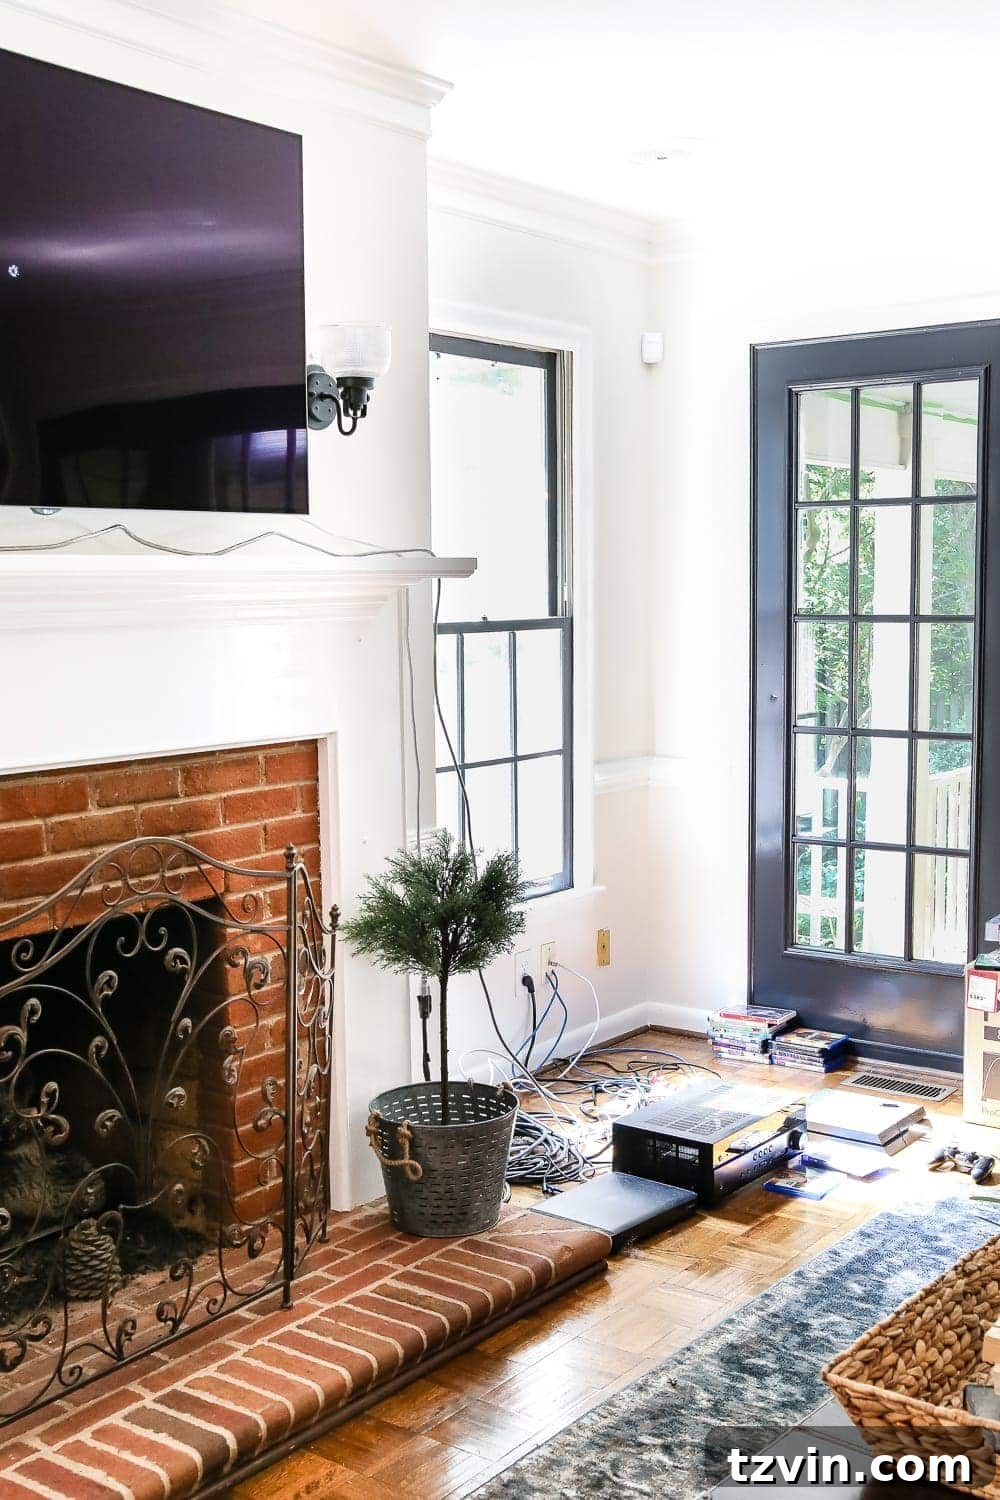
Our living room has undergone a remarkable metamorphosis since its former days of bright sunshine yellow walls and beige trim. By opting for crisp white walls and striking black doors, we’ve managed to create an illusion of significantly expanded space, making the room feel ten times larger and more modern. Further enhancing its charm, we’ve integrated stylish IKEA furniture, a unique Craigslist coffee table find, complimentary botany prints that add a touch of nature, and a fabulous new ceiling fan. These elements combined have truly elevated the room, cementing its status as my most cherished space at home.
However, despite these aesthetic upgrades, one persistent challenge remained: the management of our electronics. With our television necessarily mounted above the fireplace, we were left with a dilemma regarding our surround sound receiver, cable box, and game console. These essential components were perpetually exposed, creating an unsightly tangle of wires and devices. (I even suggested a nostalgic return to an antenna, but Robert wasn’t quite as enthusiastic about that idea! 😉 )
Many insightful readers proposed relocating the electronics to a closet and utilizing an infrared system. While a clever idea, our home presented a practical obstacle: the only suitable closet was located at the opposite end of the house, near the front door, making it an impractical solution for daily use. Coincidentally, we had already been envisioning the addition of built-in window seats flanking our fireplace. It quickly became clear that integrating electronics storage into a window seat design was the perfect, elegant solution to our clutter conundrum. Bingo! Problem solved, and a new project was born.
Rather than embarking on a complex, time-consuming build from scratch, we decided to take a clever shortcut: repurposing a compact kitchen cabinet. This approach significantly streamlined the process, transforming a potentially daunting DIY project into an achievable weekend endeavor.
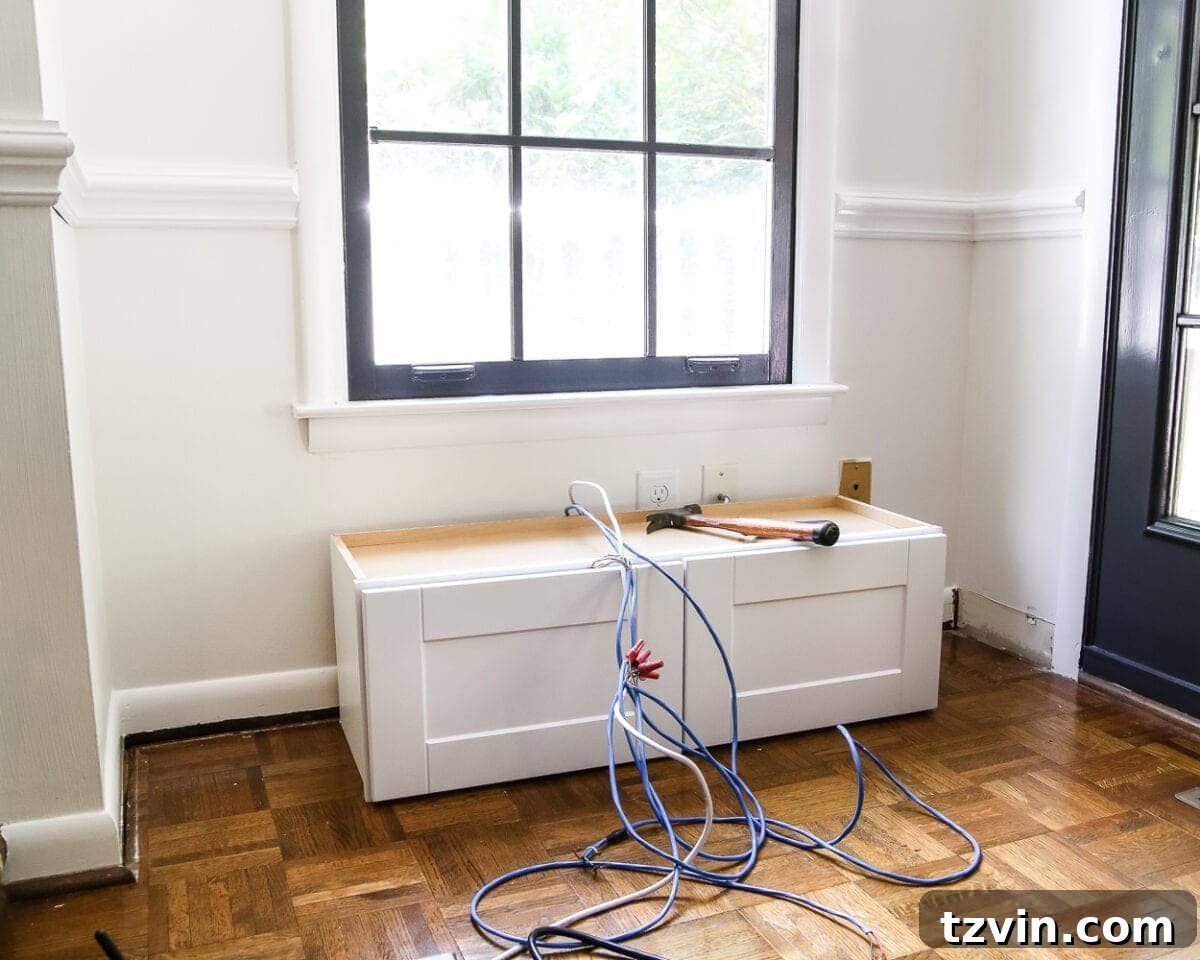
While building a window seat entirely from raw materials is certainly an option for experienced DIYers, the efficiency and convenience of starting with a pre-fabricated kitchen cabinet cannot be overstated. It significantly reduces the amount of cutting, assembling, and measuring required, making the project much more accessible and quicker to complete. Our particular space was just two inches shy of accommodating two cabinets, so we tailored our design around a single, perfectly sized unit.
Supplies Used for Your DIY Window Seat
(Some affiliate links are provided below for your convenience, helping us continue to share great DIY content.)
- Kitchen cabinet (Ours measured 36″x12″x12″ – choose dimensions that fit your space)
- 4 – 2″x4″x8′ lumber boards (for framing and support)
- 3/4″x2’x4′ pre-primed plywood (for structural integrity and a smooth finish)
- Wood baseboard (ensure it matches your existing room trim for a cohesive look)
- Quarter round molding strip (to finish edges neatly)
- 1″x12″x6′ board (for the primary seat top)
- 1″x10″x6′ board (for additional seat top depth/support)
- Tape measure (accurate measurements are key!)
- Pencil (for marking cuts)
- Small crowbar (for careful trim removal)
- Square tool (to ensure all cuts and installations are perfectly plumb)
- Hammer (for nailing components)
- 1 1/2″ carpentry nails (for framing and structural pieces)
- 1 1/4″ finishing nails (for trim and visible elements)
- Caulk (to fill gaps and create seamless transitions)
- Wood filler (for concealing nail holes and imperfections)
- Fine grit sandpaper (for a smooth, paint-ready surface)
- Circular saw (for straight, efficient cuts of lumber and plywood)
- Jigsaw (essential for cutting intricate shapes and openings in the cabinet)
- Primer (We used Kilz Premium for excellent coverage and adhesion)
- Paint (Benjamin Moore Simply White in Semigloss, perfectly matching our existing trim)
- Manual staple gun and staples (for attaching metal sheets)
- 2 aluminum metal sheets (for remote signal pass-through)
- Sheet metal snips (for cutting aluminum sheets)
- Paint brush (for smooth application)
This entire project, from initial measurements to the final coat of paint, was completed in approximately eight hours. This truly exemplifies the spirit of a “weekend warrior” project, proving that significant home improvements can be achieved with dedication and a clever approach, even on a tight schedule!
The Step-by-Step Guide to Building Your Custom Window Seat
1. Prepare the Space for Installation: Our first task was to meticulously prep the designated area. Using a small crowbar, we carefully removed the existing baseboard and quarter-round trim. We took care to keep the quarter-round intact, setting it aside for reinstallation later, as it perfectly matches our hardwood flooring and helps create a seamless finish. Once the trim was off, we took precise measurements of the exact width of our window nook. This initial measurement is crucial for ensuring the base of your window seat fits snugly and looks professionally integrated.
2. Construct the Sturdy Base Frame: A solid foundation is paramount for any built-in furniture. We began by constructing a robust base using 2″x4″ lumber. We cut two of the 2″x4″ boards to match the exact width of our window space. To provide ample support for the kitchen cabinet that would form the core of our window seat, we then added several 2″x4″ braces between these front and back pieces. This creates a sturdy, level platform that will bear the weight of the cabinet and the seat top, ensuring durability and stability.
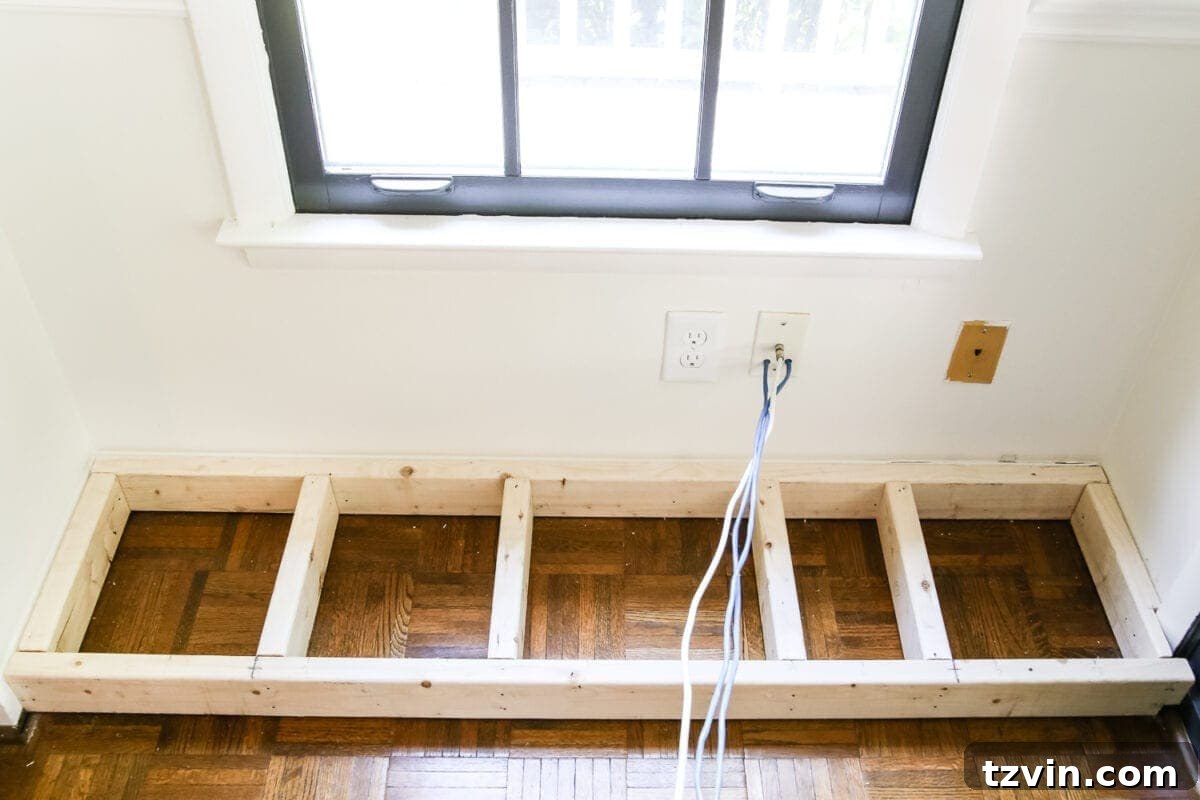
3. Secure the Base to the Wall: With the base frame assembled, we securely nailed it to the back and side walls of our window nook. This step is critical for preventing any shifting or movement of the window seat over time, ensuring it feels like a permanent, integral part of the room’s architecture. Use sturdy nails or screws appropriate for your wall type.
4. Dry Fit the Cabinet and Measure for Braces: Before final installation, we “dry fit” the kitchen cabinet on top of our newly constructed base. This allowed us to visualize the fit and, more importantly, to accurately measure the required height for the vertical support braces that would hold the cabinet firmly in place. This “measure twice, cut once” philosophy prevents costly errors and ensures a precise fit.
And of course, no DIY project is complete without a few silly faces. A touch of humor keeps the spirits high during the inevitable challenges of home improvement!
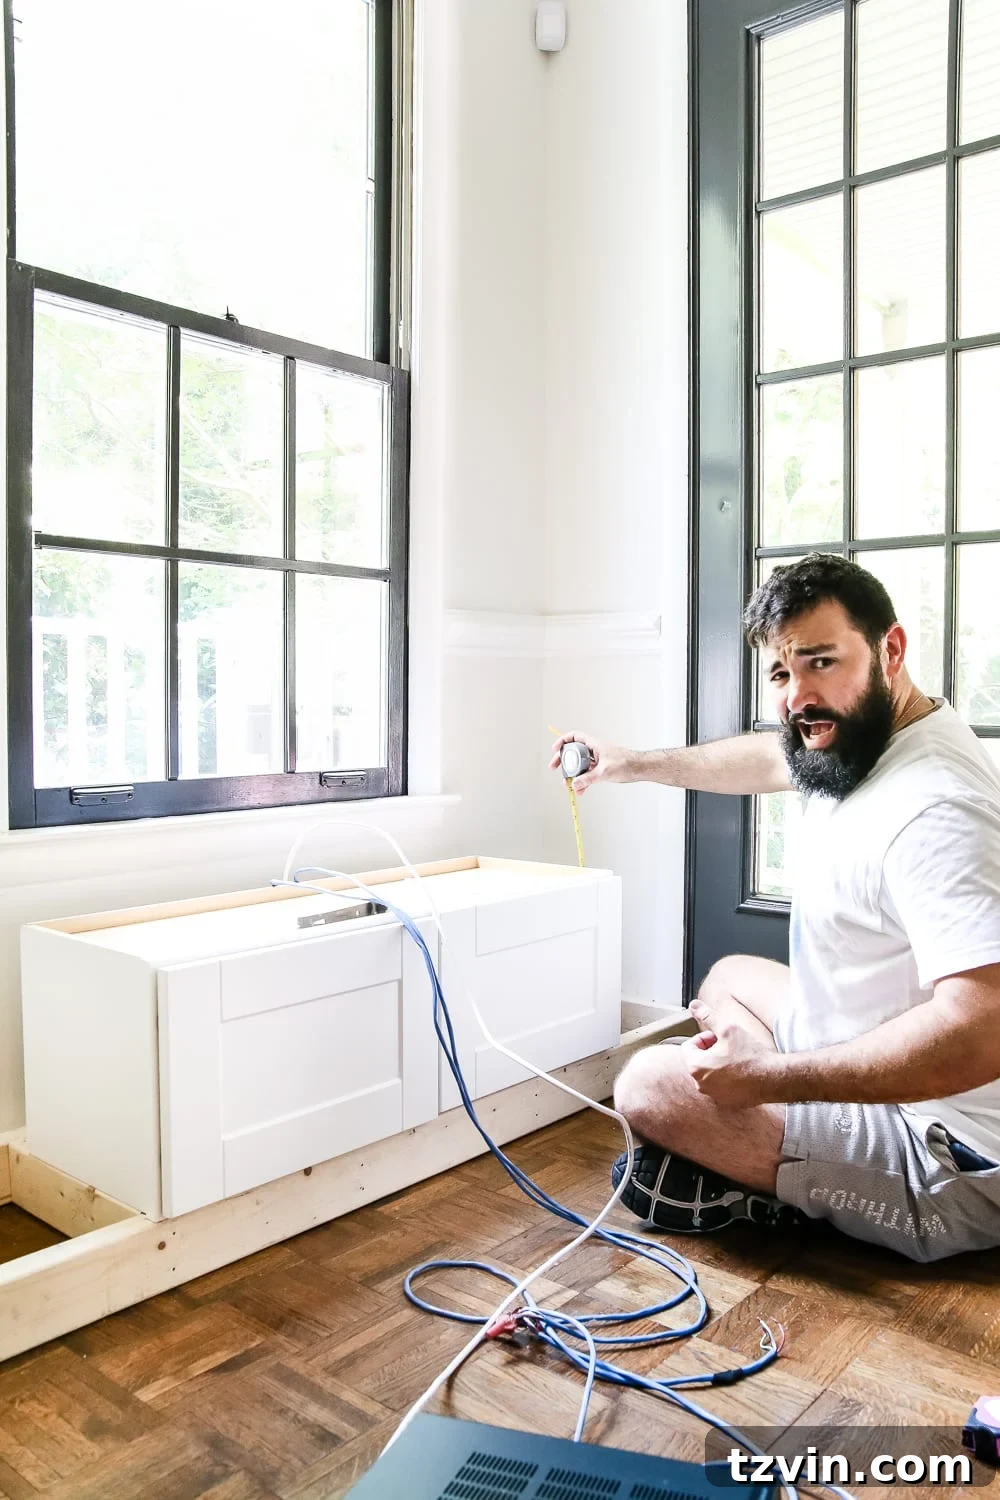
5. Cut and Prepare Cabinet Support Braces: Utilizing the measurements obtained during our dry fit, we used our circular saw to precisely cut additional 2″x4″ boards. These pieces would serve as crucial vertical braces, further securing the cabinet to the structure and enhancing its overall stability, particularly important for a piece of furniture designed for seating.
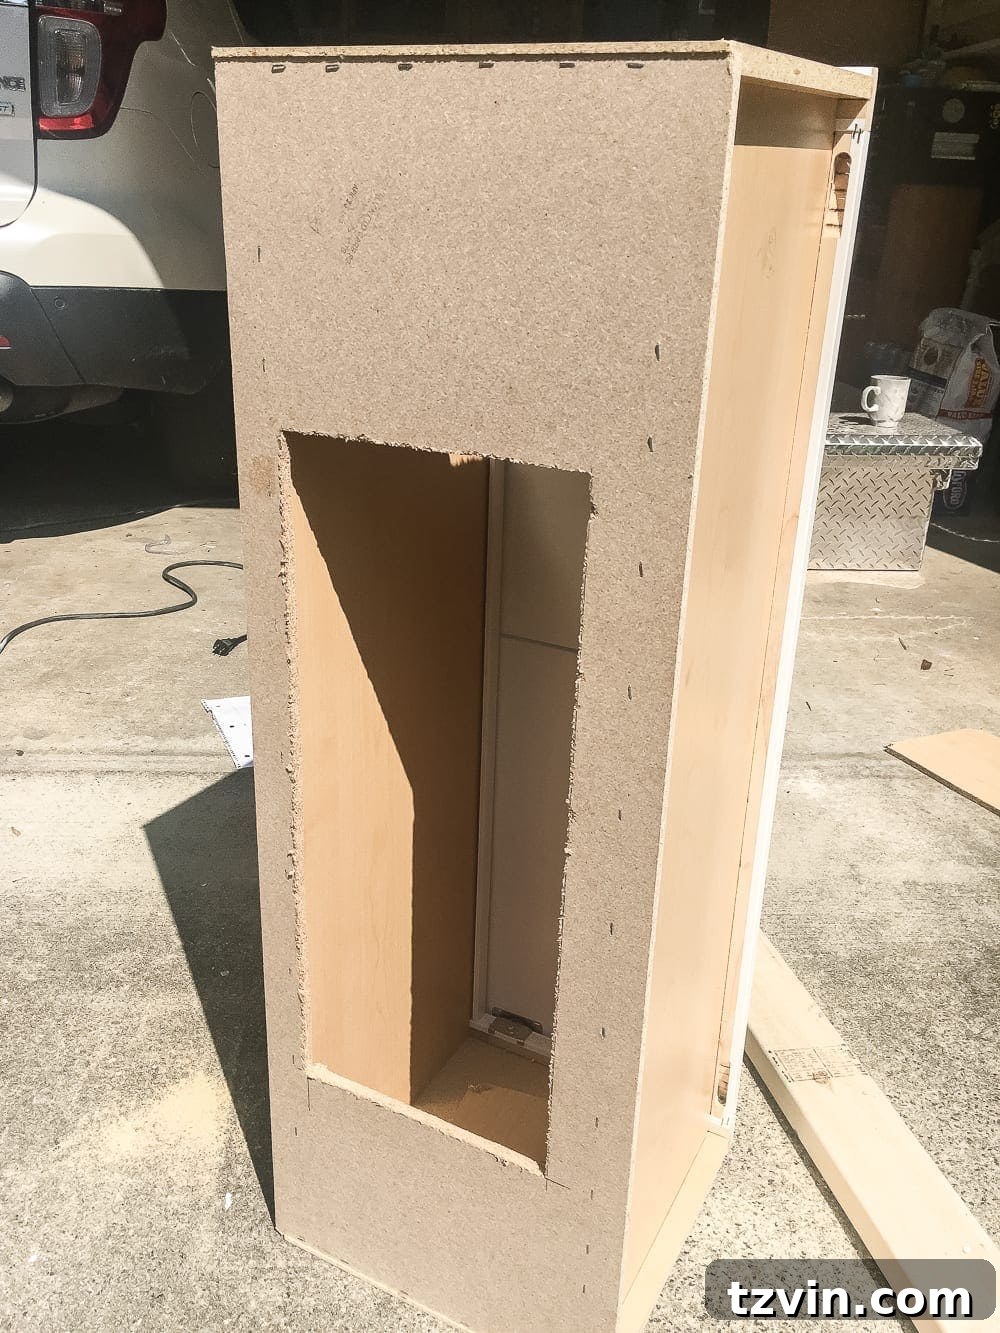
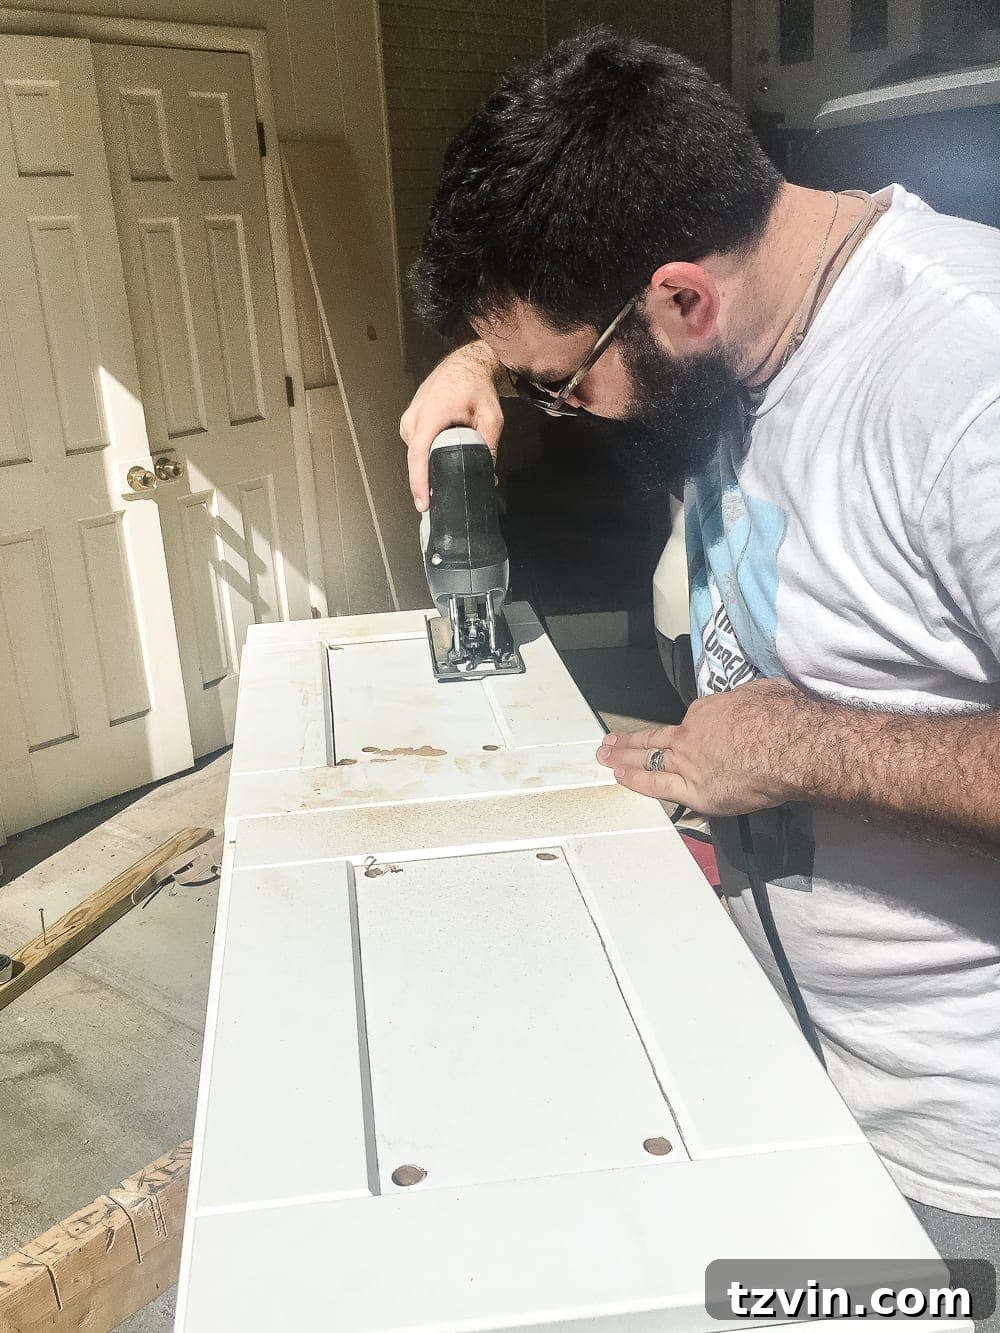
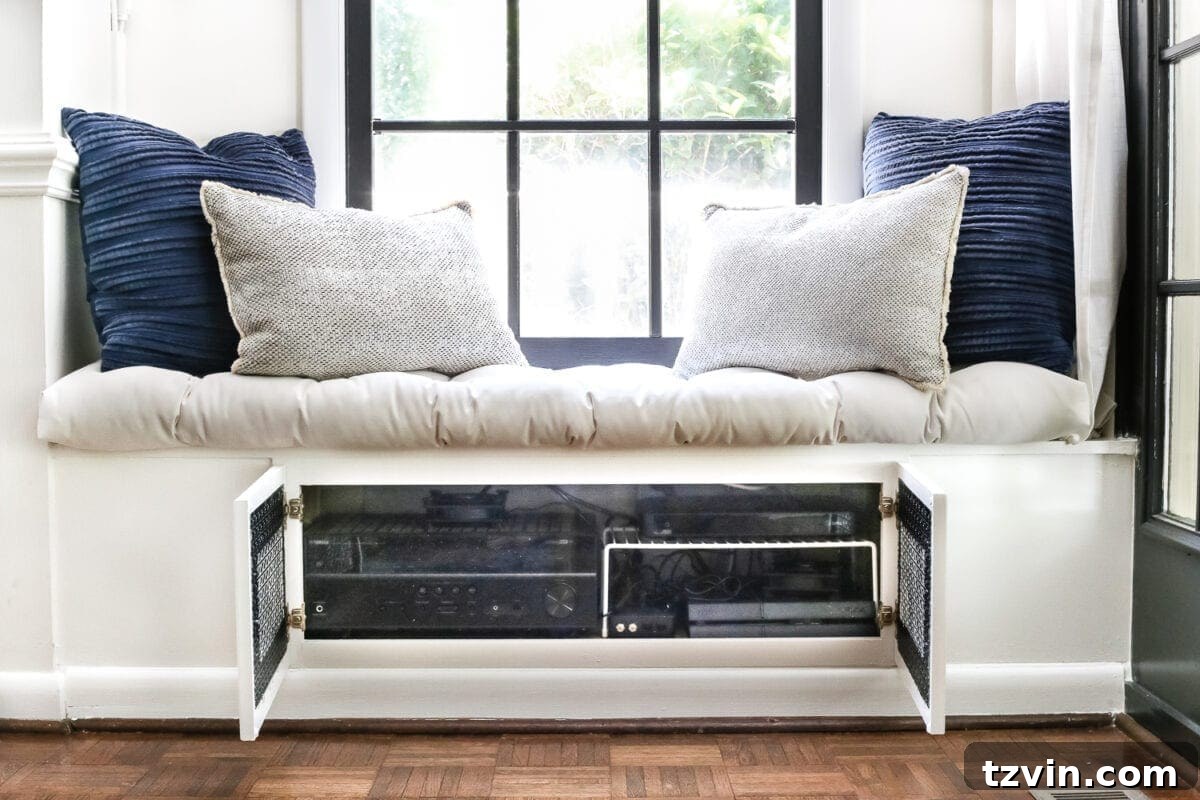
6. Modify the Cabinet for Electronics Integration: This step is where the cabinet truly transforms into a hidden electronics hub. We temporarily moved the cabinet back outside to make the necessary modifications. Using a jigsaw, we carefully cut strategic holes in the back panel of the cabinet. These openings allow for easy routing of power cables and signal wires to the wall outlet and television, keeping all cords neatly out of sight. Additionally, we used the jigsaw to cut out the inner panels of the cabinet doors. This modification is essential for allowing infrared signals from remote controls to reach the electronic devices stored inside, ensuring seamless functionality.
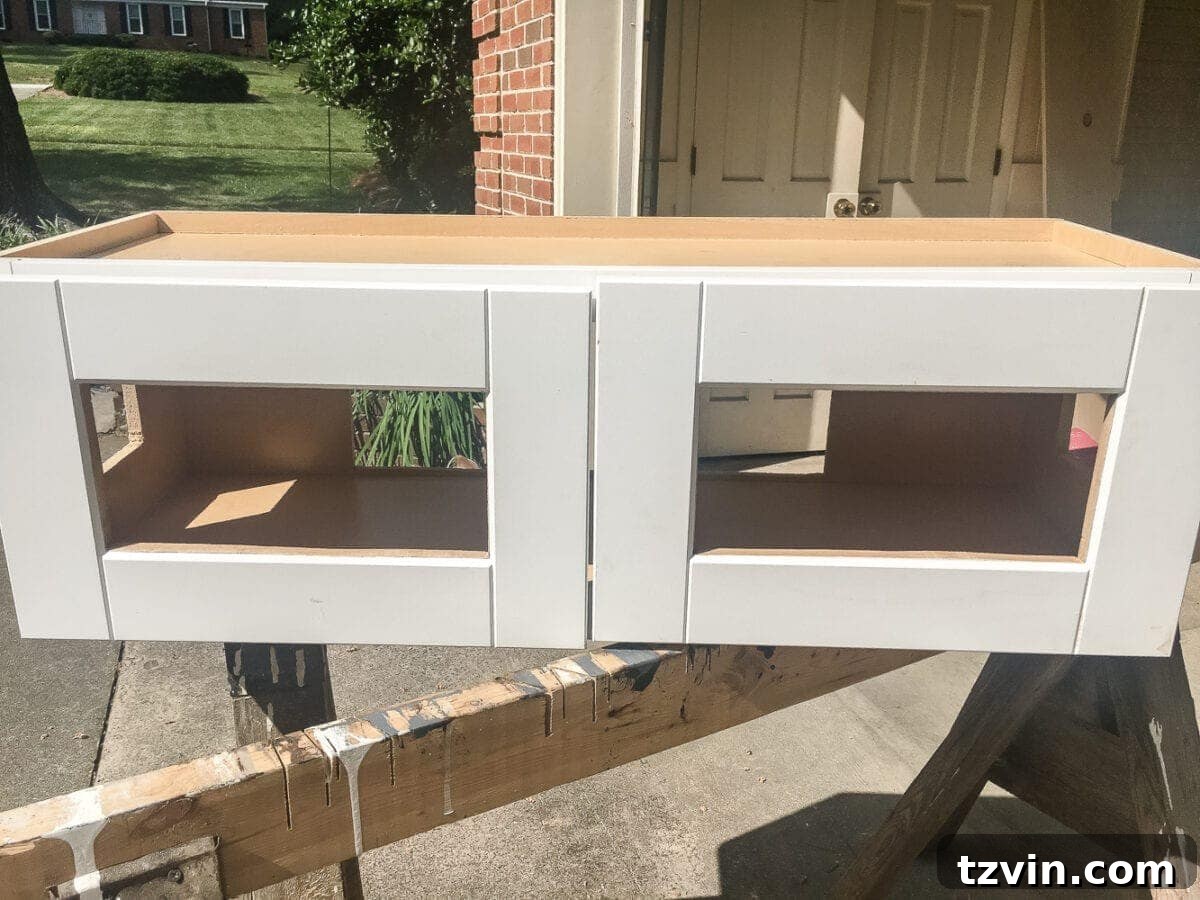
7. Secure the Cabinet in Place: Once the cabinet modifications were complete, we carefully positioned it back onto the prepared base. We then screwed the newly cut 2″x4″ braces to the sides and corners of the cabinet box. This step firmly integrates the cabinet into the window seat structure, creating a single, cohesive unit that is stable and ready for the finishing panels.
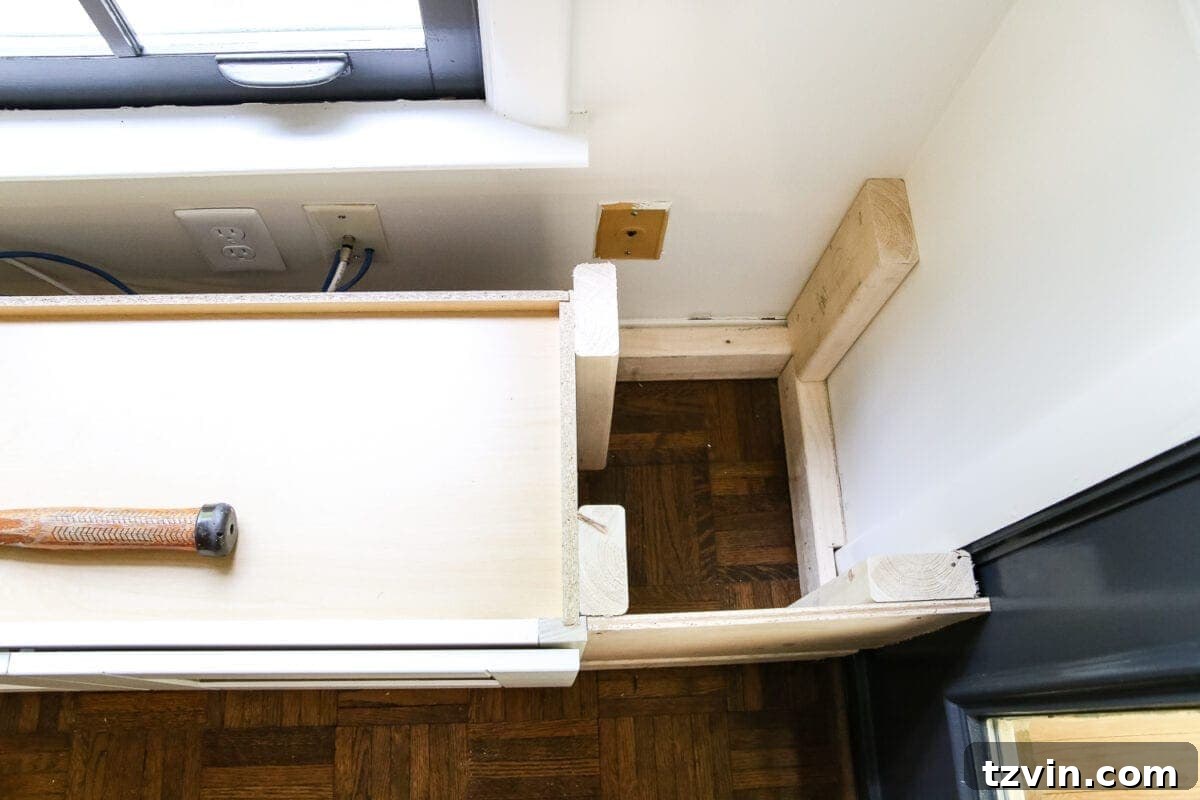
8. Measure and Cut Plywood for Enclosures: To create a truly built-in look, the spaces between the cabinet and the surrounding walls need to be enclosed. We meticulously measured the dimensions of these gaps to determine the precise size needed for the plywood pieces that would form the front and side panels of the window seat. Precision here is key for a seamless finish.
9. Attach the Front Plywood Panel: With the plywood precisely cut, we aligned the front piece flush against the two front 2″x4″ braces. These braces provide essential support, allowing us to securely nail the plywood into place. This step begins to give the window seat its final, integrated form, hiding the internal structure and creating a clean exterior.
10. Complete the Side Enclosures: We repeated the process for the sides of the cabinet. Using additional 2″x4″ braces for support and carefully cut plywood pieces, we enclosed the remaining open areas. This creates a fully integrated and finished box around the cabinet, giving it the appearance of a custom-built piece of furniture rather than a repurposed kitchen unit.
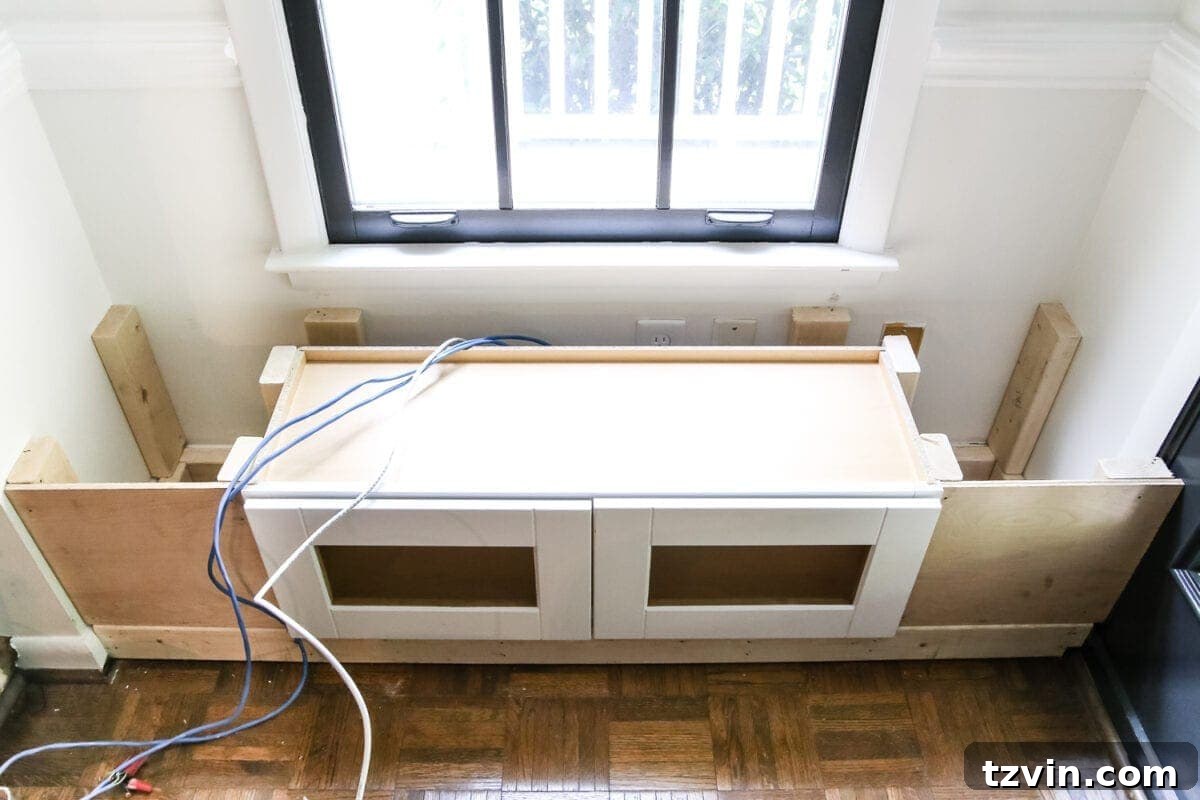
11. Reinforce the Back Wall Support: To ensure the seat top is incredibly sturdy and capable of supporting weight, we cut two more 2″x4″ braces. These were then securely nailed to the back wall, just above the cabinet and plywood structure. This provides crucial additional support for the entire top surface of the window seat, making it safe and durable for seating.
12. Apply Finishing Trim: The details make all the difference in a built-in project. We completed the front of the window seat by nailing on a new baseboard strip, ensuring it matched the existing baseboard in the room. We then carefully reattached our preserved quarter-round molding strip along the floor line. This trim work seamlessly integrates the window seat with the rest of the room’s architecture, making it look like it was always meant to be there.
13. Construct the Seat Top: For the comfortable and functional seat top, we again measured the precise width of the entire structure. We then cut the 1″x12″ and 1″x10″ boards to fit perfectly across the top of the cabinet and the supporting 2″x4″ braces. These sturdy boards create a robust surface, ready for a cushion and eager occupants.
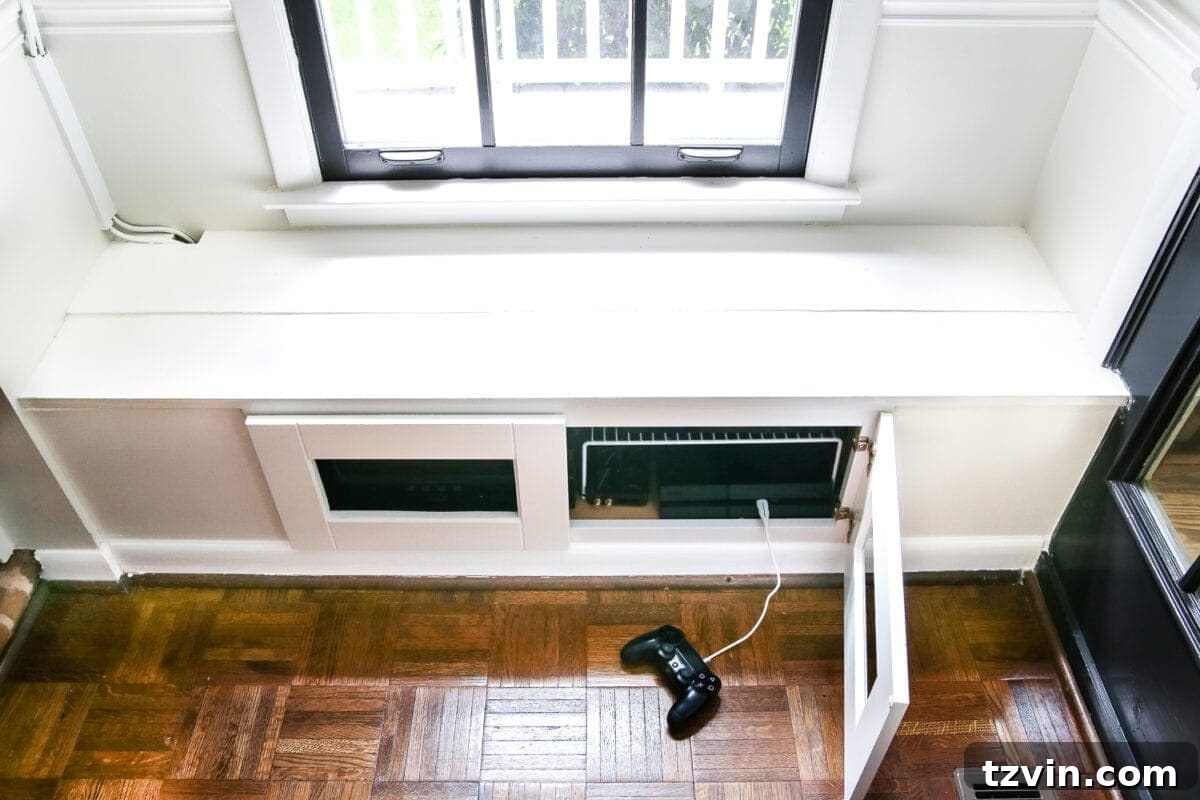
14. The Art of Finishing: Caulk, Fill, Sand, Prime, and Paint: This stage is where the raw construction transforms into a polished, professional-looking piece. We meticulously caulked all visible cracks and seams, ensuring a smooth transition between different materials. Next, we filled all nail holes with wood filler, allowed it to dry, and then carefully sanded the entire surface with fine-grit sandpaper until it was perfectly smooth to the touch. Finally, we applied a coat of primer, followed by two coats of Benjamin Moore Simply White in a semigloss finish, matching our existing trim. The result is a seamless, built-in window seat that appears as though it has always been a part of the home.
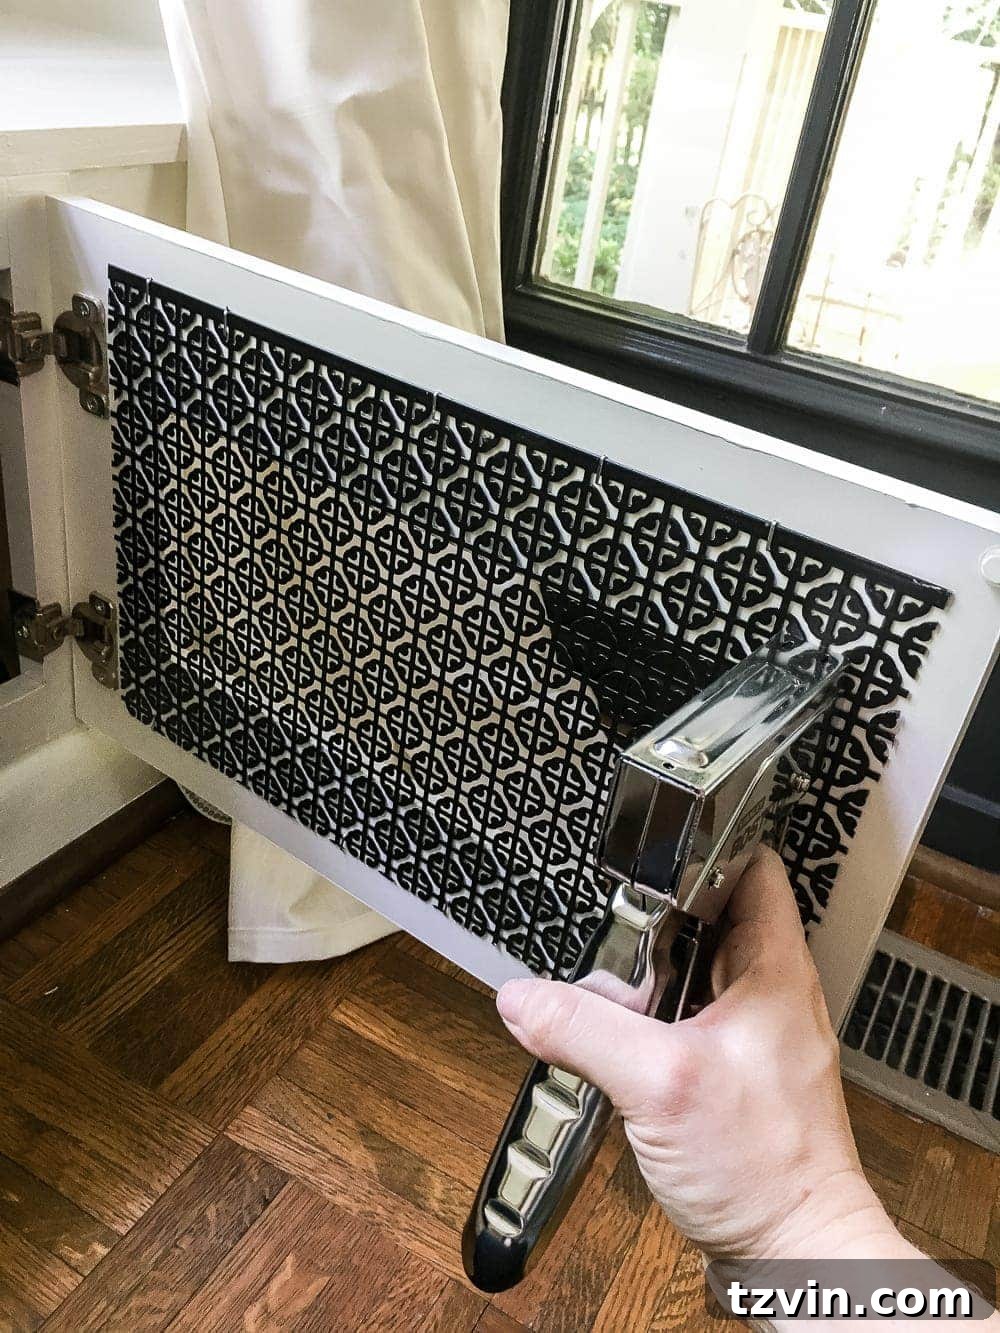
15. Optimize Remote Control Functionality: To ensure our hidden electronics remained fully functional, we added a clever touch. I cut two aluminum metal sheets with sheet metal snips, making them slightly larger than the openings we’d cut in the cabinet doors. These sheets were then stapled to the backs of the cabinet doors. After priming and painting them with the same paint used on the rest of the seat, these modified doors allow remote control signals to pass through while keeping the devices neatly out of sight. This small detail ensures complete integration without sacrificing convenience.
And voila! Our problem of unsightly electronics is beautifully solved. We now have a dedicated, hidden space for all our electronic components, transforming a cluttered corner into a charming and functional window seat. This space now serves as a delightful reading nook, perfect for quiet moments, or as invaluable overflow seating when friends and family gather, offering both practicality and aesthetic appeal.
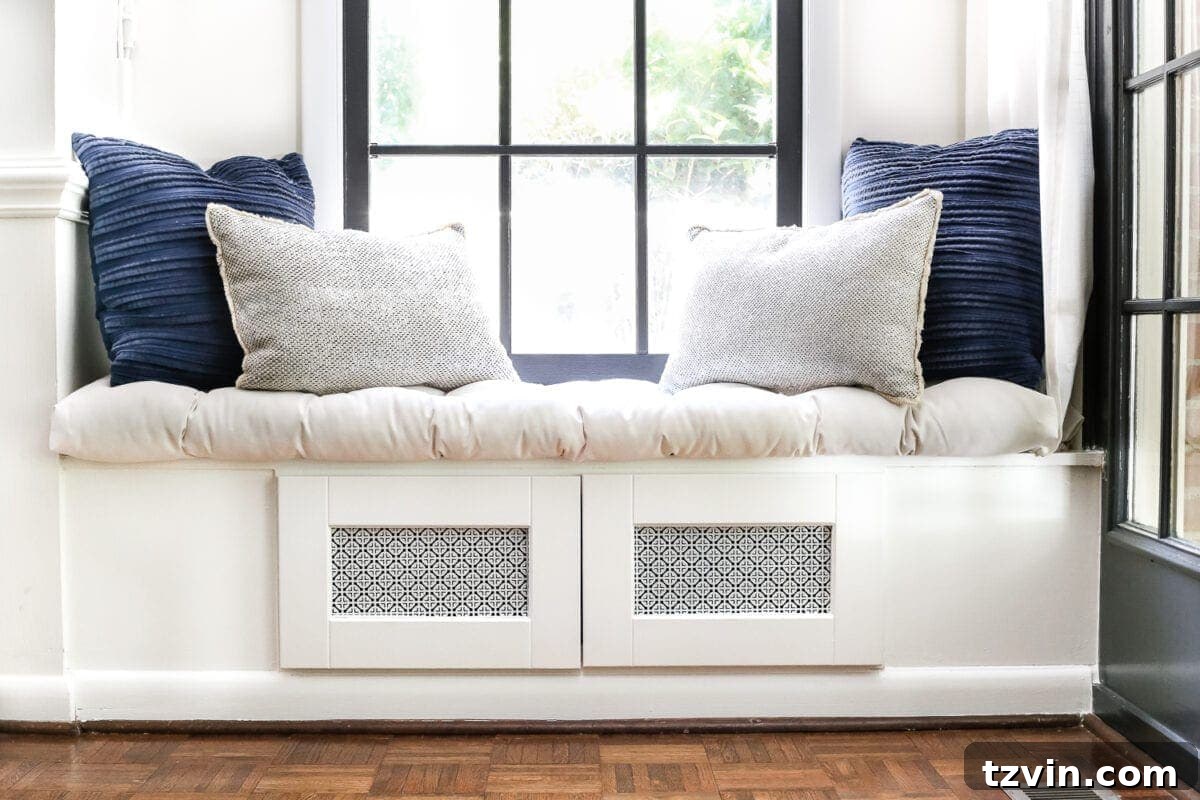
While building a window seat from scratch might offer ultimate customization, the efficiency of using a pre-fabricated kitchen cabinet is undeniable. It significantly reduces the time and effort involved, delivering impressive results without the extensive planning and construction. We achieved this transformation in just eight hours, a gratifying outcome that proves smart shortcuts can lead to beautiful solutions!
To maintain optimal performance and prevent overheating of our electronic devices, we installed these dual electronic fans inside the cabinet. They operate silently and effectively, ensuring everything stays cool and runs smoothly, even during extended use.
Finding the perfect cushion for this custom-sized window seat proved to be a bit of a challenge. Since my sewing skills are, shall we say, non-existent, a DIY cushion wasn’t an option! After some searching, I found this incredibly soft and comfortable cushion on Amazon. What made it ideal was its Sunbrella fabric construction, renowned for its durability and stain resistance. This means if our daughter, Olivia, happens to spill juice, it won’t be a major concern, keeping our new seating area beautiful and low-maintenance.
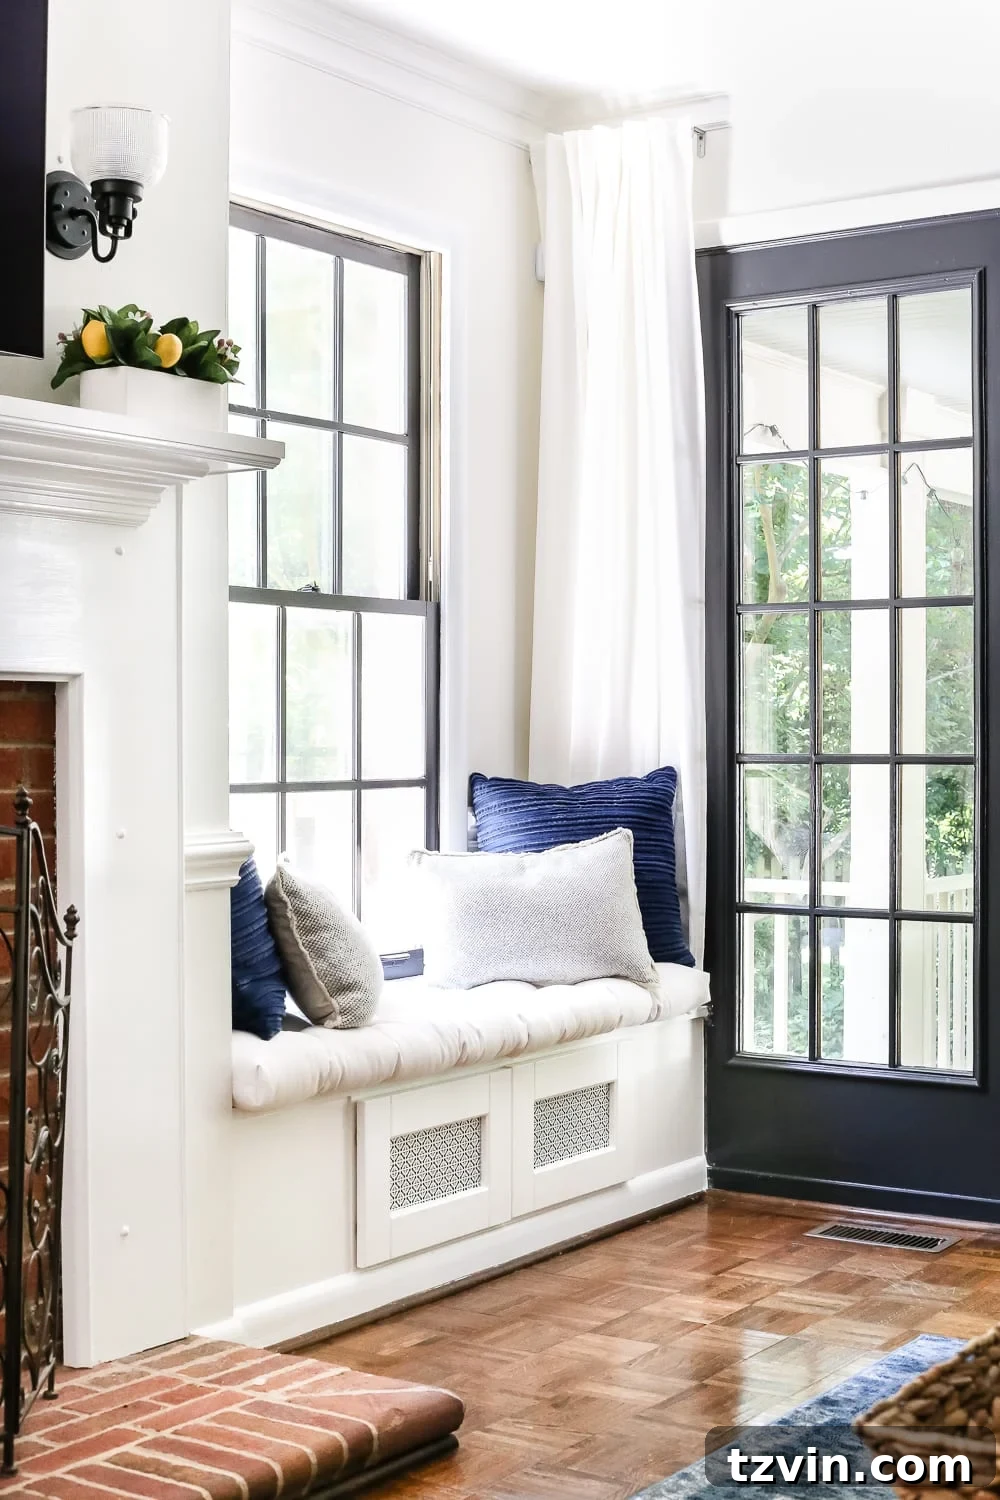
To complete the cozy aesthetic, I recently picked up these lovely blue pillows and metallic pillows from Target. Their beautiful textures and perfect silvery-blue hues perfectly complement the shades already present in our area rug, tying the entire living room design together with subtle elegance.
While we’re thrilled with the window seat, there are still a few minor paint touch-ups around the door frame that need attention. It’s a small detail, but we’ll get to it soon to ensure a truly polished finish for the room.
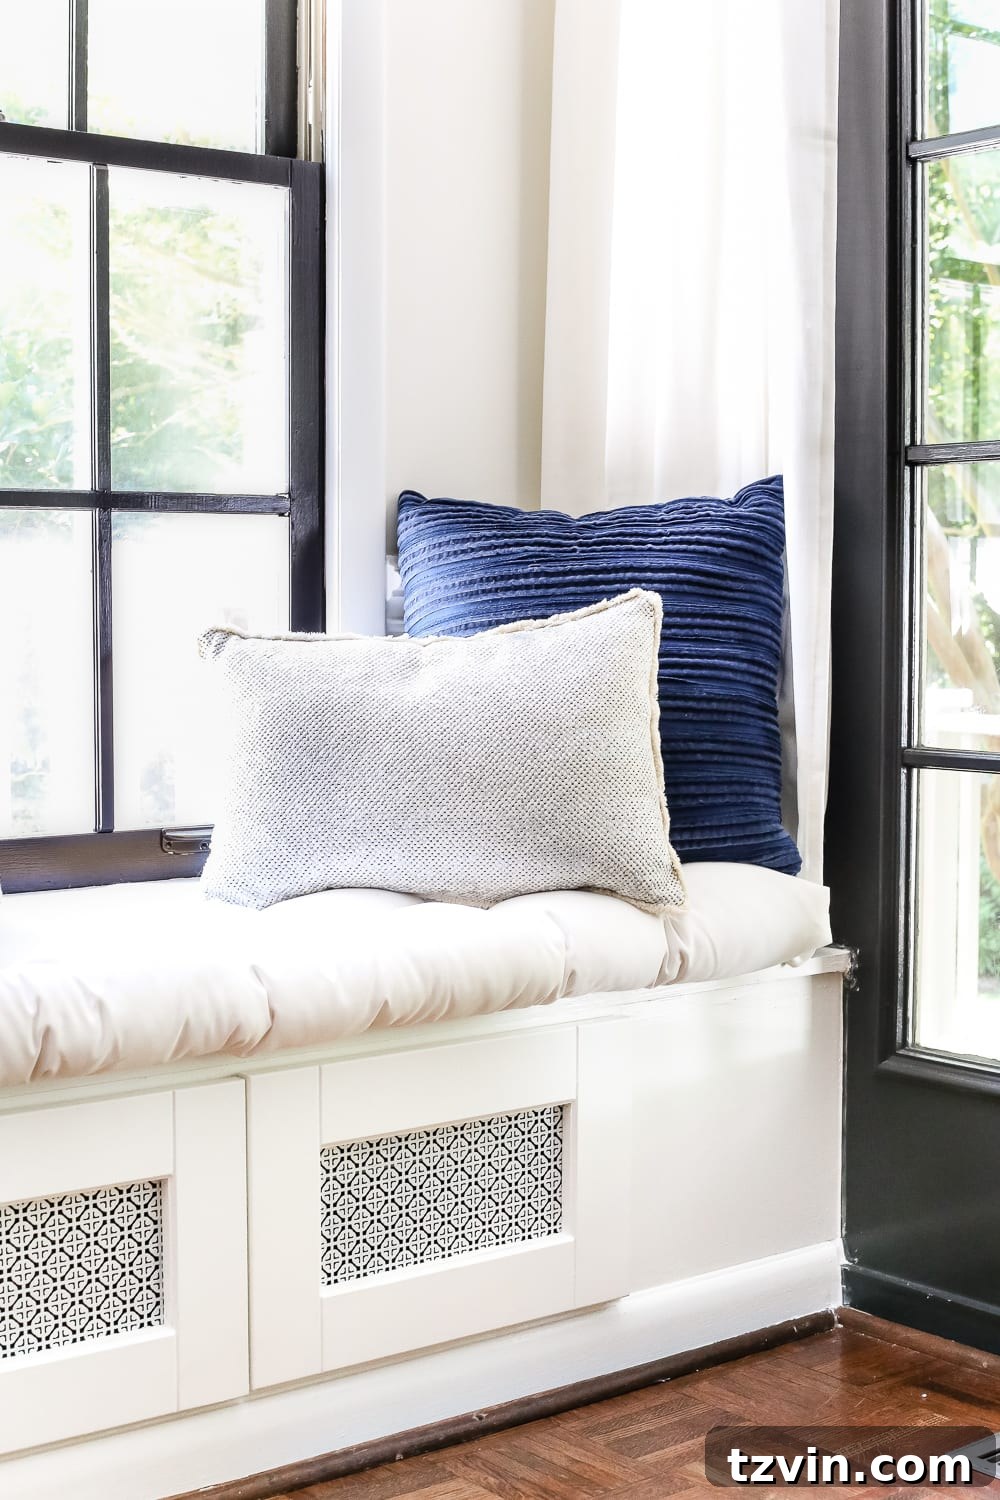
For a clean and streamlined look, I employed a simple yet effective trick to conceal the cords running between the television and the new window seat. I encased them in cord covers, which were then neatly tucked into the corner of the wall. To make them truly disappear, I painted the covers to match the wall color, Benjamin Moore Swiss Coffee. The result is a virtually invisible cord management system, preserving the room’s pristine appearance.
I’ve been contemplating whether to hang curtains on either side of this window. However, I’m leaning towards a “less is more” approach, believing that the clean lines and abundant natural light enhance the window seat’s charm without additional adornment.
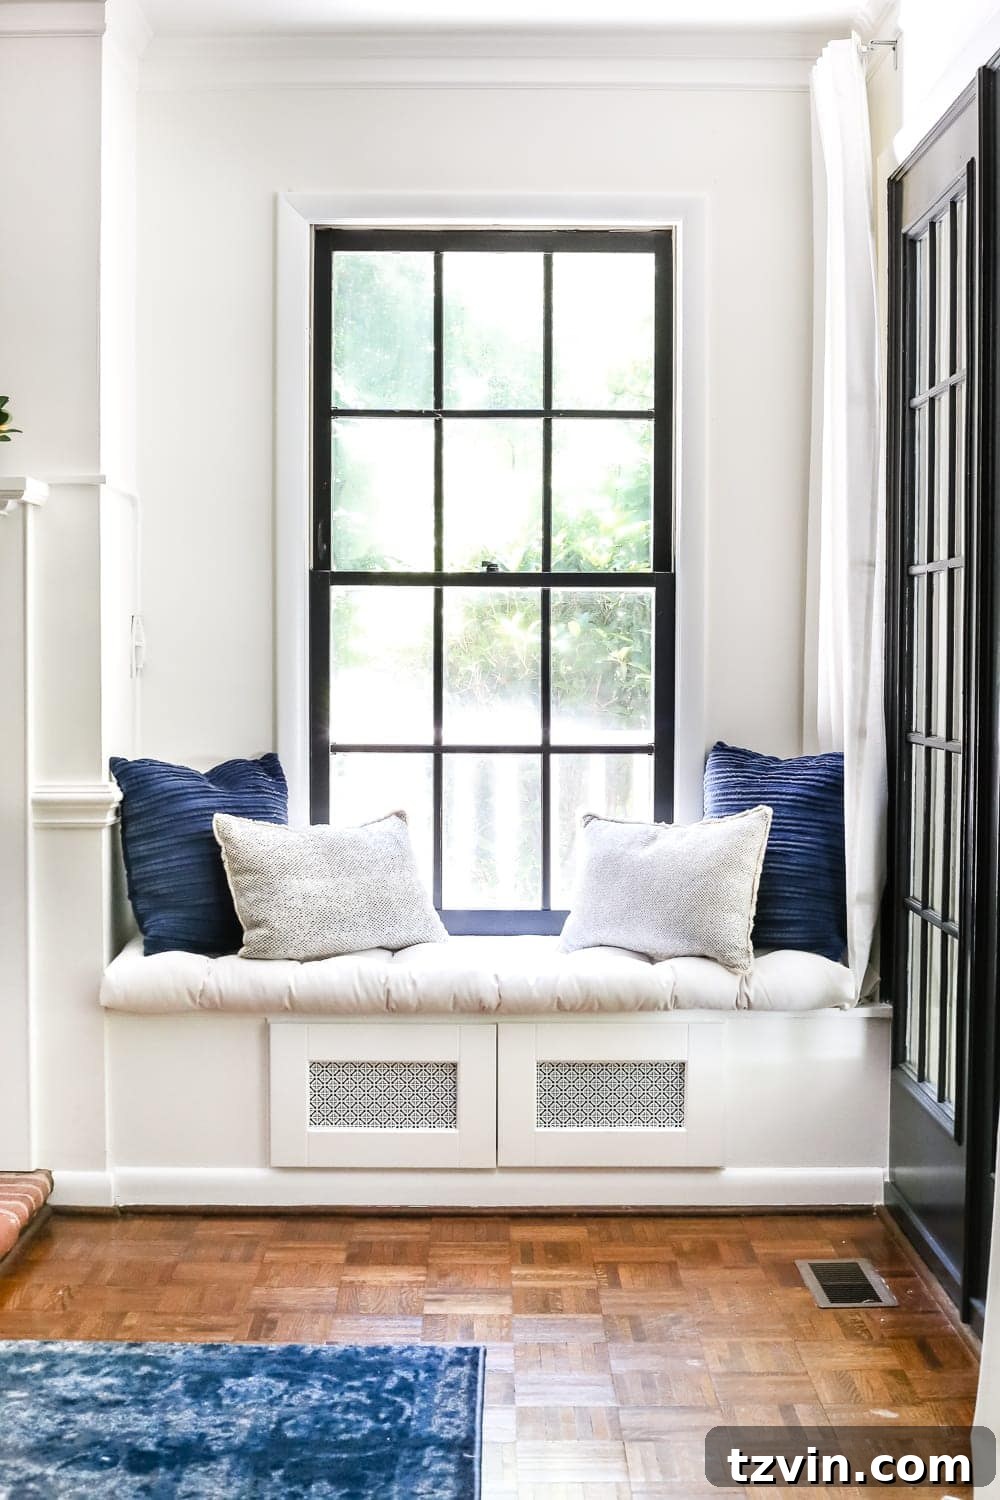
Isn’t it simply adorable? I’m already dreaming of curling up here with a good book. Olivia, my daughter, is absolutely thrilled with it too; it’s the perfect length for her to stretch out and even volunteer for a nap (a mother can dream, right?). It’s truly become a cherished spot for everyone.
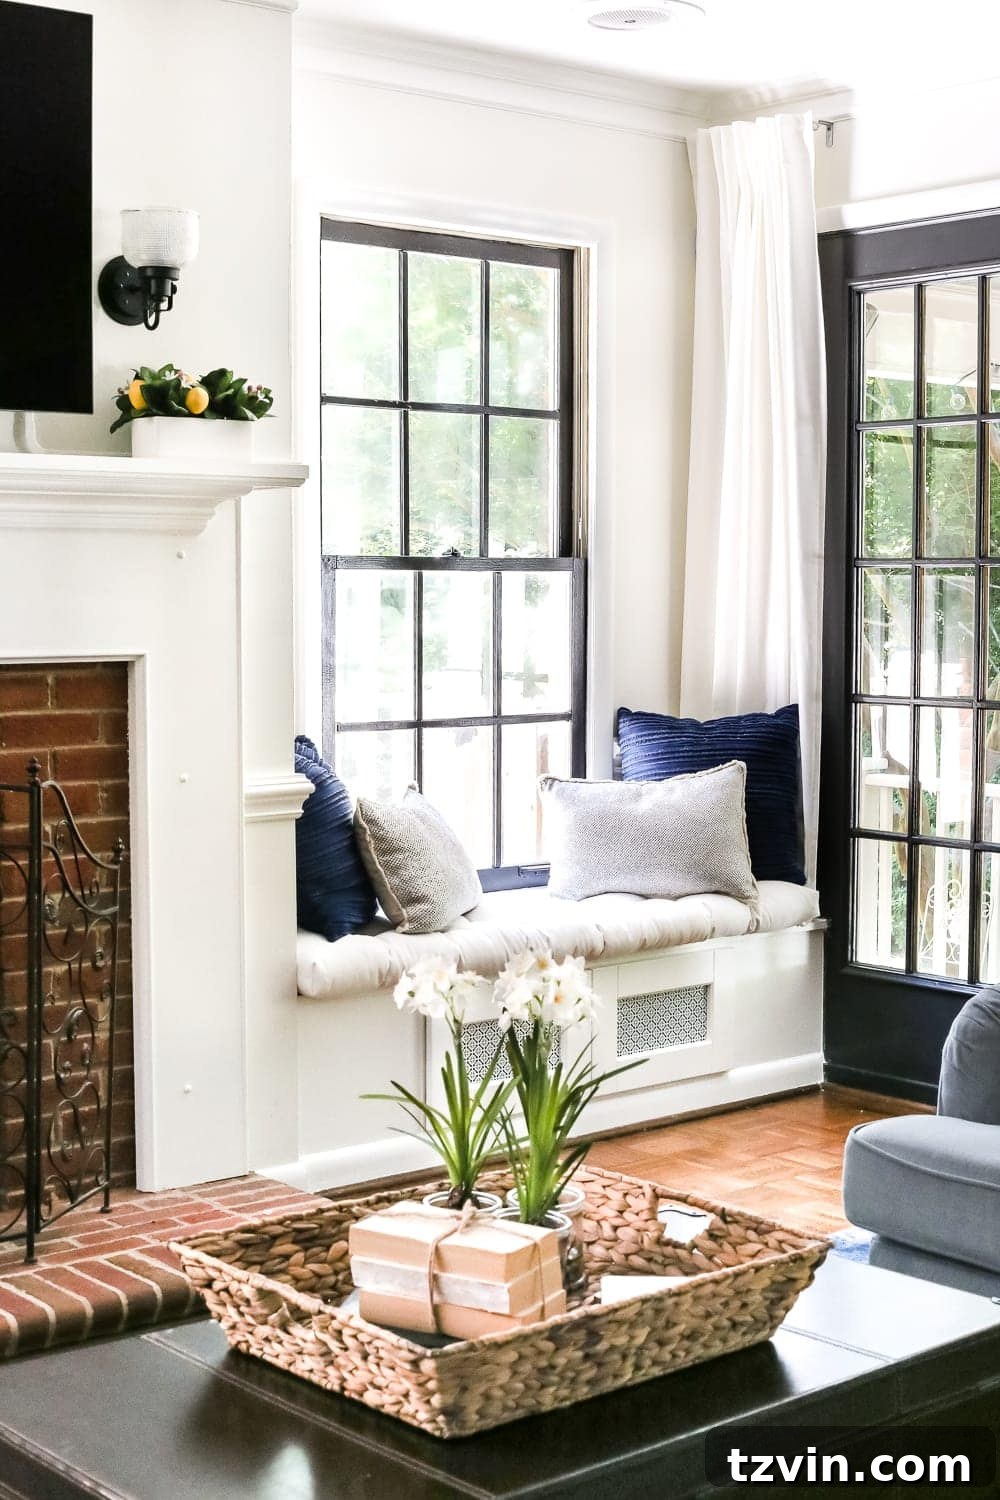
Our long-term vision includes installing a matching window seat on the opposite side of the fireplace. This will require a more significant undertaking: removing an old, non-functional door and replacing it with an actual window to create symmetry and balance in the room. It’s a project for another day, but one we’re definitely looking forward to!
Next on our living room to-do list is tackling the fireplace brick. This decision has sparked quite a debate! Many of you voted for the German Smear technique, while others suggested simply cleaning it and embracing its raw beauty, or even painting the entire surface white. The choices are overwhelming, and I confess, I’m still staring at it, waiting for the brick to tell me what it wants to be. Until then, the contemplation continues!
P.S. For those who frequently ask about our living room decor, here’s a convenient list of sources to help you achieve a similar look:
Living Room Decor Sources:
- Hyacinth basket tray (Perfect for organizing and adding natural texture)
- Lemon mantel arrangement (Adds a fresh, vibrant touch to the fireplace)
- Metallic lumbar pillow (Offers sophisticated texture and shimmer)
- Blue pleated pillow (Brings a soft pop of color and interesting detail)
- Area rug (Anchors the space and defines the seating area)
- Seat cushion (Ensures comfort and style for your window seat)
- Wall sconce (Provides ambient lighting and architectural interest)
- Wall color: Benjamin Moore Swiss Coffee (A warm, inviting neutral)
- Trim color: Benjamin Moore Simply White (Crisp and clean, perfect for highlighting architectural features)
- Door color: Benjamin Moore Wrought Iron (A bold contrast that adds depth and sophistication)
If you want to save this DIY window seat tutorial for later, you can pin it here: