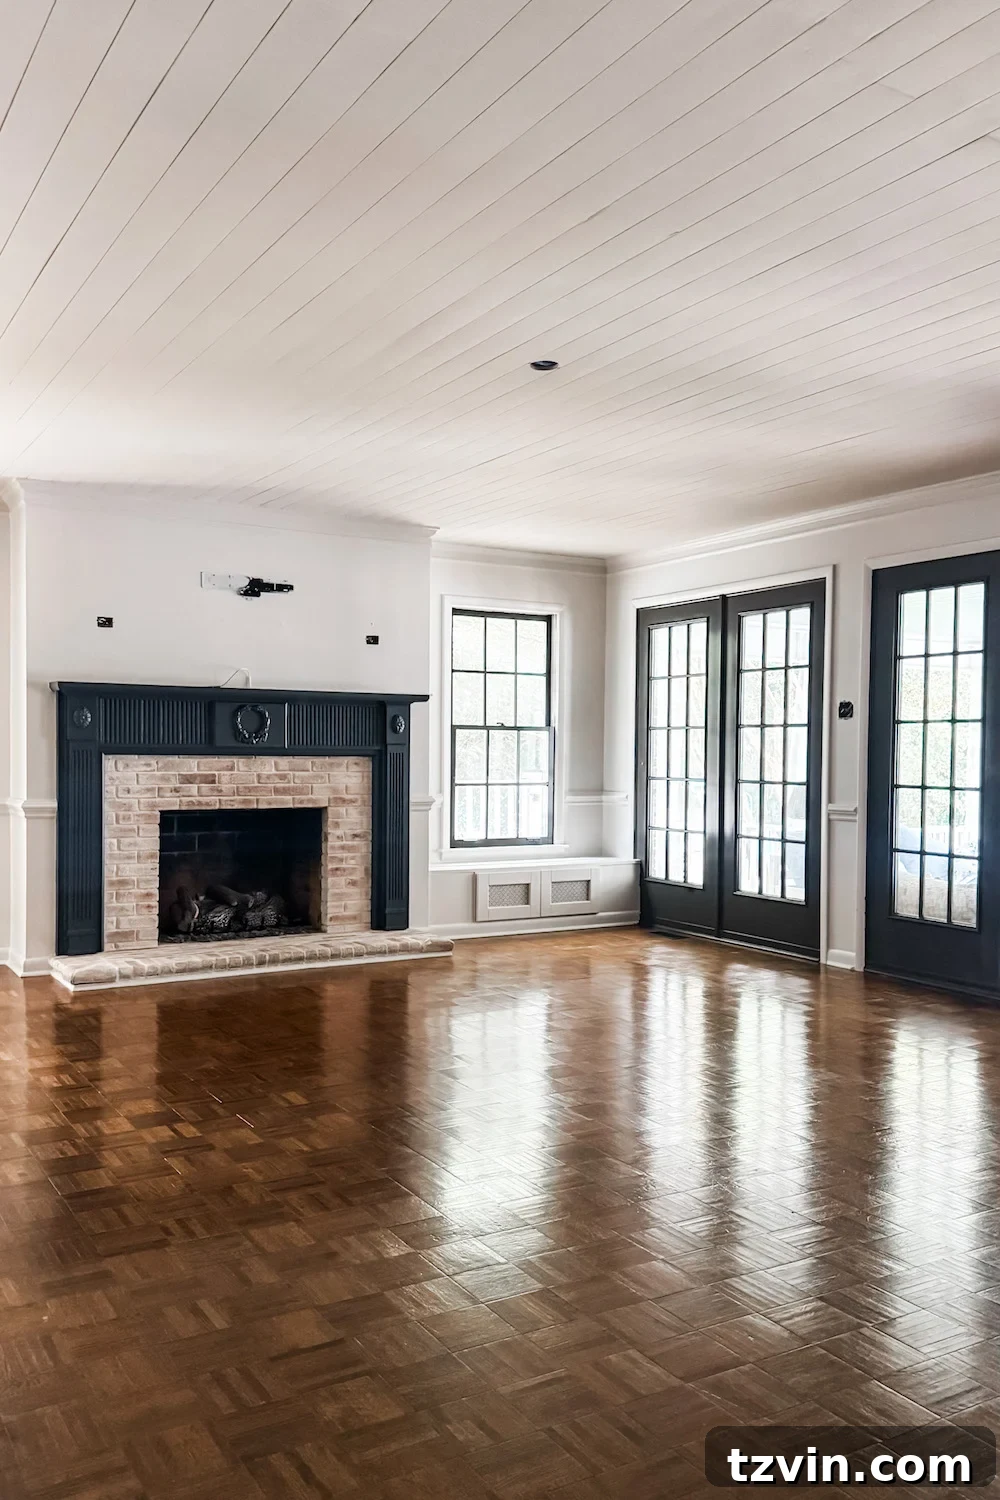
Ceilings, often overlooked, are a canvas with incredible potential, criminally underrated in most home design schemes. Yet, they possess the power to transform a room from ordinary to extraordinary. Our journey into embracing the fifth wall began with exciting trends like color drenching and creative ventures like wallpapering our ceilings, and we quickly became passionate advocates for elevating these often-neglected surfaces. The momentum truly built a few weeks ago when we added elegant tongue and groove ceiling planks to our upstairs hallway. The stunning result made it undeniable: our living room, too, deserved this dramatic and sophisticated upgrade.
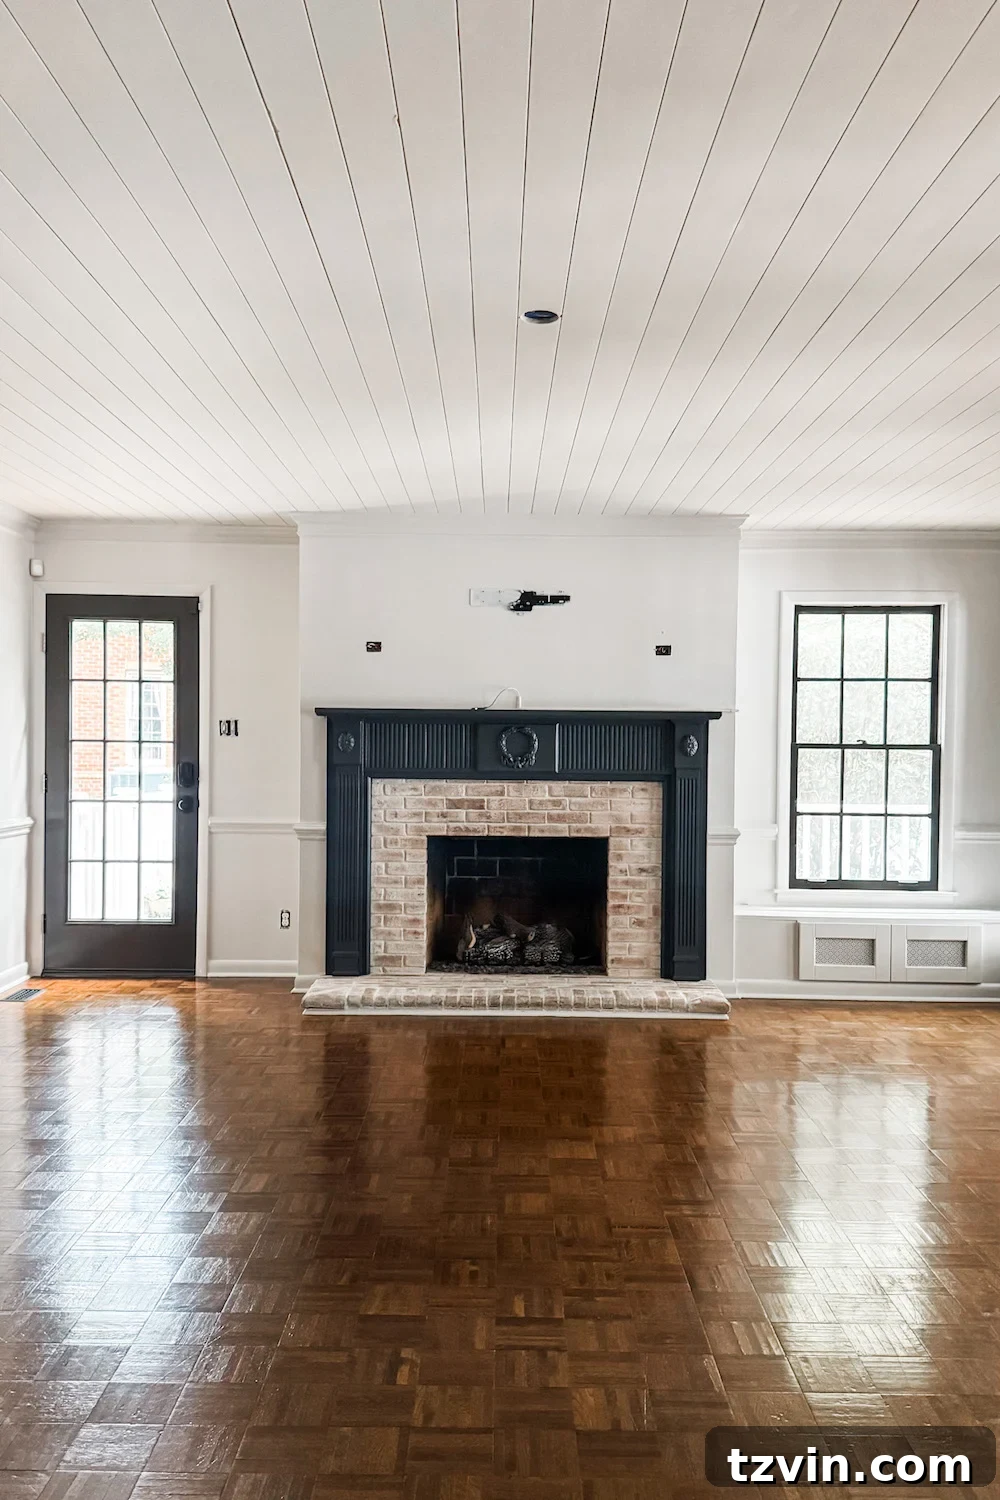
For years, I’d harbored a vision of installing a DIY shiplap ceiling in this space. However, my dream wasn’t of the rustic farmhouse variety. Instead, I envisioned a refined, buttoned-up aesthetic, where the classic charm of traditional crown molding would still command attention and complement the clean lines of the shiplap. This specific style would lend a timeless elegance, perfectly merging modern sensibilities with architectural heritage.
Our living room, despite its inherent coziness, always felt incomplete due to its flat, standard 8-foot ceiling. It was a vast, blank canvas, silently yearning for texture, depth, and a touch of personality. As we embarked on the exciting journey of our comprehensive living room makeover, the timing couldn’t have been more perfect to address this crucial element and finally bring my ceiling vision to life.
With a clear path forward, our first step involved meticulously preparing the ceiling. This meant carefully removing the antiquated attic fan vents and decommissioning the non-functional ceiling speakers – relics from the ’90s, bless their hearts. Once these obstacles were cleared, we were finally able to dive into the long-awaited ceiling upgrade, a project that had been simmering in the back of my mind for what felt like an eternity. The transformation, I can confidently say, exceeded every expectation I had. It turned out even better than I pictured, adding an unexpected layer of sophistication and warmth to the entire room.
DIY Shiplap Ceiling Tutorial with Crown Molding: Transform Your Space
Embarking on a ceiling renovation might seem daunting, but with the right guidance, a bit of patience, and a few essential tools, a DIY shiplap ceiling is an incredibly rewarding project. If you have a weekend to dedicate and a cordless nailer at your disposal, this stunning transformation is absolutely within your reach, even if you’re not a seasoned professional. Here’s a comprehensive, step-by-step guide detailing exactly how we achieved this elegant ceiling upgrade, complete with traditional crown molding for that polished, finished look.
Supplies We Used for Our Shiplap Ceiling Project
Before diving into the installation, gathering all your materials is crucial for a smooth and efficient project. Here’s a detailed list of everything we utilized to achieve our stunning shiplap ceiling:
- Tongue-and-groove shiplap planks (pre-primed): Opting for pre-primed saves significant time and effort in the long run.
- Construction adhesive: Provides extra bonding strength to keep planks securely in place.
- 2″ 16-gauge finish nails: The ideal size for strong, discreet fastening.
- Cordless nailer: A game-changer for speed and ease, minimizing arm fatigue.
- Cordless drill: Useful for various tasks, including pre-drilling if needed.
- Miter saw: Essential for precise, angled cuts on planks and molding.
- Coping saw: Indispensable for creating snug, professional-looking crown molding corners.
- Crown molding: Choose a style that complements your room’s aesthetic.
- Wood filler: For concealing nail holes and minor imperfections.
- Caulk + caulking gun: To seal gaps and create a seamless finish between different surfaces.
- Drywall sander (optional but a huge help): Significantly speeds up sanding and reduces mess, especially for large areas. A regular orbital sander can still do the job for less.
- Shop vac (optional to decrease sanding dust): Highly recommended for maintaining a cleaner workspace.
- Primer: Crucial for paint adhesion and a uniform finish.
- Paint (we used Sherwin Williams Limewash): Select a color and finish that enhances your room’s ambiance.
- Drop cloths and painter’s tape: Protect your floors and walls from paint and dust.
- Pencil, level, chalk line: For accurate marking and ensuring straight, even plank installation.
1. Preparing Your Canvas: Remove Old Trim and Molding
The first crucial step in achieving a flawless shiplap ceiling is to ensure you have a clean and unobstructed surface. We began by carefully removing any existing trim and crown molding. This isn’t just about aesthetics; it provides a perfectly clean slate, allowing the new shiplap planks to sit flush against the wall, resulting in a more professional and integrated finish. Use a pry bar and a utility knife, scoring paint lines beforehand, to minimize damage to the walls and ceiling as you gently detach the old pieces.
2. Precision Planning: Measure Your Ceiling and Plan Layout
Accuracy here saves a lot of headaches later. Measure the exact length and width of your ceiling to calculate the total square footage. This will help you determine how many shiplap planks you’ll need. Always add an additional 10-15% to your material estimate to account for cuts, potential mistakes, and future waste. Next, using a scrap piece of your chosen plank, mark your ceiling to test the spacing and visualize the layout. This vital step helps you anticipate where your planks will end and allows you to adjust your starting point if necessary, preventing you from finishing a row with an awkward, narrow sliver of wood along the crown molding or near a fireplace. Planning your layout ensures a balanced and aesthetically pleasing result.
3. Establishing Symmetry: Mark the Center Line
For a truly balanced and professional-looking shiplap ceiling, finding the exact center of your room is paramount. Measure across the width of your ceiling and mark the midpoint. Repeat this for the length, and where the two imaginary lines intersect is your ceiling’s center. Then, snap a chalk line across the entire length of the room through this center point. This center line will serve as your guiding reference, ensuring that your planks are installed symmetrically and radiate outwards evenly. Starting from the center provides more control over the overall layout and minimizes the appearance of any slight inconsistencies in your room’s dimensions.
4. Crafting Seamless Joints: Bevel the First Plank
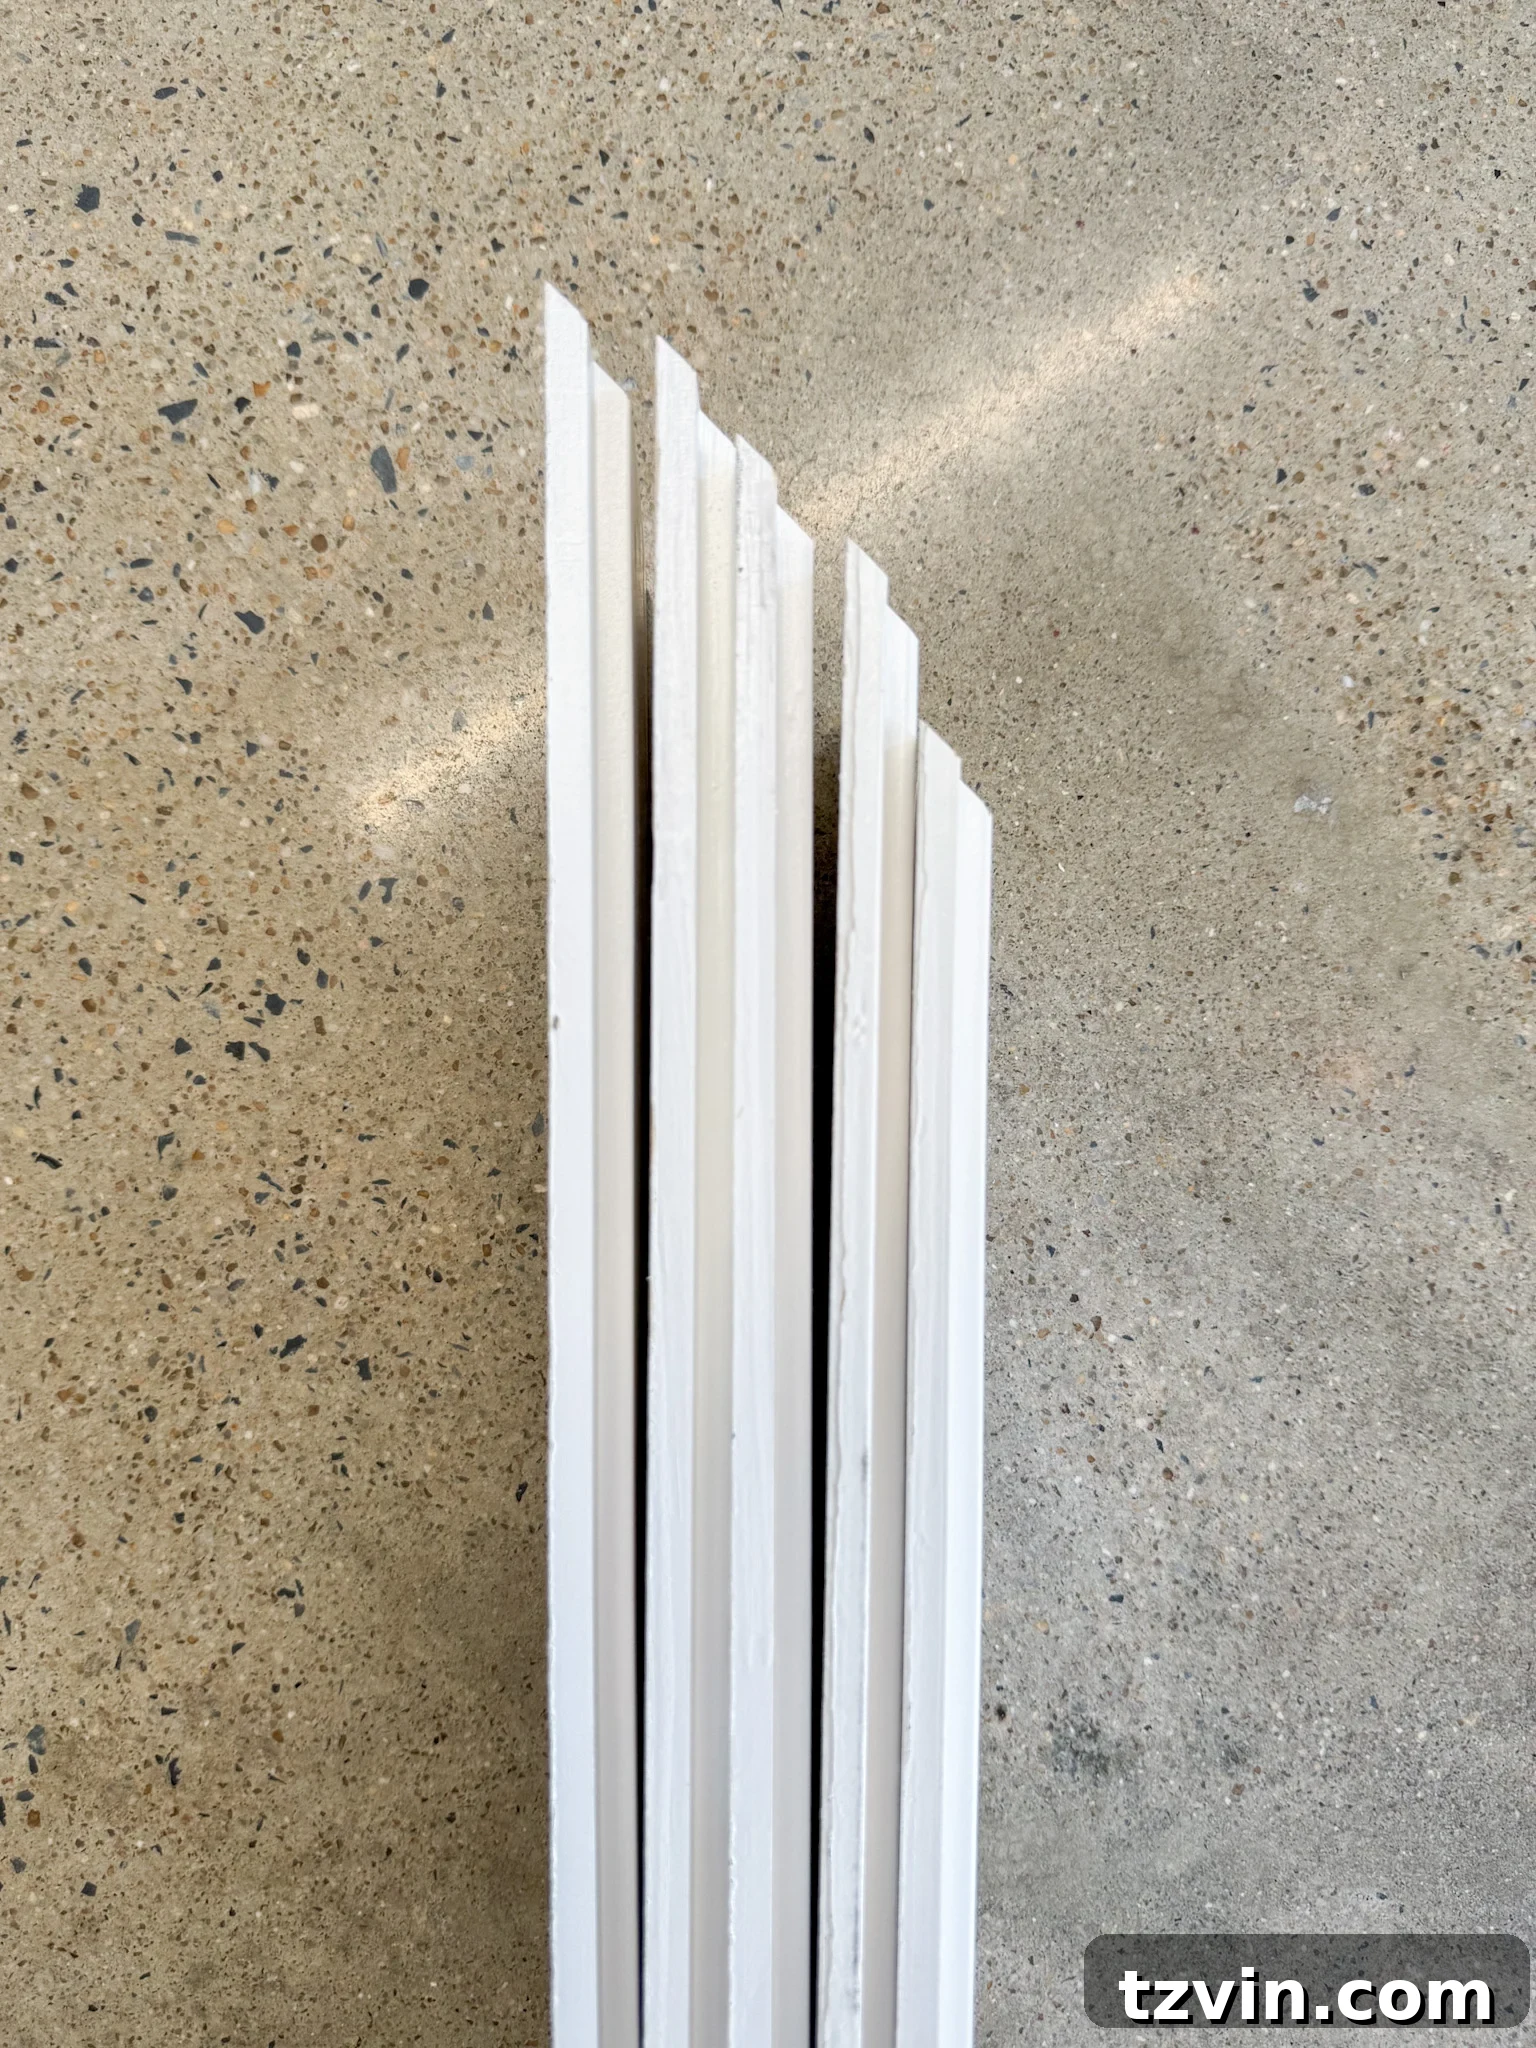
While often overlooked, beveling the end of your first plank is a small detail that makes a significant difference in the final appearance. Using a miter saw, cut one end of your initial plank at a precise 45-degree angle. This creates a beveled edge that allows the planks to join together seamlessly, minimizing visible gapping where the end pieces meet. This technique is particularly important when staggering your plank joints, giving the entire ceiling a more intentional and finely crafted look.
5. Securing the Foundation: Install the First Plank
With your center line marked and the first plank prepared, it’s time for installation. Apply a generous, continuous bead of construction adhesive in a zig-zag pattern to the back of the plank. This adhesive provides crucial long-term stability and prevents any potential sagging. Carefully position the plank along your center chalk line, ensuring it’s perfectly straight. Then, using your cordless nailer, secure it to the ceiling with 2″ 16-gauge finish nails. Whenever possible, aim to screw into ceiling joists for maximum strength and security; a stud finder can be invaluable here. Work methodically, securing the plank every 12-16 inches to ensure it adheres firmly.
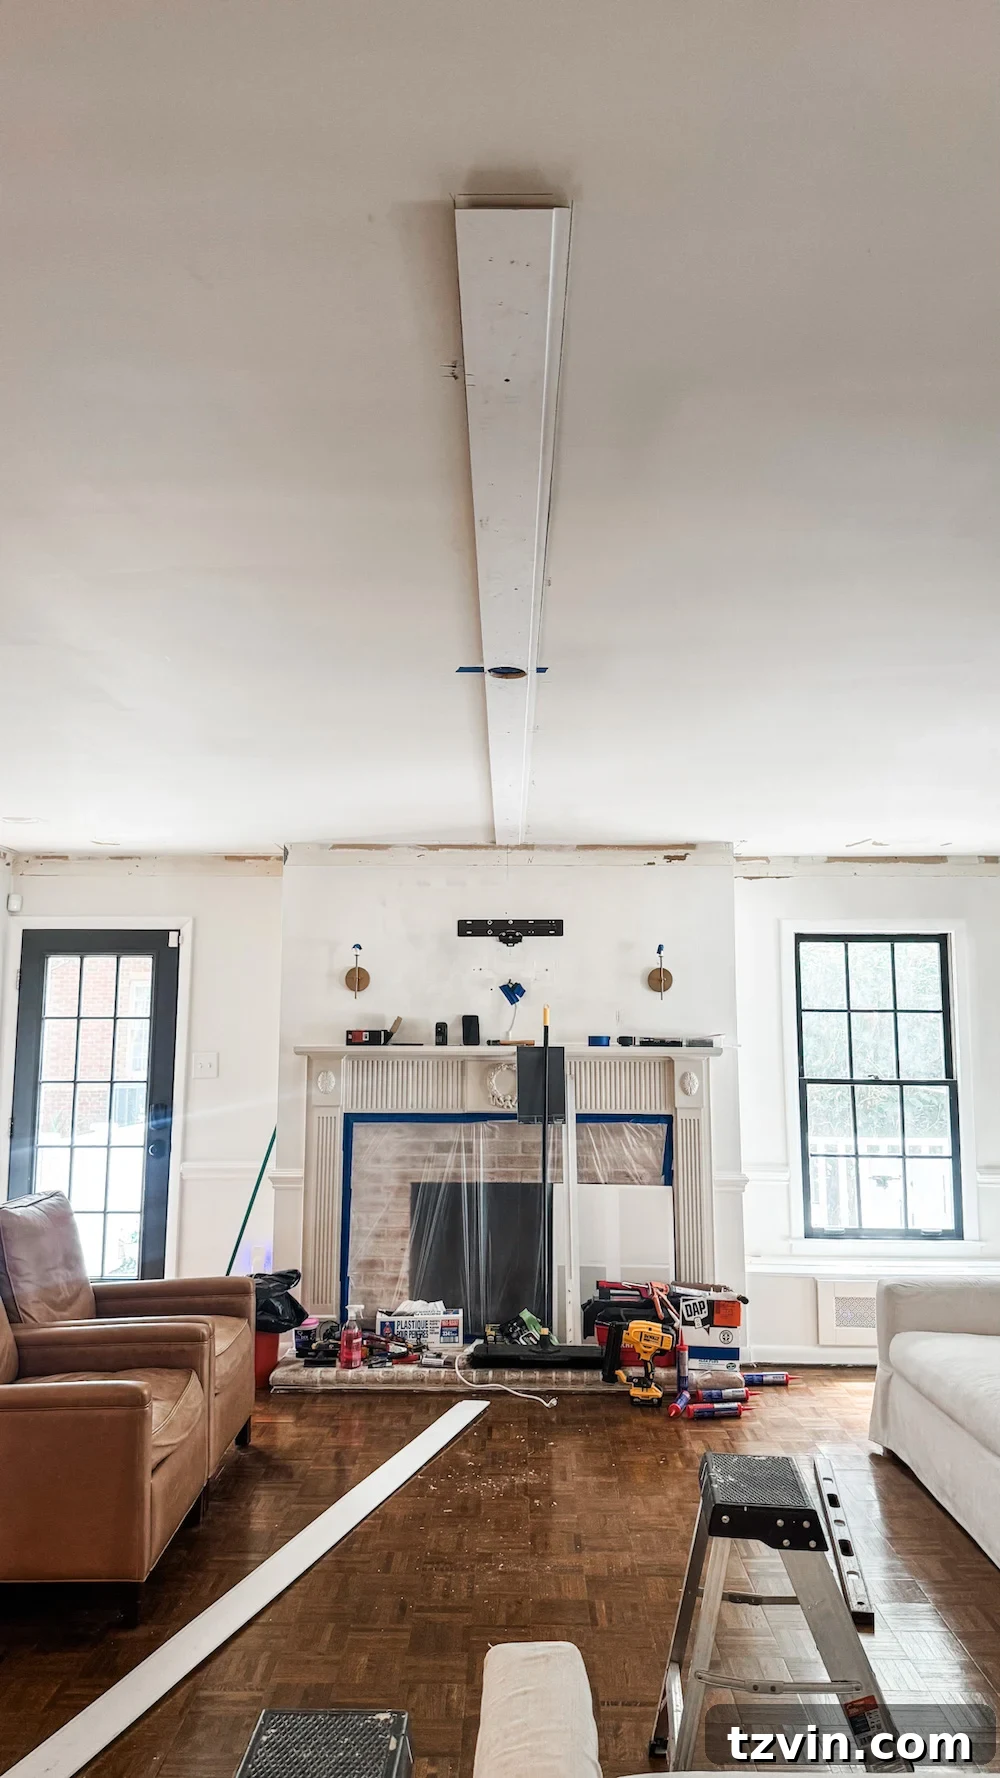
6. Building Momentum: Continue Installing Shiplap Planks
Once the first plank is securely in place, you can begin to work your way outwards from the center. The tongue-and-groove design makes this process relatively straightforward: simply align the tongue of the new plank with the groove of the previously installed one and gently tap it into place with a rubber mallet until the edges are tightly locked together. We found it efficient to apply construction adhesive every 3-4 boards, ensuring consistent adhesion across the entire ceiling. Continue cutting the ends of your planks at a bevel as you go, particularly at the joints, to maintain that intentional, seamless appearance. Remember to stagger the end joints of your planks across different rows for a stronger, more visually appealing pattern, rather than having all joints line up in a single line.

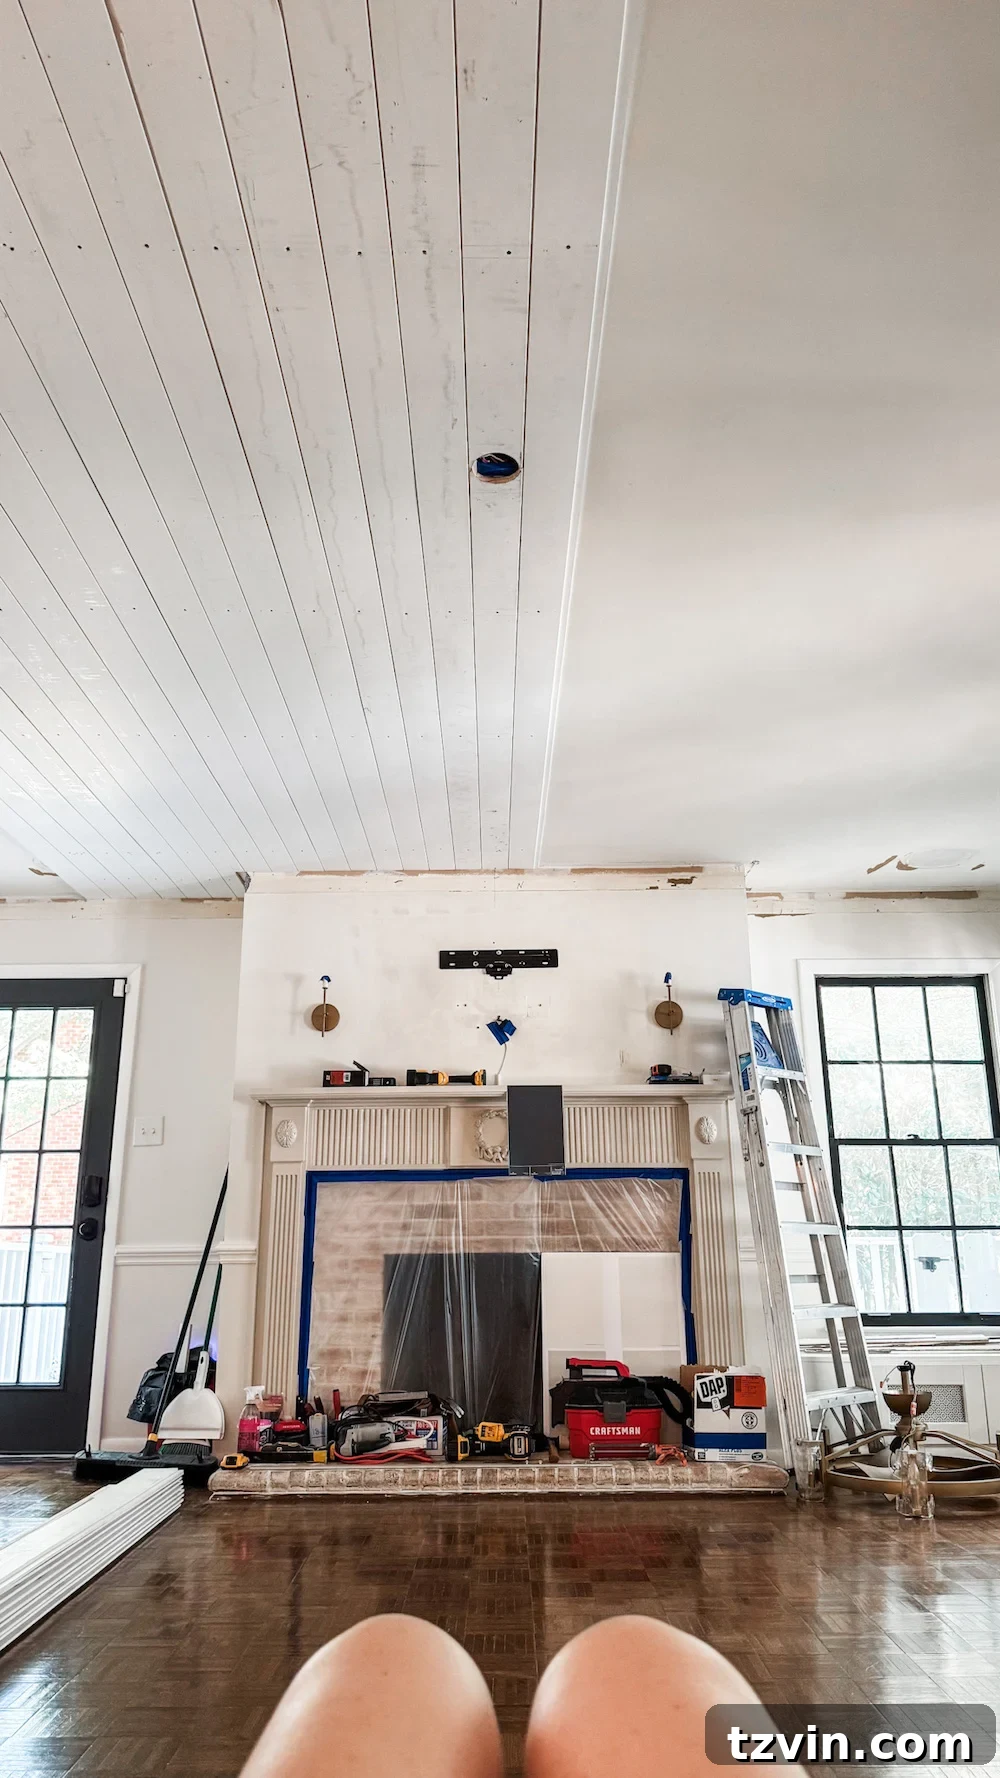
7. Covering Your Canvas: Fill the Entire Ceiling
This stage is a test of endurance and consistency. Continue the process of applying adhesive, locking planks, and nailing them into place until the entire ceiling surface is covered. Expect a solid arm workout and a significant amount of time spent on a ladder – it’s physically demanding but incredibly rewarding! Consider scheduling a relaxing massage for yourself after this step. Maintaining a steady pace and ensuring each plank is tightly joined will contribute to a professional and durable finish. Don’t rush; precision throughout this stage will save you considerable time in the finishing steps.
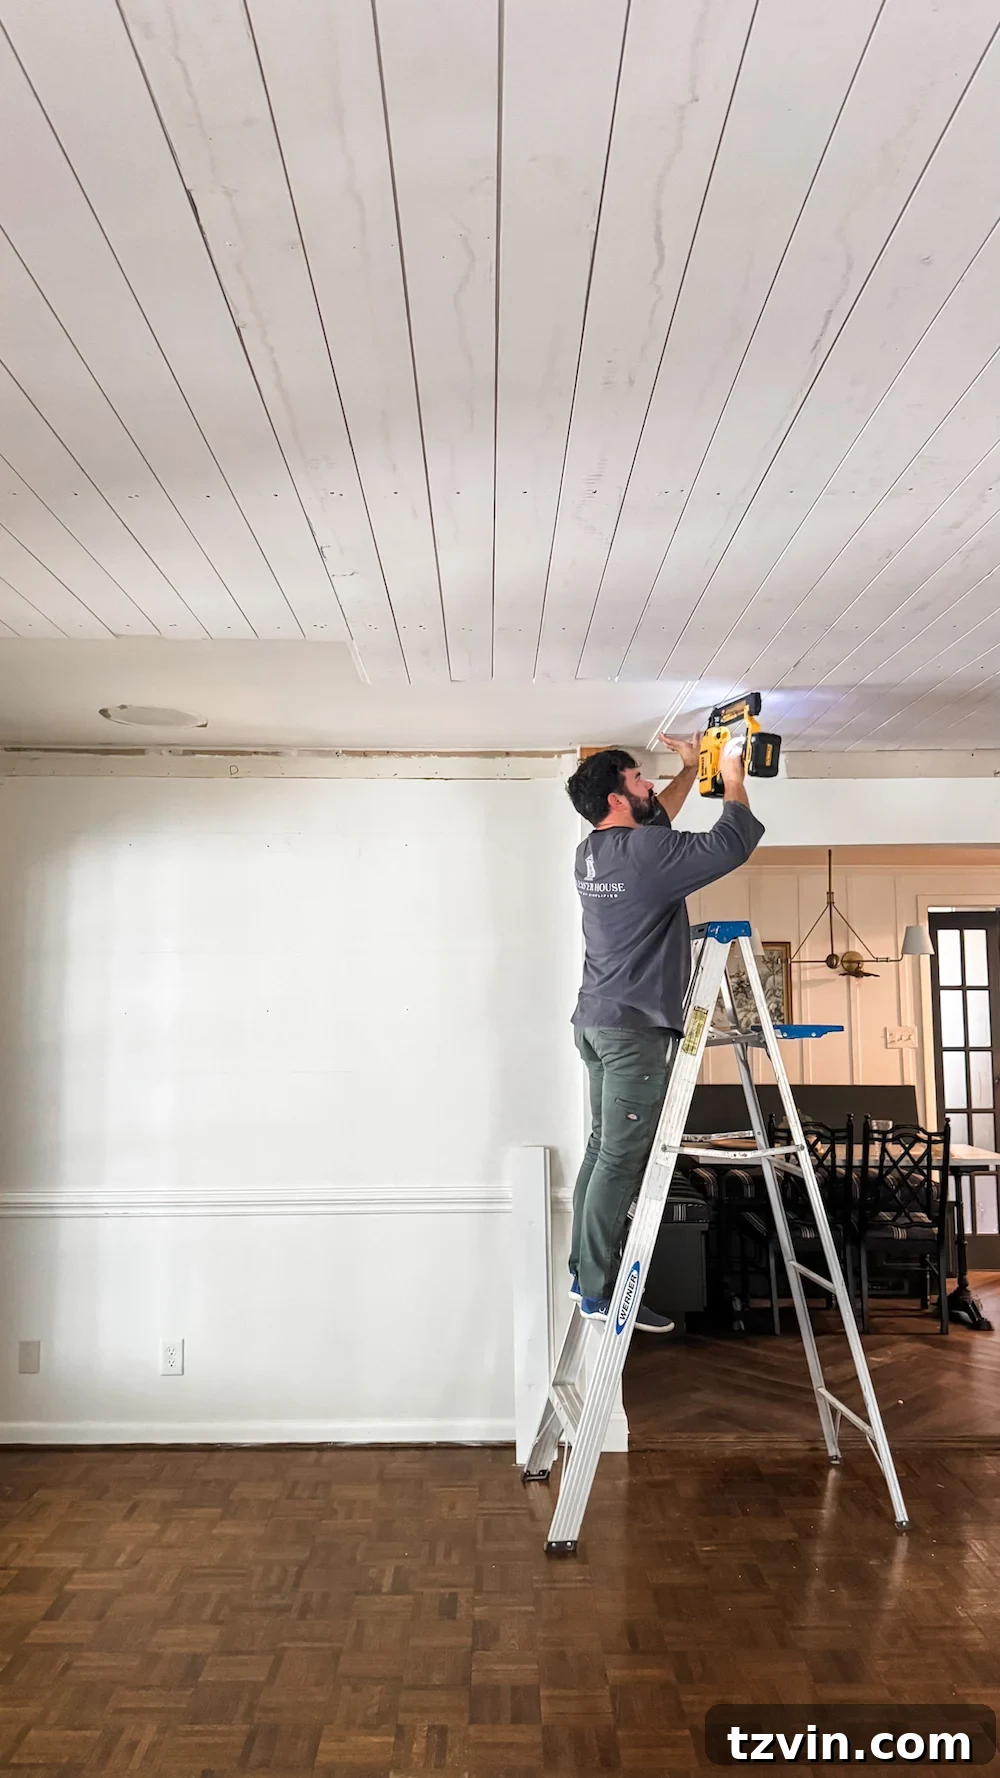

8. The Elegant Finish: Add Crown Molding (Optional but Highly Recommended)
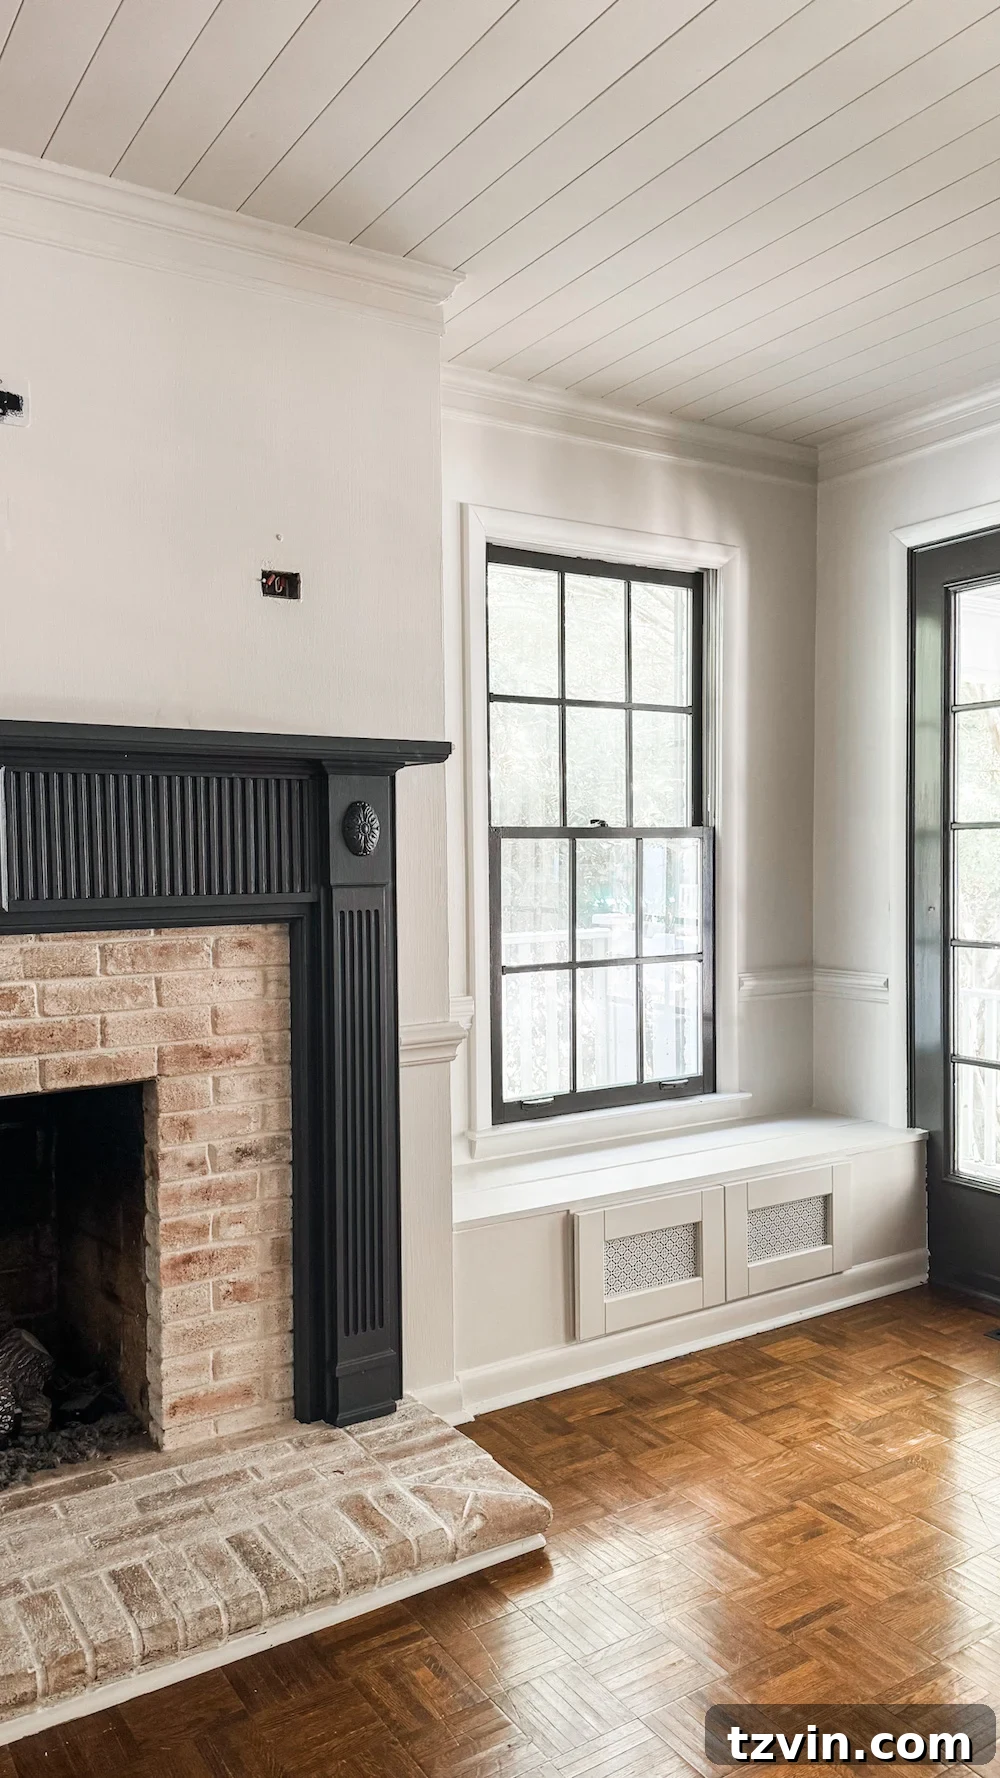
While optional, adding crown molding is the key to elevating your shiplap ceiling from a DIY project to a professionally finished architectural detail. For our project, we carefully re-installed the existing crown molding around the perimeter, which saved time. If you’re installing new molding, precision cutting is essential. Use a miter saw for outside corners, but for truly snug and professional-looking inside corners, a coping saw is invaluable. This tool allows you to cut a profile that perfectly nests into the face of the adjacent molding, creating an almost invisible joint. Once cut, secure the molding into place with finish nails, ensuring they penetrate into the wall studs or ceiling joists for a firm hold. If you need more in-depth guidance on molding, we’ve tackled similar projects before with picture frame molding, and the general process for cutting and installing corners is very similar.
Crown molding acts as a beautiful transition between the walls and the ceiling, framing your new shiplap feature and adding a layer of classic sophistication that truly completes the look.
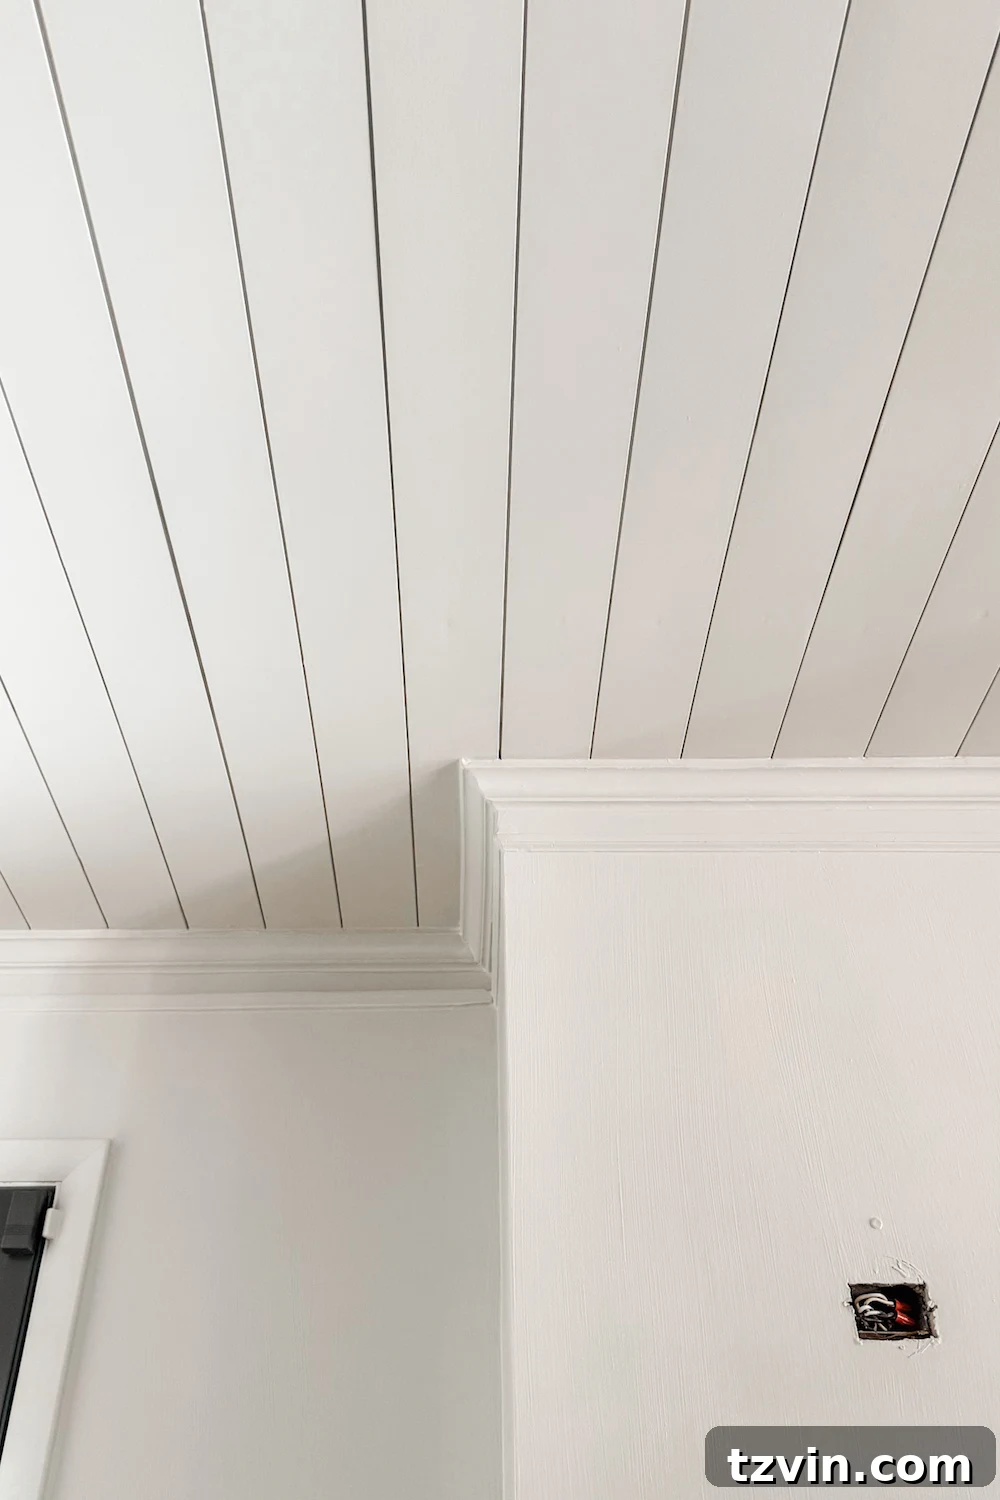
9. Refining the Details: Fill, Caulk, and Dry
This is where the magic of a flawless finish truly comes to life. Begin by using wood filler to meticulously cover all visible nail holes on your shiplap planks and crown molding. Apply small amounts, smoothing it out with a putty knife. Allow the filler to dry completely according to the manufacturer’s instructions. Next, load your caulking gun and apply a thin, even bead of caulk along all edges where the crown molding meets the wall and where it meets the ceiling. This crucial step seals any tiny gaps, creating incredibly smooth, crisp lines and a truly professional finish. Run a wet finger or a caulking tool along the bead to smooth it out. Allow all caulk and filler to dry thoroughly before proceeding to the next step, as inadequate drying time can compromise your paint finish.
10. Achieving Perfection: Sand Smooth
Once all filler and caulk are completely dry, it’s time for sanding. This step is critical for a smooth, paint-ready surface. We highly recommend using a cordless drywall sander equipped with a vacuum attachment and an extension pole. This setup made the sanding process approximately 10 times faster, significantly reduced airborne dust, and minimized the physical strain of working overhead. If a drywall sander isn’t accessible, a regular orbital sander can still get the job done, though it might require more manual effort and dust management. Sand all filled areas until they are perfectly smooth and flush with the surrounding wood. Also, lightly sand any rough spots on the planks themselves to ensure an impeccable surface for priming and painting.
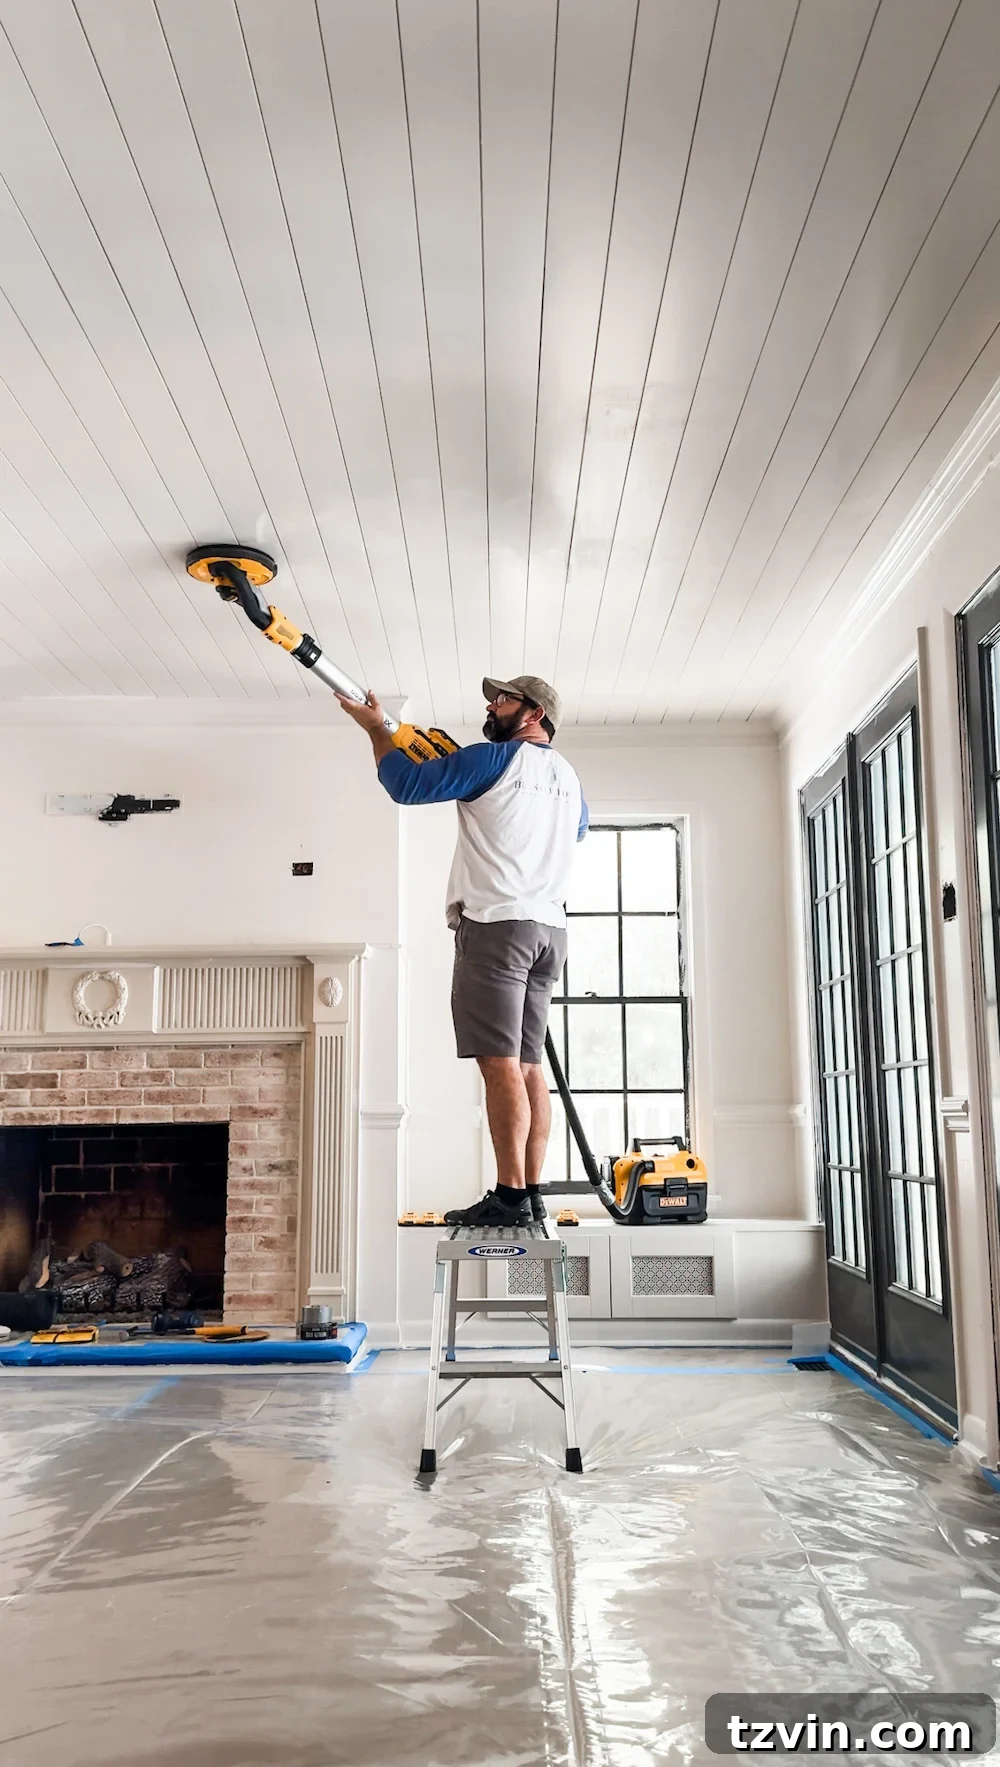
11. The Grand Reveal: Prime and Paint Your Masterpiece
After all the sanding dust has been meticulously cleaned up, it’s finally time for the exciting final steps: priming and painting. Start by applying a high-quality primer to the entire ceiling, including the shiplap planks and crown molding. Primer is essential as it seals the wood, provides a uniform base for your paint, and ensures optimal adhesion, leading to a more durable and professional-looking finish. Once the primer is dry, apply two coats of your chosen ceiling paint. We opted for Sherwin Williams Limewash, a beautiful creamy off-white shade that imparted a light, warm, and inviting glow to the entire living space, subtly enhancing the texture of the shiplap. For a touch of contrasting drama, we also painted the mantel in Benjamin Moore Temptation, creating a focal point that beautifully complements the refined ceiling.
The Final Result: A Transformed Living Room Ceiling
Now that the project is complete, I can confidently say that this shiplap ceiling is undoubtedly my favorite feature of the living room. Or, at the very least, it’s a strong contender, perhaps tying with the stunning ornate molding on the fireplace and the wall of contrasting French doors. The transformation is truly remarkable.
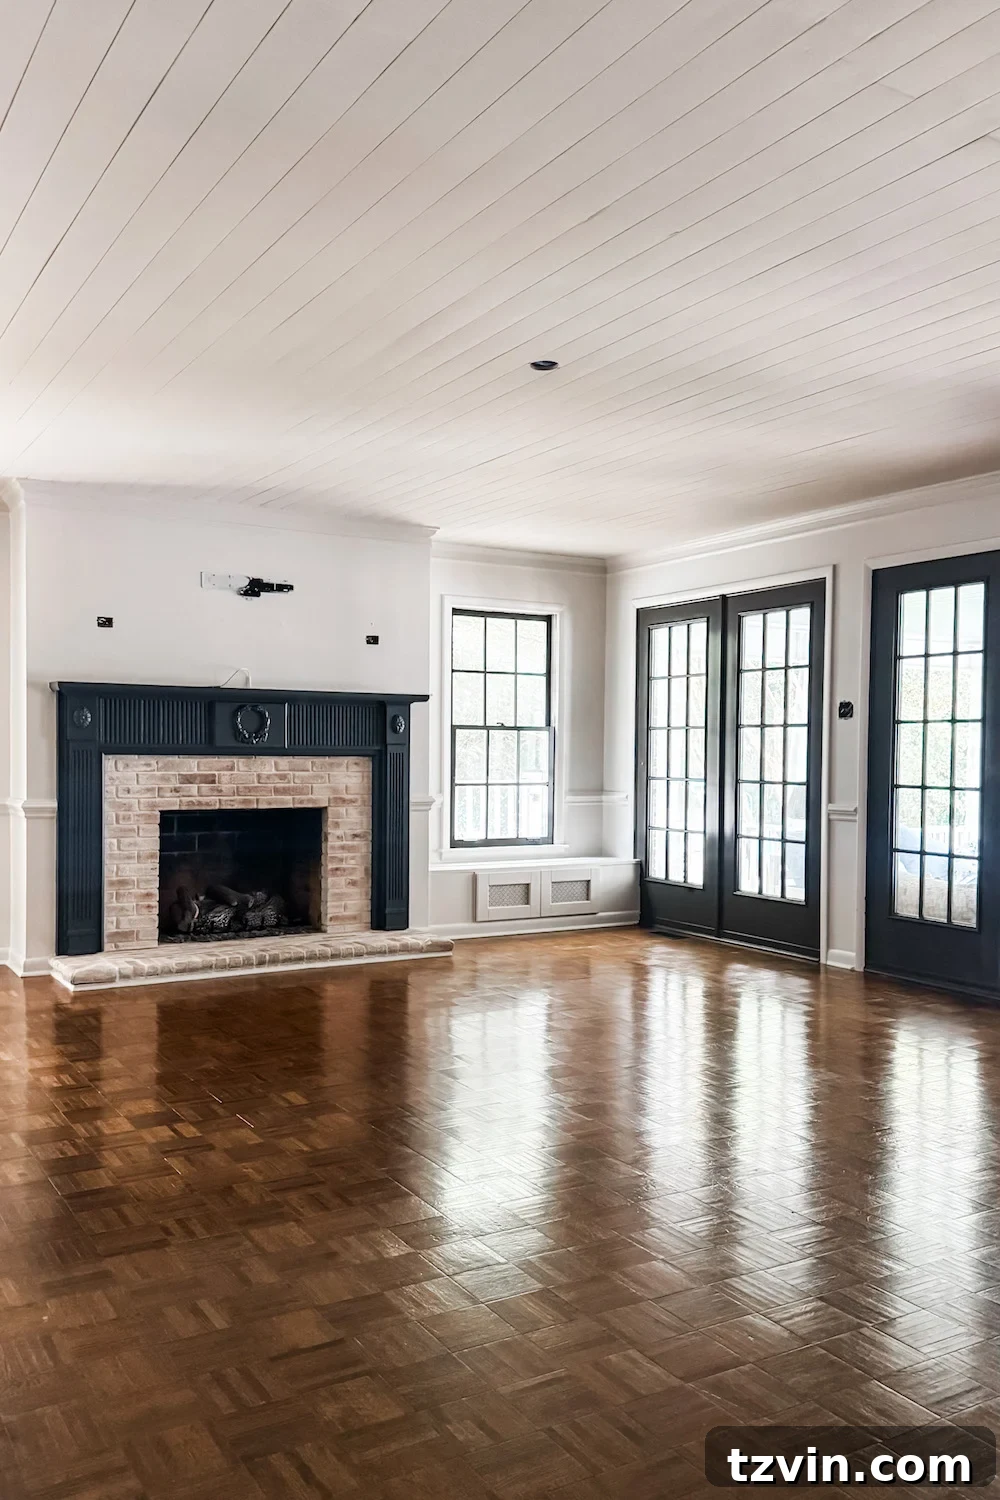
The shiplap ceiling adds an incredible amount of character and architectural interest without ever feeling overwhelming. Crucially, our previously low 8-foot ceiling no longer feels confined or cave-like. Instead, the textured planks and bright finish create an illusion of height and spaciousness, making it one of the most effective ways to make a small room look bigger. The subtle texture, the soft creamy paint, and the crisp, clean lines of the traditional crown molding work in perfect harmony. It’s as if the ceiling finally received its invitation to the party, stepping into its role as a key design element rather than a forgotten surface.
With this major undertaking complete, we’re already looking ahead to the next steps of our living room makeover. Up next: installing the new lighting (a beautiful fandelier, of course!), carefully hauling the furniture back into place, and meticulously adding some cozy, classic styling elements to perfectly match our newly improved view above. If you’ve ever contemplated tackling a DIY shiplap ceiling in your home, consider this your unequivocal sign. It’s an achievable project with an incredibly high payoff in terms of aesthetic appeal and added value. Moreover, if you’re looking for an elegant solution to cover unsightly popcorn ceilings without the messy removal, shiplap is a fantastic, beautiful, and highly effective option.
More Ideas for Your Ceilings and Home Projects
Inspired to tackle more ceiling projects or seeking additional home improvement ideas? Explore these related articles for further inspiration and helpful tutorials:
- How to Hide an Attic Door in Your Ceiling Seamlessly
- 8 Genius Ways to Cover a Popcorn Ceiling Without Removing It
- The Best Haint Blue for Porch Ceilings: A Classic Touch